
Note: When replacing lamps, follow the instructions given before subsection "Replacing headlight bulbs" Section 5.
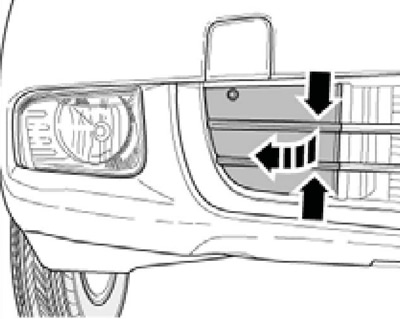
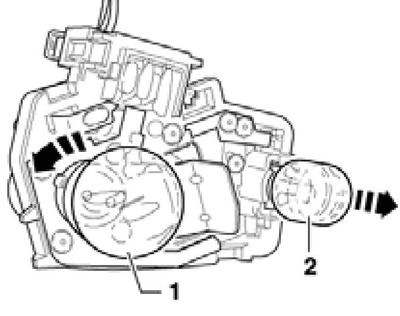
1. To remove the fog lamp, unhook the grille from the bumper cover (see illustration 6.1a), through the resulting opening, unhook the latch (arrow in illustration 6.1b), press the fog lamp out of the bumper and disconnect its connectors. If necessary, after removing the fog lamp, you can replace the bulbs in it by turning the sockets counterclockwise by 45°.
6.1a Removing the bumper grille
6.1b Fog lamp retainer
Note: The DRL bulb is removed from the socket and the fog light bulb is replaced with the socket.
2. To remove the outer section of the rear combination lamp (3 on resist. illustrations) hatchback models remove the screws (2), pull the lantern back out of the conical screw (7), pull out the seal (5), slide the foam wrap and disconnect the connector (6). If necessary, after removing the lantern, you can replace its lamps by turning the cartridges and then removing the lamps from them.
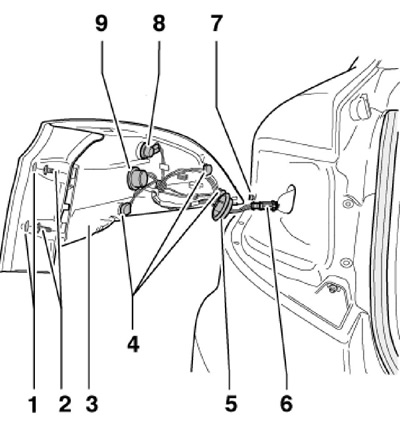
6.2 Parts of the outer section of the rear combination lamp (Hatchback)
1 Screw caps 2
2 Screws, 2.5 Nm
3 Outer section of rear light
4 Side light bulbs, W5W
5 Rubber seal
6 connector
7 Conical screw (1.3 Nm)
8 Stop/side light bulb, W16W
9 Turn signal lamp, PY21W
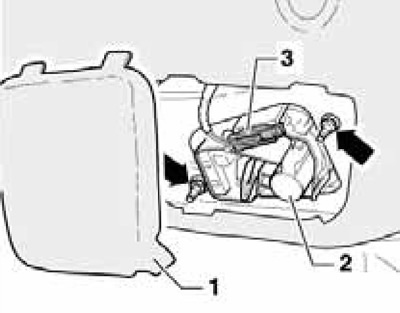
3. To replace the bulbs in the interior section of the rear combination lamp on Hatchback models, the cover must be removed (1 in illustration 6.3a), push the latch (arrow) and remove the combination chuck (2). Turn signal lamp (1 in illustration 6.3b) removed by turning, and the lamp (2) reversing light is pulled out of the socket.
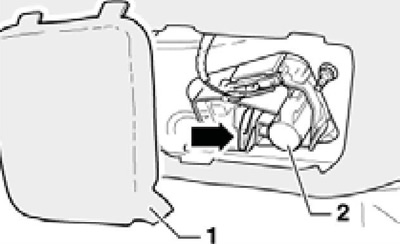
6.3a Removing the socket for the inner section of the rear combination lamp (Hatchback)
6.3b Bulbs of the interior section of the rear combination lamp (Hatchback)
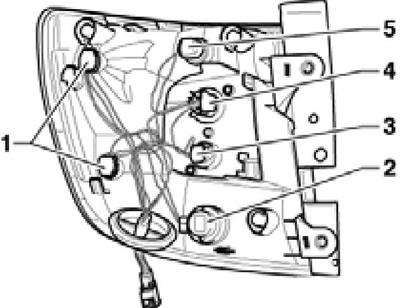
4. To remove the inner section of the rear combination lamp for Hatchback models, remove the cover (1 per resist. illustrations), give nuts (arrows, 2.5 Nm), disconnect the connector (3) and remove the flashlight along with the cartridge.
6.4 Removing the inner section of the rear combination lamp (Hatchback)
5. To remove the rear combination lamp (3 in illustration 6.5a) Station wagon models remove the screws (4, 2.5 Nm), pull the lantern back out of the conical screws (5, 1.3 Nm), pull out the seal (2) and disconnect the connector (1). The location of the lamps is shown in illustration 6.5b.
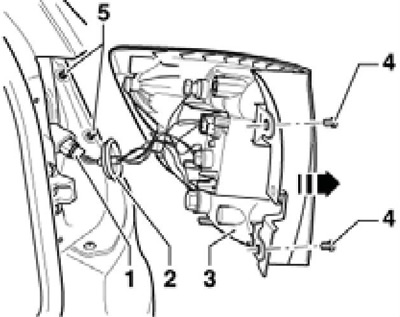
6.5a Removing the rear combination lamp (station wagon)
6.5b Rear combination lamp bulbs (station wagon)
1 W5W parking light bulb
2 P21W rear fog light bulb
3 Lamp W16W reversing light
4 Turn signal lamp RY10W
5 Lamp W16W brake light
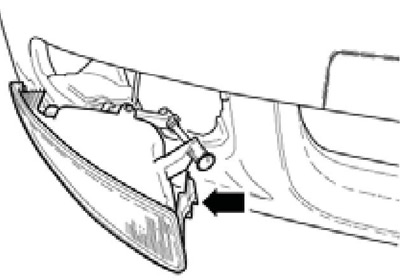
6. To remove the license plate light, unscrew its fastening screws (1 see illustration 12.5a) and squeeze it out of the bumper by prying it with a screwdriver in the place indicated by the arrow. If necessary, you can then bend the contacts (see illustration 12.5b) and remove the lamp. When installing, the protective strip of the diffuser must be in front.
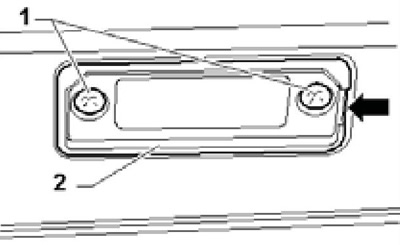
6.6а Mounting of the license plate light
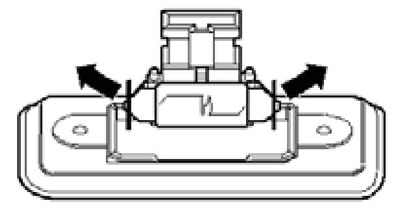
6.6b Removing the license plate lamp
7. To remove the upper level brake light, remove the top lining of the tailgate, remove the screws (2 in illustration 6.7a) and, alternately unhooking the paws with a small screwdriver (arrows), press the brake light. Disconnect the connector. The high-level brake light uses LEDs that are not separately replaceable.
Note: On Wagon models, the high-level brake light is only attached to the clips (see illustration 6.7b).
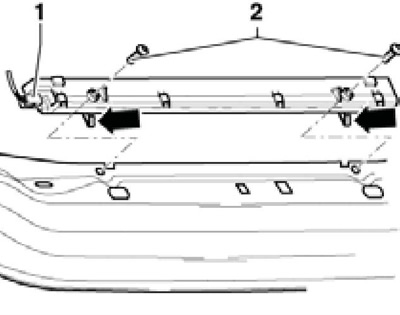
6.7a Removing the top level brake light (Hatchback)
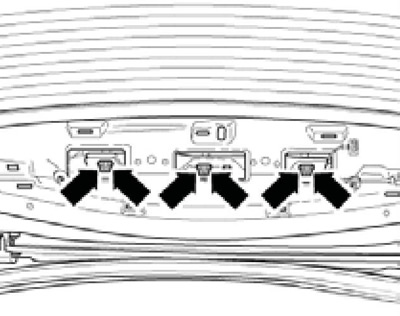
6.7b Removing the upper brake light (station wagon)