



Contents: Exterior lighting switch and…⬇ Steering column switches for models…⬇ Steering column switches for models…⬇
Exterior lighting switch and headlight range control
1. To remove the headlight range adjuster and instrument lighting dimmer, remove the left lower instrument panel trim (see Chapter 11), disconnect the connector, squeeze the locking tabs (1 in the illustration) and pull the adjuster (A) back out of the frame.
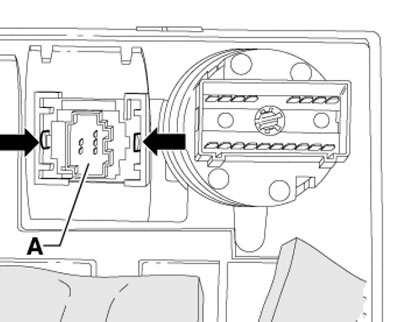
9.1. Removing the headlight range and instrument lighting brightness regulator
2. To remove the exterior lighting switch, set it to the "0" position and press it firmly (1 in the illustration) and turn it slightly clockwise (2). While holding the handle in this position, pull the switch in the direction of the arrow (3) and disconnect the connector.
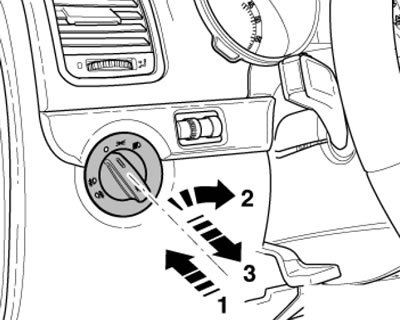
9.2. Removing the exterior lighting switch
3. To install the exterior lighting switch, connect the connector, turn the handle to the "0" position and gently press the switch until you hear it lock into place.
Steering column switches for models up to 05.2010.
4. Remove the coil spring (see Part D).
5. Unhook the locking tabs (arrows in illustrations) using a 1.0 mm feeler gauge (1) and remove the steering column switch in the direction of the arrow (A).
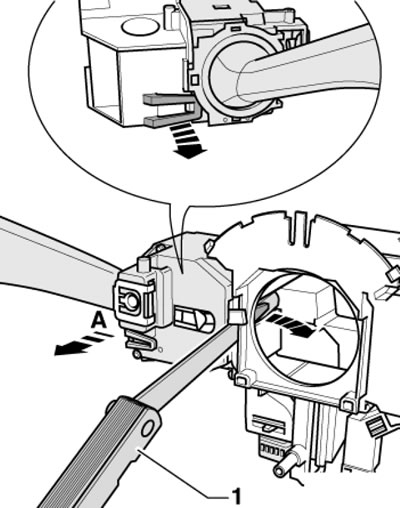
9.5a. Removing the left steering column switch (until 05.2010.)
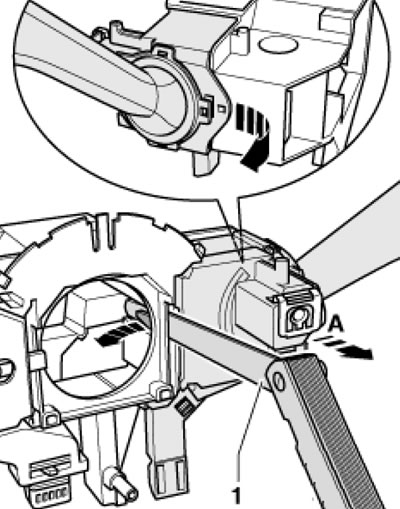
9.5b. Removing the right steering column switch (until 05.2010.)
Steering column switches for models from 06.2010.
6. Remove the steering wheel and steering column covers (see Chapter 10).
7. Remove the coil spring (see Part D).
8. Insert a small screwdriver through the opening in (And in the illustration) and unhook the lower stop tab. Then press the upper locking tabs (B) and push the steering column switch assembly out of the holder on the steering column lock in the direction of the arrows (C).