



Note: Incandescent lamps should only be replaced with lamps of the same type. Before replacing a lamp, make sure that the corresponding light fixture is switched off. Do not handle the bulb with bare fingers, use a clean towel or cotton gloves. Fingerprints left on the bulb evaporate and settle on the reflector, which is especially noticeable on headlights and fog lights. Any fingerprints left accidentally should be removed with an alcohol-soaked wipe. It is not allowed to wipe headlight reflectors covered with protective varnish with a dry hard cloth, or to use any cleaners or solvents for this purpose. Use soft, damp wipes. Halogen and xenon lamps are under pressure and may crack. Therefore, when replacing them, you should use protective glasses and gloves. When replacing xenon lamps, there is an additional risk of injury due to high voltage! Be sure to turn off the headlights and disconnect the wiring from the battery. After replacement, briefly turn the headlight on and off to relieve residual voltage. As a safety precaution, wear boots with rubber soles.
1. The headlight parts are shown in the illustrations.
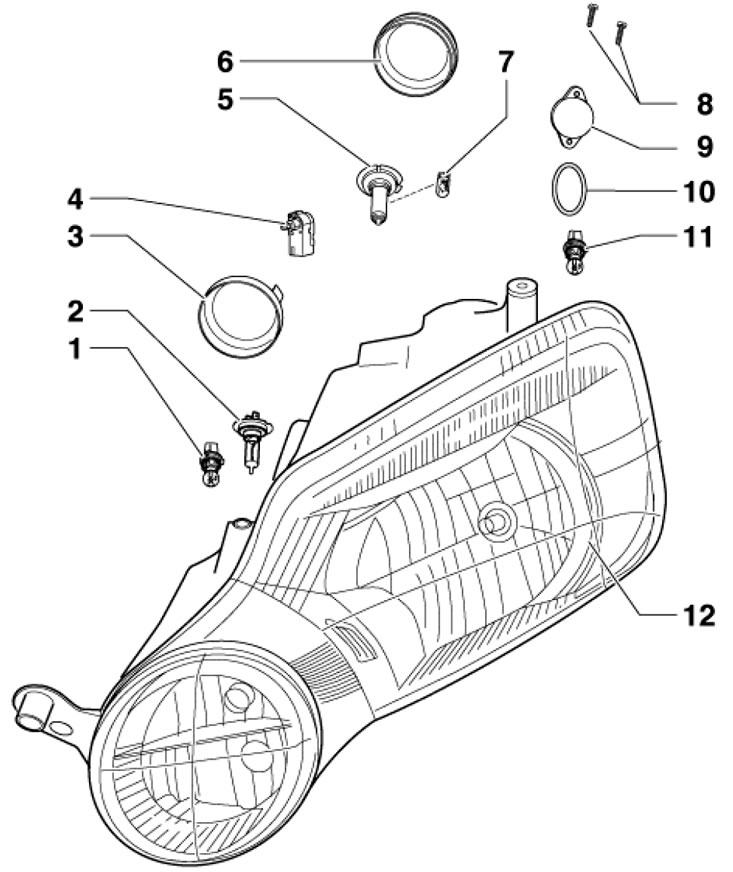
5.1a. Details of the left headlight with halogen lamps 1. DRL lighting lamp, P13W; 2. Fog light bulb, H7; 3. Rubber cover; 4. Electric motor for headlight leveling adjustment; 5. Low and high beam lamp, H4; 6. Plastic lid; 7. Parking light bulb, W5W; 8. Screws, 1.5 Nm; 9. Lamp cover 11; 10. Sealing ring; 11. Direction indicator lamp, HP-C24WY; 12. Headlight
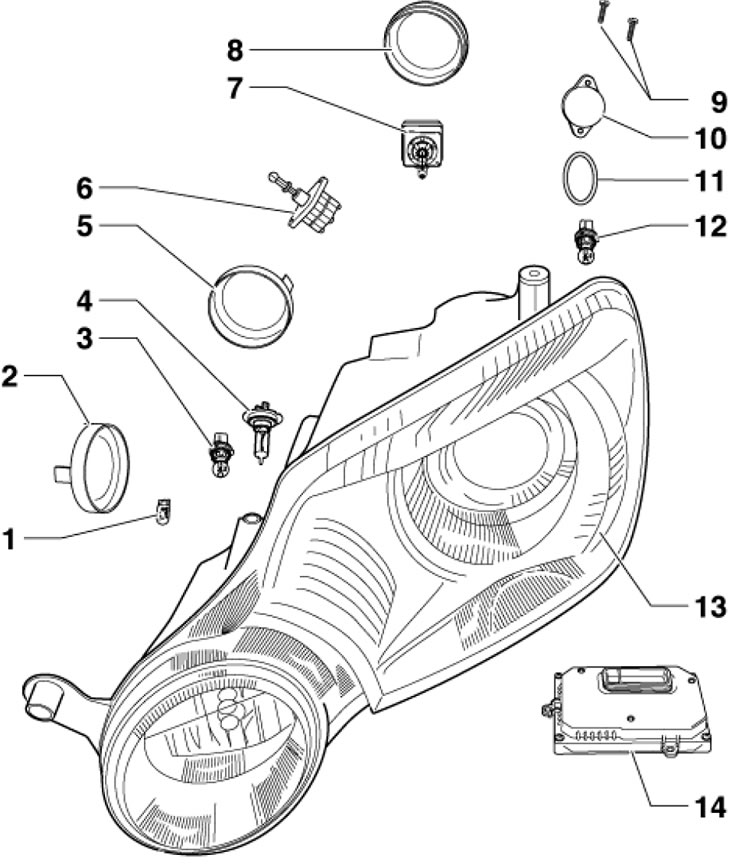
5.1b. Details of the left headlight with a xenon lamp 1. Side light bulb, W5WBL (blue glass); 2, 5. Rubber cover; 3. DRL lighting lamp, P13W; 4. Fog light bulb, H7; 6. Electric motor for headlight tilt adjustment; 7. Xenon lamp with built-in igniter, D1S; 8. Plastic lid; 9. Screws, 1.5 Nm; 10. Lamp cover 12; 11. Sealing ring; 12. Direction indicator lamp, HP-C24WY; 13. Headlight; 14. Headlight control unit
Removal and installation headlights
Note: After installing xenon headlights, the basic settings for them should be checked using a diagnostic tool (see Chapter 5).
2. Turn off the ignition and all electrical consumers. Remove the key from the ignition.
3. Remove the front bumper cover (see Chapter 11) and disconnect the headlight wiring connector.
4. Remove three bolts (A and B in the illustration) and remove the headlight by pulling it out of the opening in the body.
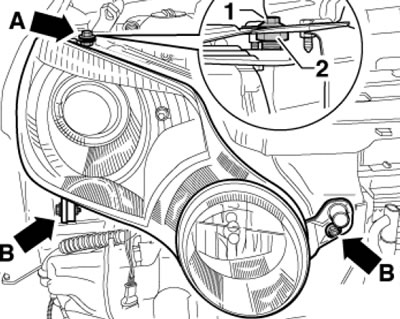
5.4. Headlight mounting bolts
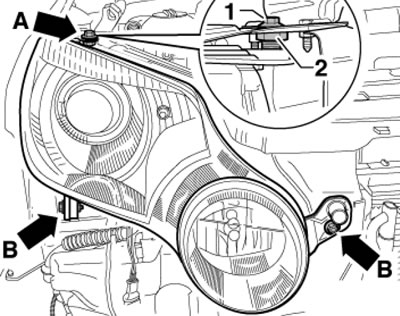
5. Installation is carried out in reverse order. In this case, you should set an even gap between the headlight and adjacent body elements (see Chapter 11 Specifications). To do this, with the bolt loosened (A, 1 in illustration 5.4) change the height of the headlight by turning the adjusting nut (2) with a left-hand thread. Finally, tighten the bolts to 4 Nm.
6. After installation, the headlight tilt should be adjusted (see Section 4).
Replacement of lamps and other headlight parts
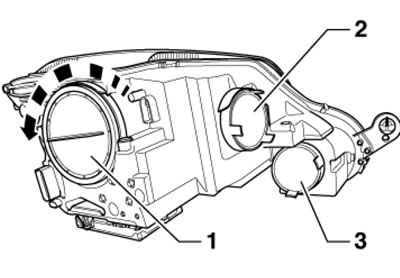
7. The serviceable components of the headlight are covered at the rear by three covers (see illustration). The cover (1) covers the low/high beam lamp, the electric motor for adjusting the headlights and the parking light lamp (only on models with halogen headlights); the side light lamp is covered with a cover (2) (only on models with xenon headlights), and the cover (3) - DRL and fog lamps. Before removing the headlight component, open the hood and remove the corresponding cover. The cover (1) is removed after turning it all the way, and the rubber covers (2) are simply pulled off the headlight. The headlight only needs to be removed to replace the turn signal bulb and electric motor.
5.7. Halogen headlight covers
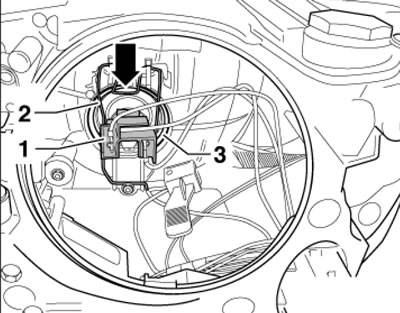
8. To remove the low/high beam halogen headlight bulb, disconnect the connector (1 in the illustration), press the spring clip (2) in the direction of the arrow to release it, then remove the lamp (3).
5.8. Electrical wiring connector and retainer for high/low beam halogen lamp
9. To remove the low/high beam xenon headlight bulb, disconnect the connector (1 in the illustration), unhook the spring clamp (arrows) and carefully remove the lamp (2) with the built-in igniter unit. After installation, apply the basic settings to adjust the headlight level using the scan tool (see Chapter 5).
5.9. Electrical wiring connector and xenon high/low beam lamp retainer
10. To remove the parking light bulb, pull the bulb together with the socket out of the headlight (see illustrations 5.10a-b), and then remove the lamp from the socket (see illustrations 5.10cd).
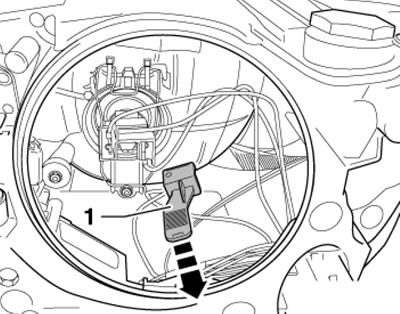
5.10a. Removing the parking light bulb socket from a halogen headlight
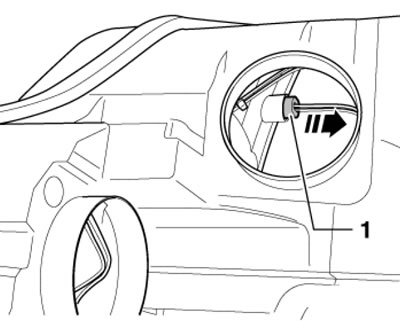
5.10b. Removing the parking light bulb socket from the xenon headlight
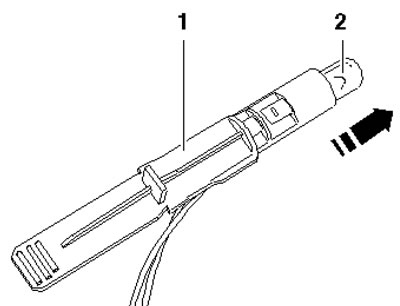
5.10s. Removing the parking light bulb of a halogen headlight from its socket
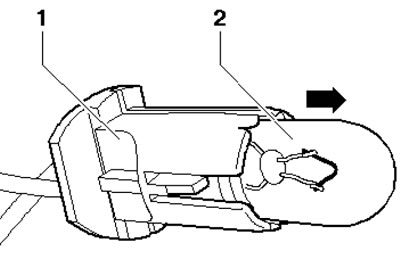
5.10d. Removing the xenon headlight side light bulb from the socket
Note: On models with xenon headlights, it is recommended to first disconnect the xenon lamp connector for easier access.
11. To remove the turn signal lamp, remove the headlight (see subsection above), carefully remove the cover with a screwdriver (2 in the illustration) from the headlight, turn the socket (4), remove it together with the bulb from the headlight, then disconnect the connector and remove the bulb. After installing a new lamp, the cover should be installed with the sealing ring (3) and the bolts (1) should be tightened with a force of 1.5 Nm.
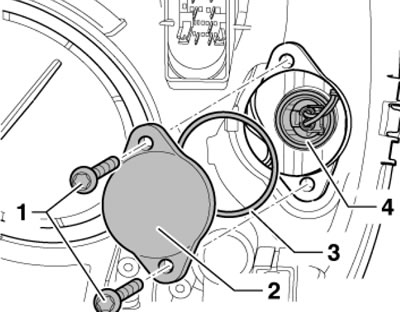
5.11. Direction indicator lamp installation details
12. To remove the fog lamp bulb, release the bulb (2 in the illustration) from the cartridge, tilting it in the direction of the arrow, and then disconnect the connector (1).
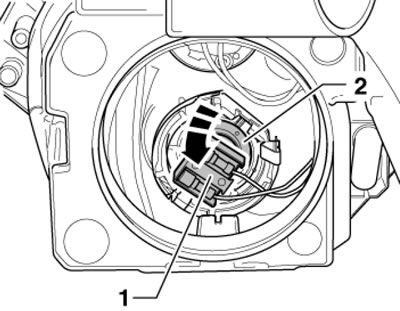
5.12. Removing the fog light bulb
13. To remove the DRL light bulb, turn the socket (1 in the illustration) together with the lamp in the direction of the arrow and remove it from the headlight, and then disconnect the connector.
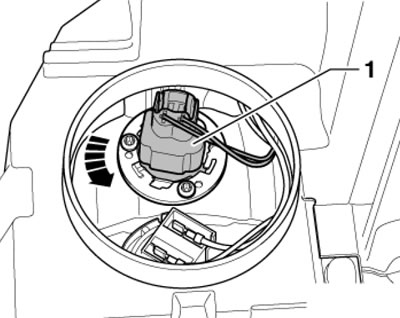
5.13. Removing the DRL light bulb
14. To remove the halogen headlight motor, remove the headlight and its cover (1 in illustration 5.7). Carefully break out the corks (1 in the illustration, for the left headlight) or (2, for right headlight), preventing them from falling inside the headlight. Then unscrew the screws, unhook the pressure element from the electric motor (arrow), pull out the electric motor (3) and disconnect its connector. When installing the plugs in place, install the plugs from the repair kit. Finally, adjust the headlight.
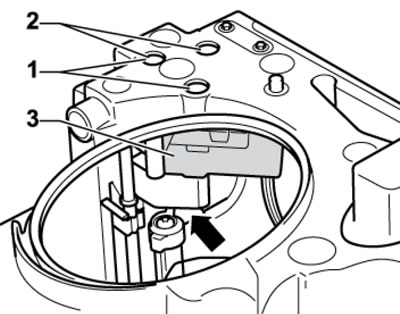
5.14. Removing the electric motor for adjusting the tilt of the halogen headlight
15. To remove the xenon headlight electric motor, remove the headlight and its cover (1 in illustration 5.7), for easier access, it is also recommended to remove the xenon lamp. Carefully break out the corks (1 in illustration 5.15a) and unscrew the electric motor mounting screws (2). Then unhook the pressure element (1 in illustration 5.15b) from the electric motor in the direction of the arrow, pull out the electric motor and disconnect its connector. When installing the plugs in place, install the plugs from the repair kit. Finally, adjust the headlight.
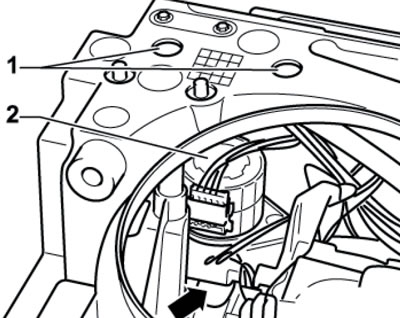
5.15a. Fastening the electric motor for adjusting the tilt of the xenon headlight
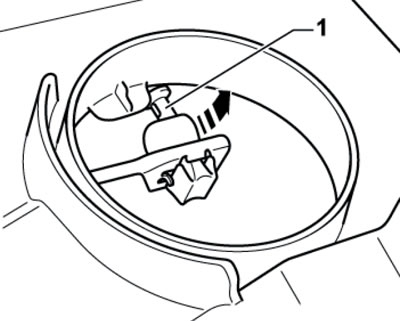
5.15b. Removing the electric motor for adjusting the xenon headlight tilt
16. To remove the "J668+J344" or "J667+J344" xenon headlight control unit, remove it, unscrew the bolts (2 in the illustration), carefully press the control unit (1) down and disconnect the connector (3). After installing the new module, code it using the diagnostic tool (see chapter 5).
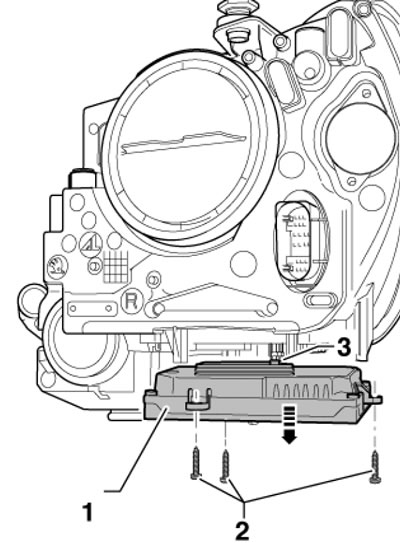
5.16. Removing the xenon headlight control unit
17. To remove the control unit "J745" for the turning light and xenon headlight tilt adjustment, remove the glove compartment (see Chapter 11), unscrew the lower instrument panel bolts on the right side and slightly tilt its lower part towards you. Remove the bolts (1 in the illustration), separate the control unit (2) from the bracket and then disconnect the connector by turning the locking element (3). After installing the new module, code it using the diagnostic tool (see Chapter 5).
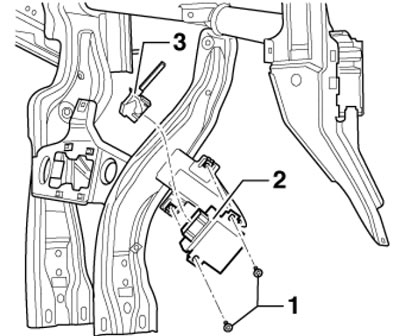
5.17. Removing the control unit for the turning light and xenon headlight tilt adjustment