



Contents: Instrument panel ⬇ Instrument panel beam ⬇
Instrument panel
1. Remove the steering wheel (see Chapter 10).
2. Remove the upper trim of the A-pillars (see Section 17).
3. Using a plastic wedge, remove the top cover (1 on the accompanying illustration) steering column and instrument panel cover (2).
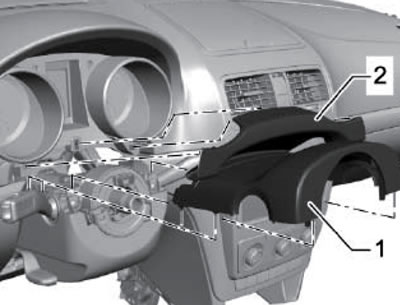
15.3. Upper steering column cover and trim under the instrument cluster
4. Remove the screws (2 in the illustration) and remove the lower steering column cover (1).
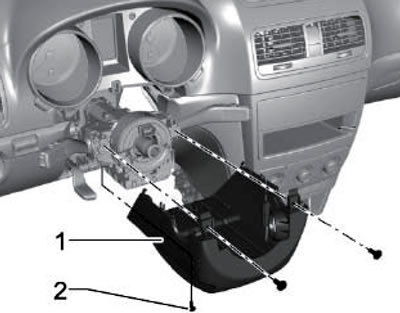
15.4. Lower steering column cover
5. Remove the left end cap (see illustration) and remove the exterior lighting control switch (see Chapter 12).
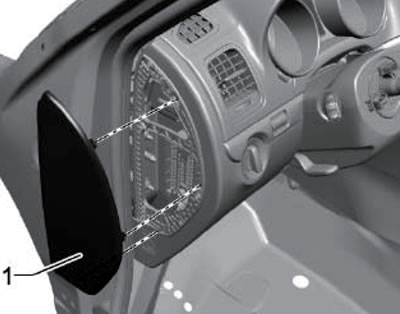
15.5. Left end plate
6. Unhook and remove the center frame (see illustration).
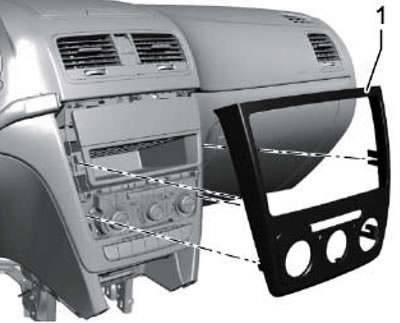
15.6. Central frame
7. Unhook and remove the decorative strips (1 and 2 in the illustration). Remove the headlight leveler and instrument cluster (see Chapter 12).
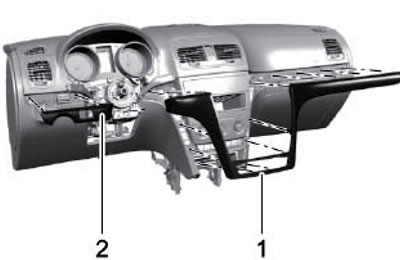
15.7. Decorative stripes
8. Unhook the overlay (1 in the illustration), unscrew the screws (3) and remove the left lower trim (2) of the instrument panel, separating the diagnostic connector.
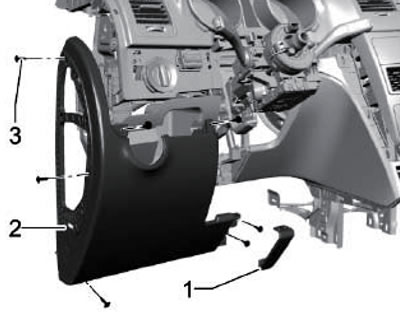
15.8. Left instrument panel trim
9. Remove the center console (see Section 13). Remove the screws (4 in the illustration) and remove the climate control unit. Remove the plugs and switches (5), disconnect their connectors. Remove the central niche (2) and the cover (1) of the audio unit.
Material is available on the website: SkodaBook.ru
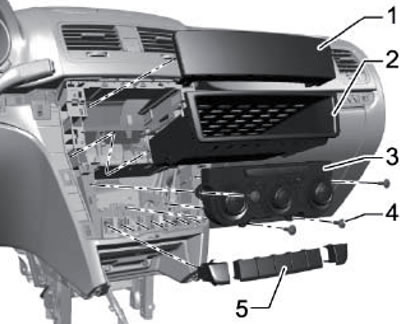
15.9. Details in the center of the instrument panel
10. Unhook and remove the emergency stop button and the airbag deactivation key (between the central deflectors), disconnecting their connectors. Remove the right end cover (see illustration) and remove the main storage compartment (see Section 14).
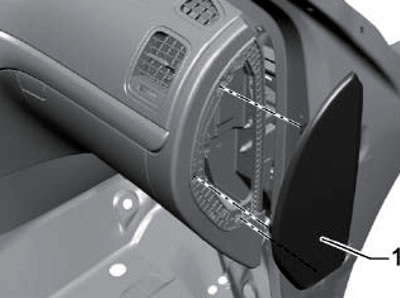
15.10. Right end plate
11. Remove the screws (1 in the illustration) and remove the upper storage compartment (2). Remove the solar radiation sensor and air duct, disconnect the connectors of the air temperature sensors supplied to the footwells.
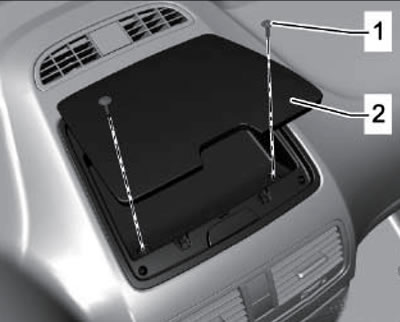
15.11. Fastening the upper storage compartment
12. Remove the screws (2 and 3 in the illustration), unhook the instrument panel (1) from the hook (4) and remove it.
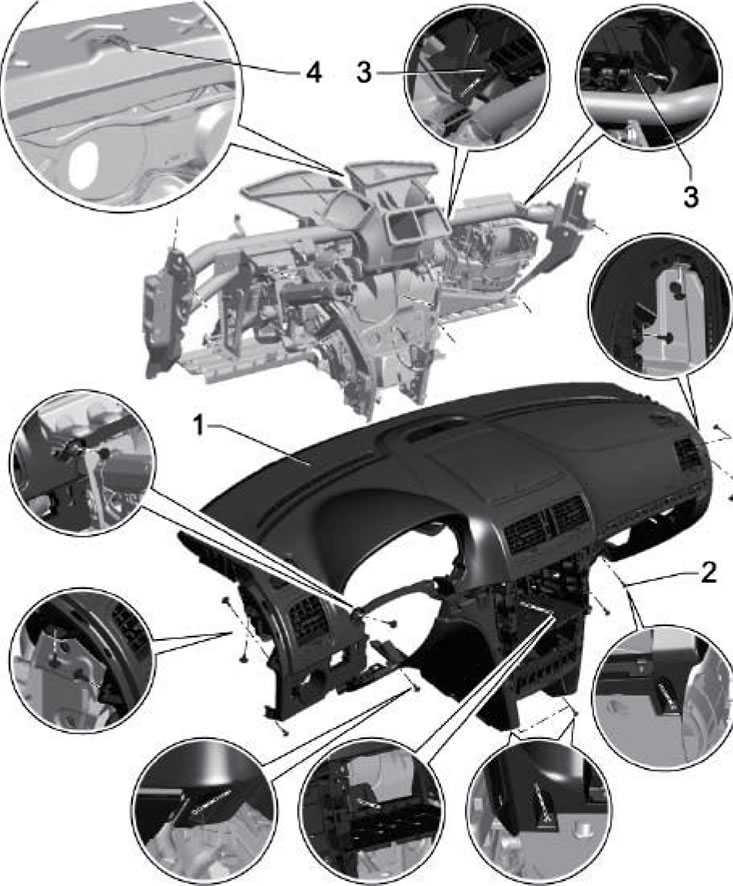
15.12. Instrument panel fastening
13. Installation is carried out in reverse order. Bolts (2 and 3 in the illustration) tighten to 2 and 9 Nm respectively.
Instrument panel beam
14. The details of the instrument panel beam fastening are shown in the illustration. To remove the holder (5), remove the knee airbag and unscrew the bolts (6). To remove the crushable brake or clutch pedal support, remove the holder (5) and unscrew the bolts (6). The following describes how to remove the instrument panel beam.
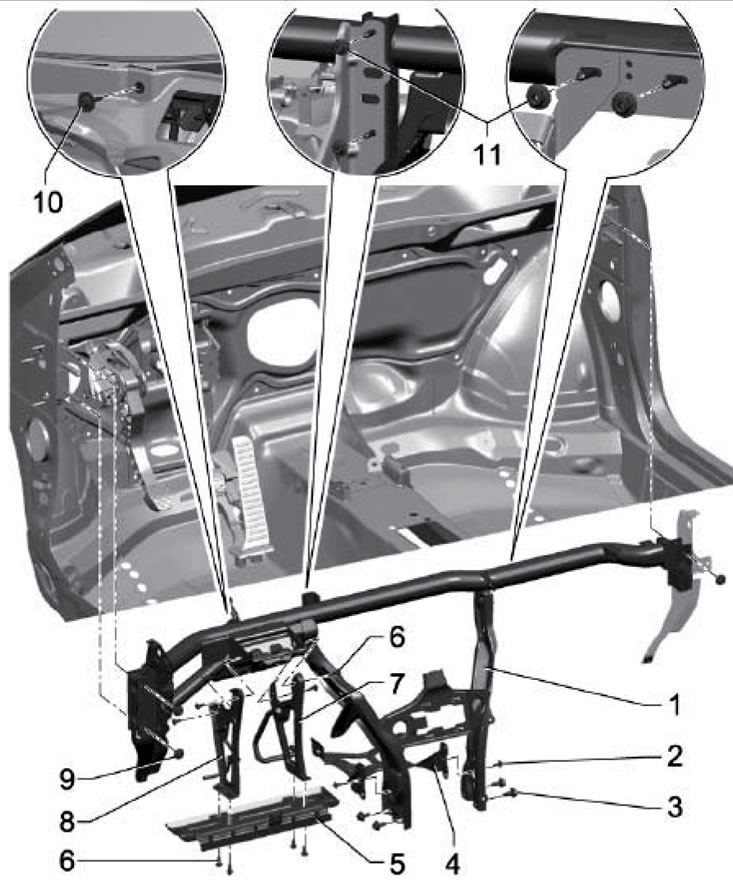
15.14. Instrument panel beam fastening parts 1. Instrument panel beam; 2. Bolts, 2 Nm; 3. Bolts, 20 Nm; 4. Console; 5. Knee airbag holder; 6. Nut, 9 Nm; 7. Brake pedal support collapsing; 8. The clutch pedal support is crushed; 9. Nut, 20 Nm; 10. Bolt, 25 Nm; 11. Nut, 9 Nm
15. Remove the instrument panel (see subsection above).
16. Remove the relay and fuse holders from the instrument panel beam.
17. Remove the knee airbag and pillar (8 in illustration 15.14).
18. Remove the steering column assembly from the instrument panel beam (see Chapter 10).
19. Remove the intermediate parts of the air duct in the instrument panel and the air duct to the windshield.
20. Remove the bolts (2 in illustration 15.14) consoles (3) and pillars of the central tunnel.
21. Partially remove the windshield wiper motor (see chapter 12) and unscrew the bolt (10 in illustration 15.14) gutter.
22. Give me the nuts (11 in the illustration) and loosen the electrical installation with the brackets of the climate control system housing. Loosen the nuts (9) and remove the instrument panel beam (1).
23. Installation is carried out in reverse order.