



Removal
Note.
- The steering column is supplied as a single piece and cannot be repaired.
- Before starting any work related to removing the steering column, it is necessary to disconnect the negative terminal from the battery.
- Set the front wheels in the direction of straight-ahead travel.
Caution: If the preparatory work is not carried out, the passive safety system element may be damaged.
1. Set the front steering wheels in the direction of straight-ahead movement.
2. Remove the steering wheel assembly.
Caution: The airbag module contact ring must only be removed and installed when the steering wheel is in the neutral position.
3. Remove the instrument panel assembly (for more details, see the relevant section in the chapter Body).
4. Remove the air duct directing the air flow to the footwell area, on the driver's side (for more details, see the corresponding section in the chapter Heating, ventilation and air conditioning system).
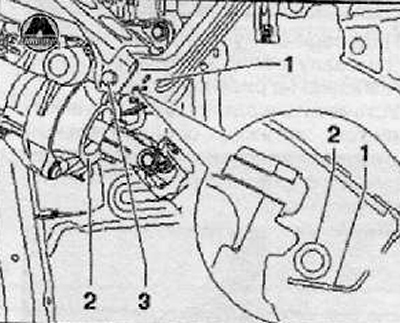
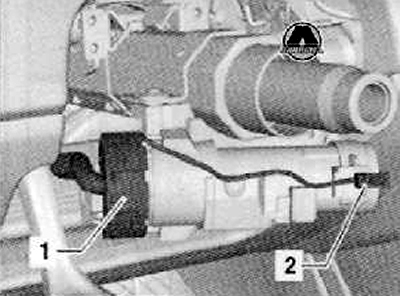
5. Disconnect the wiring harness connector (1) of the immobilizer read coil as shown in the figure below.
6. Disconnect the wiring harness connector (2) from the ignition switch housing as shown in the figure below.
7. Unscrew the mounting screw and disconnect the ground wire of the steering column.
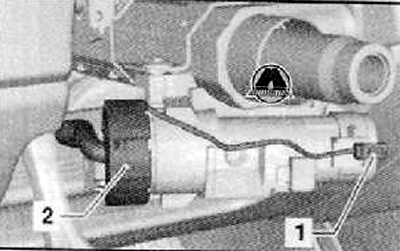
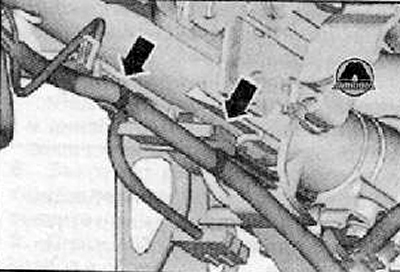
8. Disconnect the wiring harness clips from the steering column (arrows) as shown in the figure below.
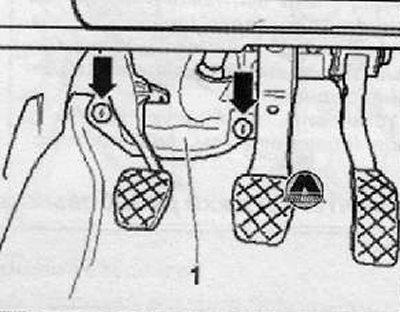
9. Unscrew the plastic fastening nuts (arrows) and remove the trim panel (1), shown in the figure below.
10. Remove the fastening screw (arrow) connecting the steering column shaft and the steering gear pinion shaft via the universal joint (1), as shown in the figure below. Disconnect the steering column shaft by moving the universal joint in the direction of the arrow.
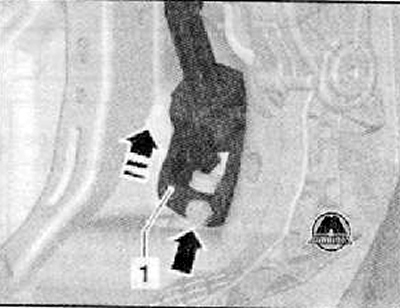
11. Remove the lower mounting screw (arrow) of the mounting bracket as shown in the figure below.
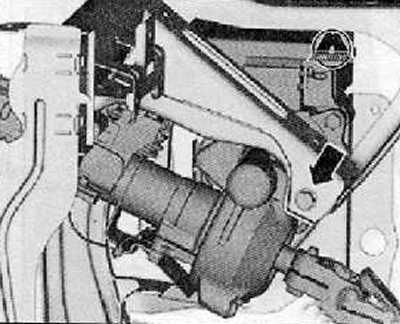
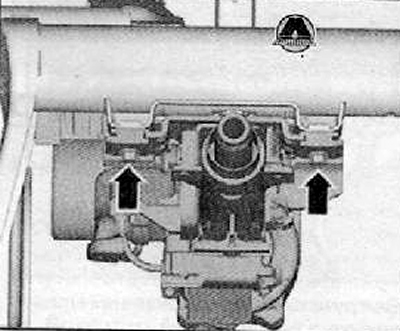
12. Unscrew the mounting bolts (arrows), shown in the figure below, of the steering column to the instrument panel crossmember. Hold the steering column assembly to prevent it from falling.
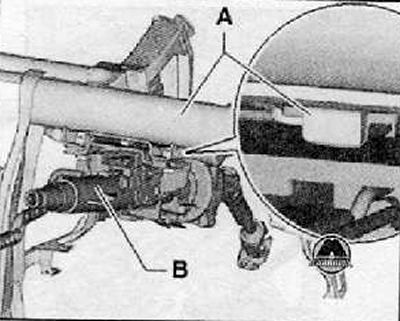
13. Carefully separate the steering column assembly (B) from the support bracket (A) as shown in the figure below.
14. Remove the steering column assembly.
Caution: Be extremely careful with the steering column to avoid damage.
Installation
1. Install the steering column assembly (2) into the mounting bracket on the instrument panel support crossmember assembly as shown in the figure below.
2. Fix the steering column assembly (B) to the supports (A) on the instrument panel cross member as shown in the figure below. Check and make sure that the steering column is installed on the supports properly.
Note: When installing the steering column, it is necessary that the mounting holes are aligned precisely.
3. Install and tighten the steering column to instrument panel crossmember bolts (arrows) as shown in the figure below.
4. Unlock the steering column adjustment lever.
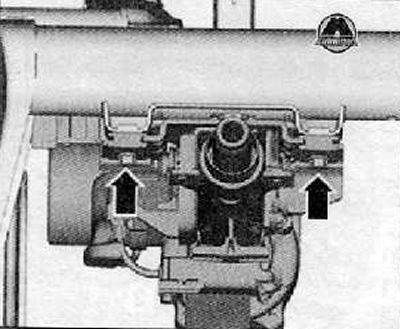
5. Install and tighten the steering column side bolt to the mounting bracket to the specified torque as shown in the figure below.
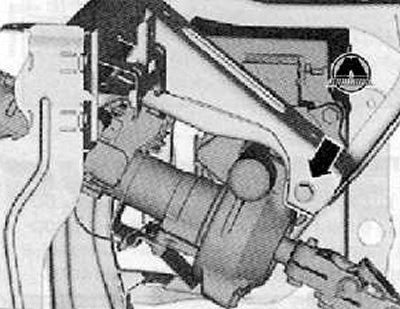
6. Connect the universal joint (1) to the steering rack pinion shaft as shown in the figure below.
7. Install and tighten the steering column-to-steering gear pinion shaft connecting screw to the specified torque as shown in the figure below.
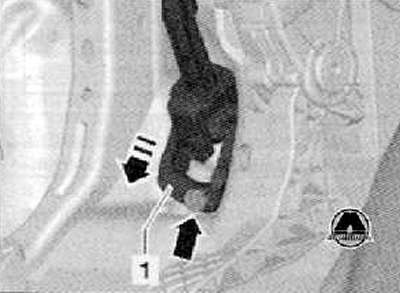
8. Secure the wiring harnesses with clamps on the steering column (arrows), as shown in the figure below.
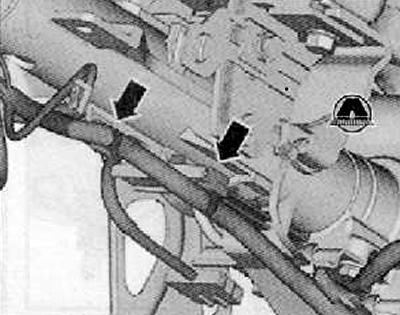
9. Connect the wiring harness connector to the ignition switch housing (1) as shown in the figure below.
10. Connect the wiring harness connector (2) to the immobilizer read coil as shown in the figure below.
11. Connect and secure the steering column ground wire.
12. Install and secure the ventilation system air duct in the driver's side footwell area (for more details, see the relevant section in the chapter Heating, ventilation and air conditioning system).
13. Install the instrument panel assembly (for more details, see the relevant section in the chapter Body).
14. Install the steering column switches.
15. Install the steering column trim panels as an assembly.
16. Install the steering wheel assembly. Install the front driver airbag module (for more details, see the relevant section in Chapter Passive safety).
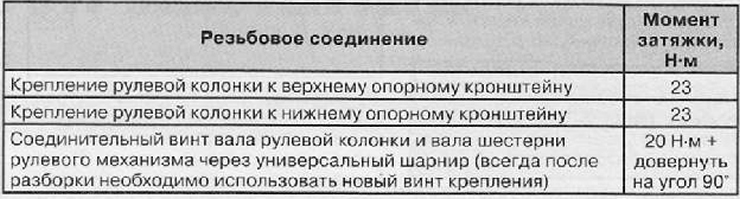
Tightening torques for threaded connections
[Source of the article web resource: SKODABOOK.ru]