



Electrical equipment and appliances Skoda Rapid 1

Audio system — general view
1. Multifunction steering wheel 2. Radio 3. External antenna 4. Rear window antenna 5. Jack for connecting external audio devices AUX-IN 6. MDI input (USB, AUX-IN) 7. Rear full range speaker 8. Front tweeter 9. Front...
1. Multifunction steering wheel 2. Radio 3. External antenna 4. Rear window antenna 5. Jack for connecting external audio devices AUX-IN 6. MDI input (USB, AUX-IN) 7. Rear full range speaker 8. Front tweeter 9. Front...

Audio system head module — removal and installation
Note. Before removing the head module, you must remove the CD-ROM from it, if installed. Removing 1. Turn off the audio system module and all power consumers. Remove the key from the ignition switch. 2. Using a special...
Note. Before removing the head module, you must remove the CD-ROM from it, if installed. Removing 1. Turn off the audio system module and all power consumers. Remove the key from the ignition switch. 2. Using a special...

Wiring harness connectors on audio head unit
Note. Connectors that are not described below are not used. Multi-pin connector A, 16-pin, two parts 1 - Audio speaker, rear right (+) 2 - Audio speaker, front right (+) 3 - Audio speaker, front left (+) 4 - Audio...
Note. Connectors that are not described below are not used. Multi-pin connector A, 16-pin, two parts 1 - Audio speaker, rear right (+) 2 - Audio speaker, front right (+) 3 - Audio speaker, front left (+) 4 - Audio...

Media Control Module — Removal and Installation
Removing Note. The media control module is located under the glove box on the passenger side. 1. Turn off the ignition and all electrical consumers. 2. Remove the additional luggage compartment from the instrument panel...
Removing Note. The media control module is located under the glove box on the passenger side. 1. Turn off the ignition and all electrical consumers. 2. Remove the additional luggage compartment from the instrument panel...

Audio system speakers — removal and installation
Removing 1. Turn off the ignition and all electrical consumers. 2. Remove the door trim panel from which you want to dismantle the speaker of the audio system (for more details, see the relevant section in chapter...
Removing 1. Turn off the ignition and all electrical consumers. 2. Remove the door trim panel from which you want to dismantle the speaker of the audio system (for more details, see the relevant section in chapter...
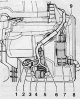
Washer fluid reservoir, washer pumps and fluid level sensor
Removing 1. Turn off the ignition and all electrical consumers. 2. Disconnect and remove the front part of the right wheel arch liner (for details, see the relevant section in chapter Body ). 3. Disconnect the wiring...
Removing 1. Turn off the ignition and all electrical consumers. 2. Disconnect and remove the front part of the right wheel arch liner (for details, see the relevant section in chapter Body ). 3. Disconnect the wiring...

Windscreen wiper arms
Removing 1. Using a screwdriver, remove the decorative caps of the nuts securing the windshield wiper arms. 2. Loosen the fastening nuts (arrows) windshield wiper arms as shown in the illustration below. 3. Install...
Removing 1. Using a screwdriver, remove the decorative caps of the nuts securing the windshield wiper arms. 2. Loosen the fastening nuts (arrows) windshield wiper arms as shown in the illustration below. 3. Install...

Electric motor together with the system of rods and levers of the windshield wiper
Removing 1. Turn off the ignition and all electrical consumers. 2. Remove windshield wiper arms (for details, see the relevant section in this chapter). 3. Remove the expansion tank of the engine cooling system (for...
Removing 1. Turn off the ignition and all electrical consumers. 2. Remove windshield wiper arms (for details, see the relevant section in this chapter). 3. Remove the expansion tank of the engine cooling system (for...

Electric motor of the windscreen cleaner drive
Removing 1. Using a special puller (MP8-602/1), disconnect the rod (1) from the hinge (arrow), as shown in the figure below. 2. Loosen the fastening nut (1) and disconnect the crank (2) from the windshield wiper motor...
Removing 1. Using a special puller (MP8-602/1), disconnect the rod (1) from the hinge (arrow), as shown in the figure below. 2. Loosen the fastening nut (1) and disconnect the crank (2) from the windshield wiper motor...

Rear window wiper arm
Removing 1. Remove cover (1) from the latch, as shown in the figure below, and pull it down. 2. Gently push out the atomizer (2) rear window washer (arrow), as shown in the picture below (except Spaceback models). 3....
Removing 1. Remove cover (1) from the latch, as shown in the figure below, and pull it down. 2. Gently push out the atomizer (2) rear window washer (arrow), as shown in the picture below (except Spaceback models). 3....

Headlights with halogen lamps — general view
1. Headlight housing 2. Incandescent lamp for low beam headlights (H7) 3. Rubber cover 4. Control motor for headlight height adjustment 5. Plastic cover 6. Rubber cover 7. Incandescent bulb for daytime running lights...
1. Headlight housing 2. Incandescent lamp for low beam headlights (H7) 3. Rubber cover 4. Control motor for headlight height adjustment 5. Plastic cover 6. Rubber cover 7. Incandescent bulb for daytime running lights...

Headlamp — removal and installation
Removing Note. The process of removing and installing the left headlight is described below, the removal of the right headlight is similar. Before removing the cartridges from the headlamp housing, their location must...
Removing Note. The process of removing and installing the left headlight is described below, the removal of the right headlight is similar. Before removing the cartridges from the headlamp housing, their location must...

Headlight lamps
Attention. H7 and H15 bulbs are pressurized and may break when replaced, resulting in personal injury. Wear protective gloves and goggles before starting lamp replacement work. Attention. When replacing an incandescent...
Attention. H7 and H15 bulbs are pressurized and may break when replaced, resulting in personal injury. Wear protective gloves and goggles before starting lamp replacement work. Attention. When replacing an incandescent...

Electric motor for headlight beam adjustment
Removing 1. Remove headlight assembly (for details, see the relevant section in this chapter). 2. Turn the cover (3) to the left and remove, then remove the cover (1), as shown in the figure below. 3. Unlock the...
Removing 1. Remove headlight assembly (for details, see the relevant section in this chapter). 2. Turn the cover (3) to the left and remove, then remove the cover (1), as shown in the figure below. 3. Unlock the...

Headlights with gas discharge (xenon) lamps — general view
1. Incandescent parking light headlights 2. Rubber cover 3. High beam bulb and daytime running light system 4. Lid 5. Electric motor for headlight beam height adjustment 6. Gas discharge headlight lamp (D5S) 7. Lid 8....
1. Incandescent parking light headlights 2. Rubber cover 3. High beam bulb and daytime running light system 4. Lid 5. Electric motor for headlight beam height adjustment 6. Gas discharge headlight lamp (D5S) 7. Lid 8....

Headlamp headlight bulbs
Attention. H7 and H15 bulbs are pressurized and may break when replaced, resulting in personal injury. Wear protective gloves and goggles before starting lamp replacement work. Attention. When replacing an incandescent...
Attention. H7 and H15 bulbs are pressurized and may break when replaced, resulting in personal injury. Wear protective gloves and goggles before starting lamp replacement work. Attention. When replacing an incandescent...

Electric motor for headlamp beam direction adjustment with gas-discharge (xenon) lamps
Removing 1. Remove headlight assembly (for details, see the relevant section in this chapter). 2. Turn the cover (3) to the left and remove, then remove the cover (2), as shown in the figure below. 3. Unlock the...
Removing 1. Remove headlight assembly (for details, see the relevant section in this chapter). 2. Turn the cover (3) to the left and remove, then remove the cover (2), as shown in the figure below. 3. Unlock the...

Rear light combination — removal and installation
Removing 1. Turn off the ignition and all electrical consumers. 2. Using a special tool (Т10389) or through a hole in the wheel arch trim panel in the luggage compartment (1), unfasten the fasteners (2), as shown in the...
Removing 1. Turn off the ignition and all electrical consumers. 2. Using a special tool (Т10389) or through a hole in the wheel arch trim panel in the luggage compartment (1), unfasten the fasteners (2), as shown in the...

Replacing the rear light combination bulbs
1. Remove the lamp combination housing (for details, see the relevant section in this chapter). 2. Disconnect from the grips and remove the lamp holder (arrows), as shown in the figure below. Not relevant when replacing...
1. Remove the lamp combination housing (for details, see the relevant section in this chapter). 2. Disconnect from the grips and remove the lamp holder (arrows), as shown in the figure below. Not relevant when replacing...
This section is available on russian, bulgarian, belarusian, ukrainian, serbian, croatian, romanian, polish, slovak, hungarian
Read similar sections on other Skoda models
➧ Electrical equipment: Equipment and devices Skoda Fabia 1 (1999-2007)
➧ Electrical equipment: Equipment and devices Skoda Octavia 3 (2013-2019)
➧ Electrical equipment: Equipment and devices Skoda Superb 2 (2008-2015)
➧ Electrical equipment: Equipment and devices Skoda Felicia (1994-2001)
Link to this section in various formats
TEXTHTMLBB Code
- General information
- Faults en route
- User manual
- Maintenance and care
- Power unit
- Petrol engines
- Diesel engines
- Power and control system
- Lubrication system
- Cooling system
- Intake and exhaust system
- Transmission
- Clutch
- Mechanical gearbox
- Automatic gearbox
- Drive shafts
- Chassis (running gear)
- Front suspension
- Rear suspension
- Brake system
- Steering
- Body and interior
- Exterior (external elements)
- Interior (internal elements)
- Doors, locks and windows
- Heating and air conditioning
- Security systems
- Electrical equipment
- Equipment and devices
- Power devices
- Electrical circuits
- Electrical circuits (petrol)
- Electrical circuits (diesel)