
Installation instructions
Tighten the nuts and mounting bolts in four steps to the tightening torque shown in the table below.
 | 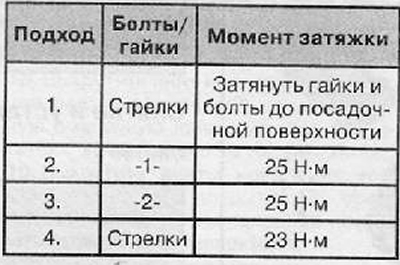 |
Removing
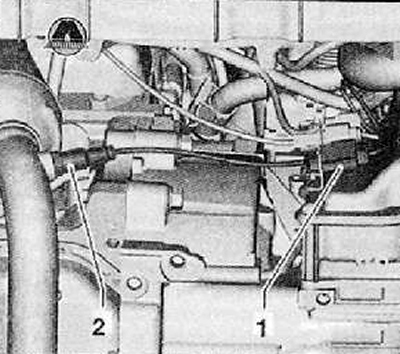
1. Unscrew and remove complete lambda probe -G39- shown in the figure below (1).
2. Unscrew the upper screw securing the alternator (2), move the generator downwards as shown in the figure below.
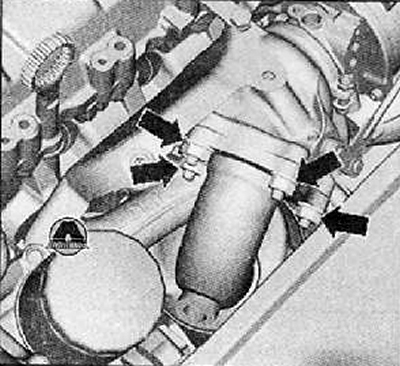
3. Unscrew the fastening screws (arrows), remove the thermal insulation cover from the turbocharger as shown in the figure below.
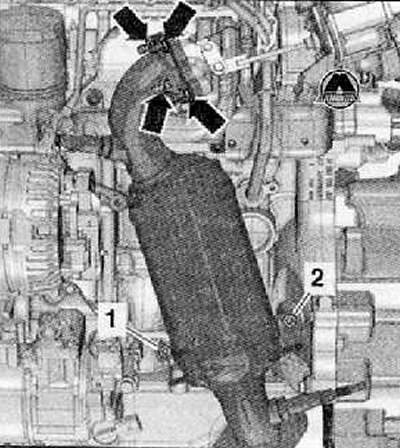
4. Loosen the fastening nuts on the turbocharger housing (arrows), as shown in the figure below.
5. Remove the bottom protective cover of the engine compartment.
6. Disconnect the wiring harness connector (1), unscrew and remove the rear lambda probe for the catalytic converter -G130- as shown in the illustration below.
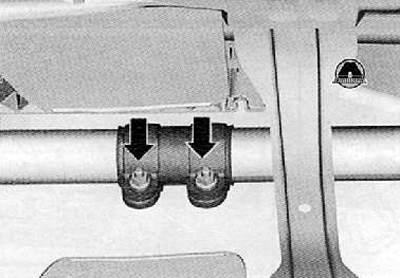
7. Loosen fastening nuts (arrows) on the front clamping bracket, slide the clamp onto the middle part of the exhaust pipe.
Note.
- The connector in the front of the exhaust pipe must not be angled more than 10°- risk of damage.
- Do not bend the connector excessively.
- Do not damage the wire mesh of the connecting element.
- The connecting element must be protected from being overstretched by the transport device (Т10403).
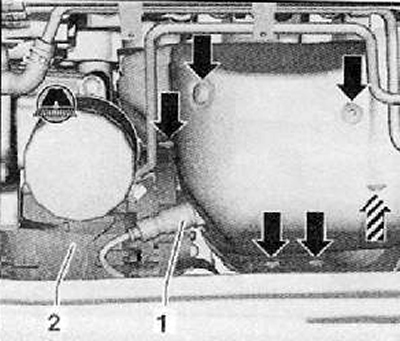
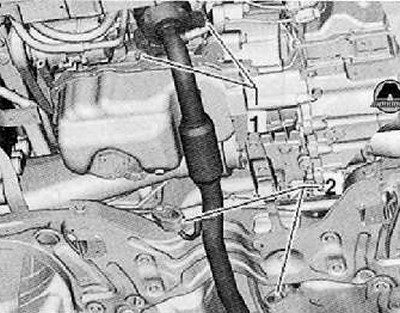
8. Unscrew the fastening screws (1) exhaust gas catalyst holder as shown in the figure below.
9. Disconnect exhaust piping from suspension brackets (2) and remove downwards.
Installation
1. Installation is made in reverse order to removal.