
Removing
Note: The engine can only be removed from the vehicle together with the transmission. after which they can be divided. The engine/transmission block is lowered from the engine compartment to the floor.
1. Park the vehicle on level ground, then remove the hood as described in Section 11.
2. If the engine needs to be disassembled, drain the oil and remove the oil filter (see section 1). Clean the drain plug and replace it.
3. Apply the handbrake and loosen the front wheel bolts. Jack up the front of the vehicle and place it securely on axle stands. Remove both front wheels.
4. Drain the gear oil as described in Section 1, then clean the drain plug and reinstall it.
5. Drain the cooling system as described in Section 1.
6. Remove the air filter assembly as described in Section 4.
7. Disconnect a negative wire from the accumulator and remove the generator.
8. Turn the clutch adjusting nut counterclockwise to create maximum clutch cable play. Disconnect the cable from the clutch release lever, and release the cable cover from the bracket.
9. Unscrew the knurled retaining ring, and disconnect the speedometer drive cable from the rear of the transmission.
10. Slide the rubber insulating boot off the main terminal of the starter traction relay, then unscrew the nut and disconnect the battery wiring.
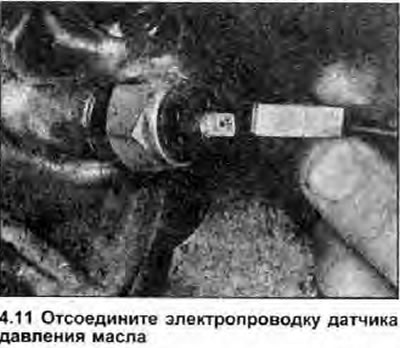
11. Disconnect the electrical wiring connectors from the oil pressure sensor located on the front wall of the cylinder block and the reversing light switch mounted on the back of the transmission (see illustration).
12. Release the mounting bracket, then disconnect the supply hose from the fuel priming pump/filter connection. Cap the end of the hose to minimize fuel loss.
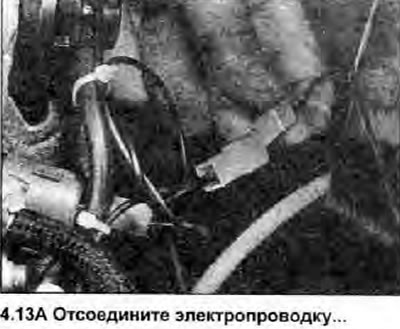
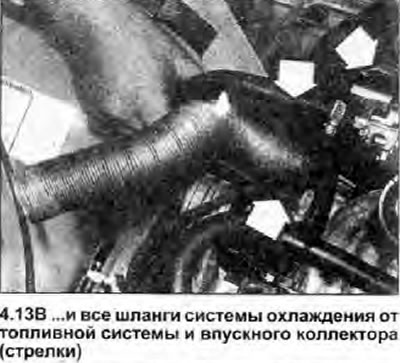
13. Disconnect from the fuel system and intake manifold the following (see illustrations):
- a) Wiring connector.
- b) Gas pedal cable.
- c) Brake booster unit hose.
- d) Hoses of the cooling system.
 |  |
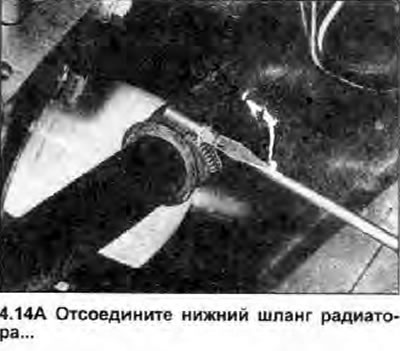
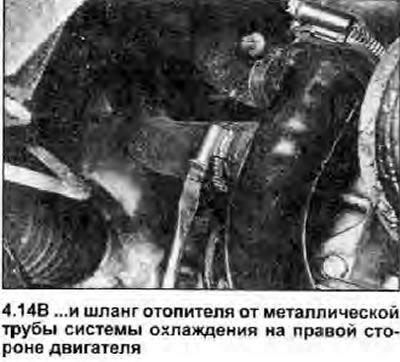
14. Acting as described in Section 3, disconnect the wiring from the coolant temperature gauge sensor, and disconnect the upper radiator hose and expansion tank hose from the thermostat housing. Loosen the mounting brackets, and disconnect the lower radiator hose from the front and the heater hose from the rear of the metal coolant pipe (see illustrations).
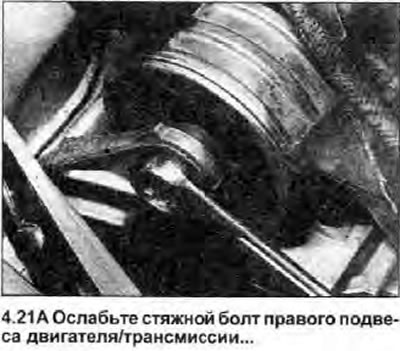
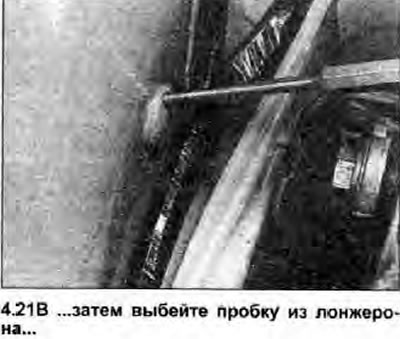
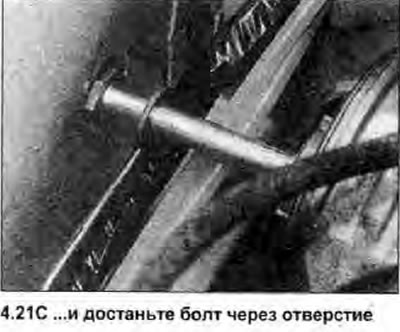
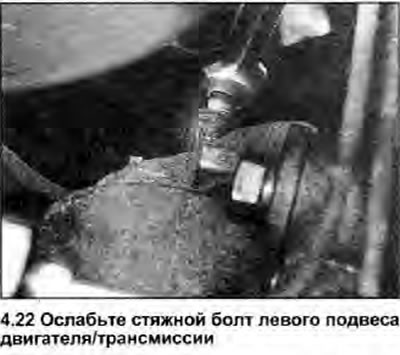
 |  |
15. Track the low voltage wiring from the distributor to the ignition unit, and disconnect the connectors. Disconnect the ignition coil high voltage wire from the center of the distributor, and move it away from the engine.
16. Working under the vehicle, remove the mounting bolt and disconnect the transmission ground strap from the underside of the vehicle.
17. Disconnect movable draft of a gear change from transmission. Disconnect the inner CV joints of the drive shaft from the transmission. Make sure the drive shaft and shift links will not interfere with engine/transmission removal.
18. On models equipped with an engine oil cooler, disconnect the cooler hoses from the block, see Chapter 8 of Section 2A.
19. Attach the lifting chains to the bracket on the rear of the cylinder head and winch the engine slightly. Make sure the chains do not touch surrounding components.
20. Remove the nut securing the engine/transmission rear mount to the subframe. Remove the bolt securing the rod to the engine support bracket and remove the rod from under the vehicle.
21. Loosen the right engine/transmission mount pinch bolt and remove the nut. To obtain the necessary space for removing the bolt, knock out the plug from the right side member. Coupling bolt can now be removed through the hole from under the wing (see illustrations).
 |  |
 |
22. Loosen and remove the left hanger pinch bolt, and remove its square nut from the front of the bracket (see illustration). Note that there is no need to disturb the left or right gimbal brackets; they should be left in place as they are good adjustment points when the engine will be raised to the running position when installed.
23. Once again, make sure that nothing prevents the removal of the engine / transmission from the car. Please note that it will be much easier to remove the block from under the car if you lower it onto a wheeled trolley.
24. Gently lower the engine/transmission from the engine compartment. Then disconnect the chains and remove the block from under the car.
25. If you need to separate the engine and transmission, first remove the starter. Loosen the flywheel housing plate mounting bolts, and remove the plate from the transmission. Loosen and remove the remaining bolts securing the transmission case to the engine, noting the location of the clutch cable bracket. Separate the gearbox from the engine, freeing it from the mounting pins. If necessary, also remove the clutch.
Installation
26. Installation is carried out in the reverse order, taking into account the following additional points:
- a) Before connecting the engine and transmission, adjust and lubricate the clutch components.
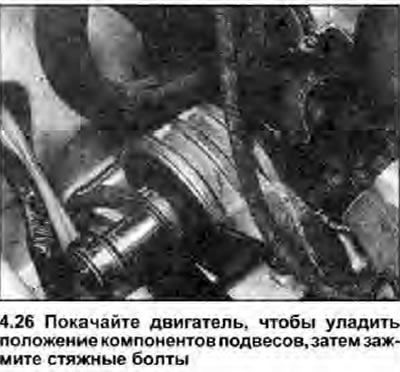
- b) Carefully lift the engine/transmission assembly into the engine compartment, then insert the left and right hanger pinch bolts and hand tighten them. Install the rear suspension bar by firmly tightening the mounting nut and bolt, then rock the engine/transmission assembly to adjust the position of the suspension components. Finally, tighten both tie bolts with a tightening torque specified specifications (see illustration).
- c) Tighten all nuts and bolts to the specified torque specifications, where given
- d) Make sure that all hoses and pipes are securely connected to their original places and secured with brackets. It is recommended to replace all old Skoda hose clamps with standard worm-type ones.
- e) Finally, fill the engine and transmission with the specified Specifications type and amount of oil, and fill the cooling system as described in Section 1.