



Note: Before installing the parts, make sure that their fasteners are intact.
1. To remove the upper trim of the A-pillar (2 in the illustration) unhook its fasteners (1) from the rack, starting from the bottom.
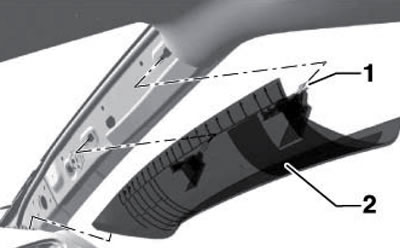
17.1. Fasteners for the right upper trim of the A-pillar
2. To remove the lower trim of the A-pillar (1 in the illustration) remove the hood release lever (only on the left side, see Section 7), remove the screw (2, 1.5 Nm, left side only) and pull the cover out of the clips (3).
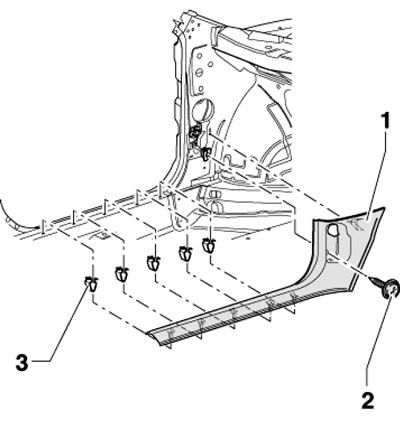
17.2. Removing the left lower trim of the A-pillar
3. To remove the upper trim of the B-pillar (1 in the illustration) unscrew the lower seat belt anchor bolt (35 Nm), remove the plug (3) and unscrew the screw (2, 2.5 Nm) located behind it. Then release the trim (1) from the door seals and remove it from the B-pillar (6), pulling the seat belt (4) through the trim.
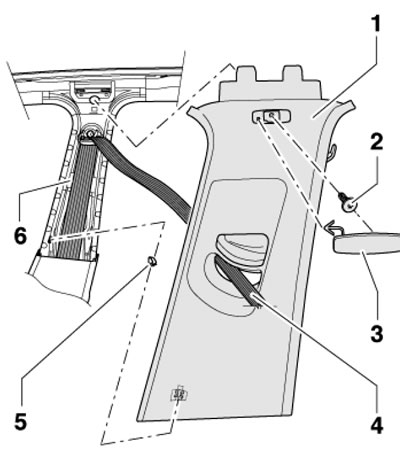
17.3. Removing the upper trim of the B-pillar
4. To remove the lower B-pillar trim, partially loosen the upper B-pillar trim (see paragraph 3) and separate its lower edge from the B-pillar. Pull out the upper edge of the lower trim (1 in the illustration) from the clips, then pull it up (arrow) and disconnect the connector (3) of the interior volume sensor (only on the left side).
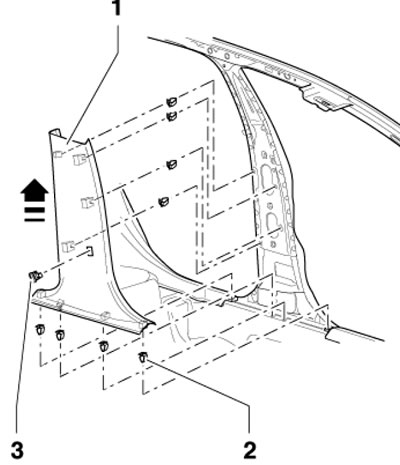
17.4. Removing the lower trim of the B-pillar
5. To remove the upper trim of the C-pillar (1 in the illustration) remove the plug (3), unscrew the bolt located behind it (2, 2.5 Nm) and release the trim from the door seals.
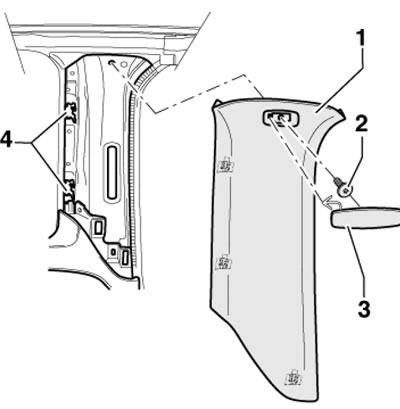
17.5. Removing the upper trim of the C-pillar
6. To remove the lower trim of the C-pillar (3 in the illustration) remove the side trim of the luggage compartment (see paragraph 9), remove the rear seat backs and the floor covering under the rear seats. On models without side airbags, remove the bolt (5, 1.5 Nm), and on models with side airbags, remove these bags. Unscrew the bolt (1, 1.5 Nm), release the retainer (2), loosen the upper edge of the pad (3) and remove it.
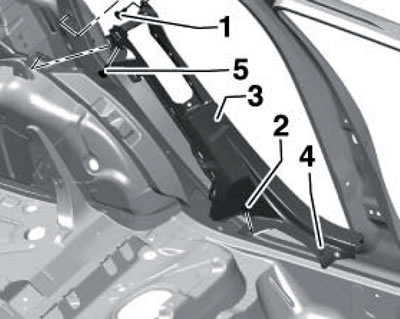
17.6. Removing the lower trim of the C-pillar
7. To remove the upper trim of the D-pillar (1 in the illustration) unhook its fasteners (2) from the rack.
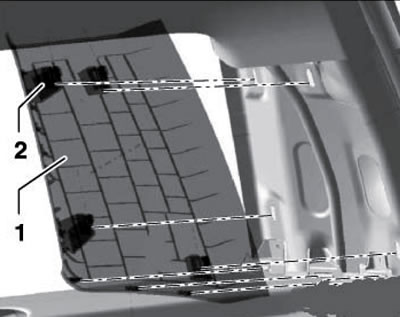
17.7. D-pillar upper trim fasteners
8. To remove the rear door sill trim (1 in the illustration) lift the floor covering, unscrew the screws (3.2 Nm) and press the fasteners (2) of the trim away from the threshold.
The original can be viewed on SKODABOOK
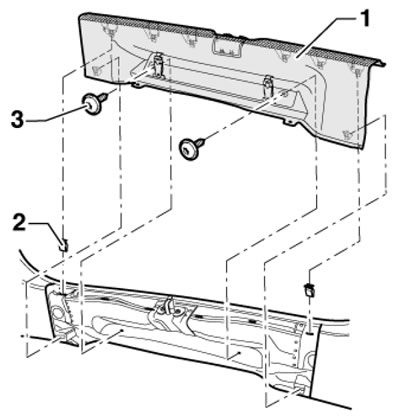
17.8. Tailgate sill trim fasteners
9. The details of fastening the side trim of the luggage compartment are shown in the illustration. To remove the CD changer bracket, remove the CD changer, case (19) and cover (9), then unscrew the bolts (2). To remove the fold-down hook, remove the panel (9) and unscrew the bolt (16). To remove the hook holder, pry up the cover (14) with a plastic wedge, then unscrew the bolts (15). The following describes how to remove the side cover (9).
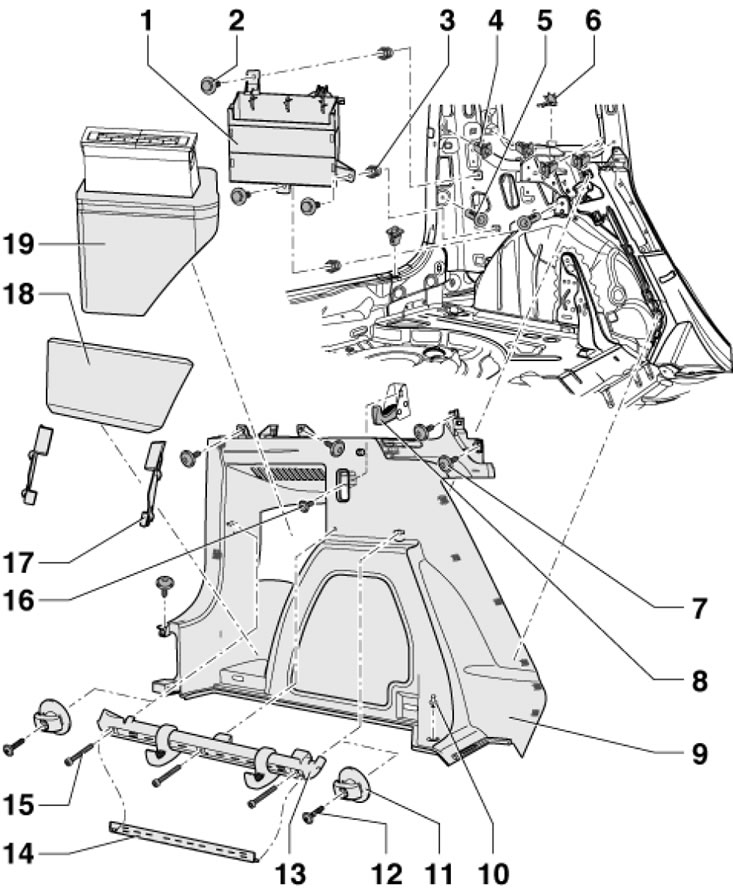
17.9. Details of installation of side trim of luggage compartment 1. CD changer bracket; 2. Bolt, 4 Nm; 3.5. Embedded nut; 4. Adjusting nut; 6. Retainer; 7. Bolt, 2.5 Nm; 8. Drop hook; 9. Side trim; 10. Retainer; 11. Hook; 12. Hook bolt 11, 2 Nm; 13. Hook holder; 14. Holder cover 13; 15. Bolt, 5 Nm; 16. Bolt, 7 Nm; 17. Guides; 18. The cover of the storage compartment is held in guides 17; 19. CD changer housing
10. Remove the tailgate sill trim and the upper C and D pillar trims (see relevant paragraphs above).
11. Remove the screws (7 in illustration 17.9) and remove the lower seat belt anchor. If present, remove the hook holder (13), hook (11) and folding hook (8). Remove the retainer (10), unhook the side cover (9) and pull the seat belt through it.