
Note: Depending on the model variants, the mounting parts may differ slightly.
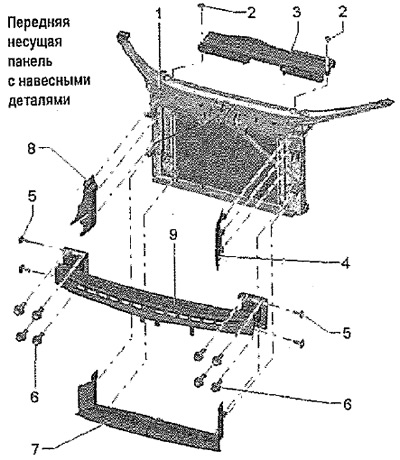
1. Front carrier with attachments
2. Screw: Tightening torque - 2.5 Nm
3. Duct
4. Air duct
5. Screw: Tightening torque: 8 Nm
6. Screw: Tightening torque: 55 Nm
7. Duct
8. Duct
9. Bumper beam
Service position
Bring into position for maintenance:
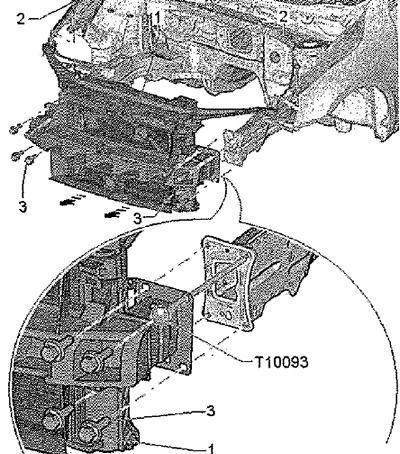
Remove the front bumper. Remove headlight. Disconnect the cable from the front support panel. Detach the washer reservoir filler from the front support panel. Disconnect the air conditioning pipes from the front support panel (going to the evaporator). Remove air duct (depending on engine). Release screws -3- on left and right side members. Insert guide pins -T10093- into left and right side member. Remove upper screws -2-. Front carrier -1- can be moved forward by approx. 10 cm -arrows- on guide pins -T10093-.
Note: When detaching the front support panel, take care not to damage the electrical wires and other communications.
Installation
Installation in reverse order.
Note: Hoses and lines must not be pinched.