



Automatic transmission 0CW car Skoda Octavia 3
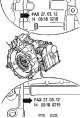
Designation of the KP
"7-speed manual transmission with dual clutch DSG - 0CW" is installed in combination with 4-cylinder engines. Placement of letter designations in the CP Example for CP: The letter designation of the checkpoint "see...
"7-speed manual transmission with dual clutch DSG - 0CW" is installed in combination with 4-cylinder engines. Placement of letter designations in the CP Example for CP: The letter designation of the checkpoint "see...

Filling quantities
"7-speed dual clutch gearbox DSG - 0CW" is divided into two zones and is filled with two different types of fluids. One zone is filled with transmission oil "see arrow A" and the other - with hydraulic fluid "see arrow...
"7-speed dual clutch gearbox DSG - 0CW" is divided into two zones and is filled with two different types of fluids. One zone is filled with transmission oil "see arrow A" and the other - with hydraulic fluid "see arrow...

General diagram of the KP installation
1. Sapun KP 2. Parking lock cover: After removing it, you can directly fill the gearbox with oil without using the ventilation hole 3. Gear shift lever 4. Mechatronics breather for dual clutch gearbox "J743" 5....
1. Sapun KP 2. Parking lock cover: After removing it, you can directly fill the gearbox with oil without using the ventilation hole 3. Gear shift lever 4. Mechatronics breather for dual clutch gearbox "J743" 5....
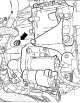
Gearbox repair
KP There is a "see arrow" hole in the gearbox housing. Note: This opening is sealed with a protective cap. During installation, make sure that nothing falls into this opening. If the gearbox lock cover is removed from...
KP There is a "see arrow" hole in the gearbox housing. Note: This opening is sealed with a protective cap. During installation, make sure that nothing falls into this opening. If the gearbox lock cover is removed from...

Removal and installation of a double-disc clutch — brief description
The clutch is disconnected with the gearbox removed by "moving upwards". The mechatronics remains on the gearbox. When installing a new clutch, it is necessary to determine and adjust the positions of the engagement...
The clutch is disconnected with the gearbox removed by "moving upwards". The mechatronics remains on the gearbox. When installing a new clutch, it is necessary to determine and adjust the positions of the engagement...

General diagram of installation of double clutch
Caution! Risk of damage to the clutch adjuster. The clutch automatically adjusts the working clearance. Vibrations can have a negative effect on the clutch adjuster. Therefore, the clutch must not be dropped. Also, when...
Caution! Risk of damage to the clutch adjuster. The clutch automatically adjusts the working clearance. Vibrations can have a negative effect on the clutch adjuster. Therefore, the clutch must not be dropped. Also, when...

Removal the double clutch
Gearbox removed. Gearbox mechatronics with dual clutch "J743" is installed on the gearbox. Both breathers "arrows" must be removed when performing installation work on the gearbox, and the holes must be hermetically...
Gearbox removed. Gearbox mechatronics with dual clutch "J743" is installed on the gearbox. Both breathers "arrows" must be removed when performing installation work on the gearbox, and the holes must be hermetically...
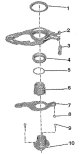
Clutch Drive Overview
1. Adjusting washer "K1": determine the thickness 2. Large engagement lever "K1": together with large engagement bearing; replace when replacing dual clutch 3. Hinge support: for large engagement lever pos. 2; cannot be...
1. Adjusting washer "K1": determine the thickness 2. Large engagement lever "K1": together with large engagement bearing; replace when replacing dual clutch 3. Hinge support: for large engagement lever pos. 2; cannot be...

Adjusting the dual clutch
Caution! Risk of damage to the clutch and other components. The support of the engagement levers and the entire release bearing unit must be dry and free of oil and grease. Remove the installed spherical pin with the...
Caution! Risk of damage to the clutch and other components. The support of the engagement levers and the entire release bearing unit must be dry and free of oil and grease. Remove the installed spherical pin with the...

Installing a double clutch
Attention! When replacing the dual clutch, it is necessary to replace the following parts at the same time: both engagement levers with release bearings, the spherical journal of the engagement lever of the "K2" clutch,...
Attention! When replacing the dual clutch, it is necessary to replace the following parts at the same time: both engagement levers with release bearings, the spherical journal of the engagement lever of the "K2" clutch,...

Electrical/electronic components and their installation locations, DSG automatic transmission — 0CW
1. Diagnostic connector: Installation location: Driver's footwell trim 2. Gear selector position indicator "Y6": Installation location: Integrated into the instrument panel; the gear indicator is off, indicating...
1. Diagnostic connector: Installation location: Driver's footwell trim 2. Gear selector position indicator "Y6": Installation location: Integrated into the instrument panel; the gear indicator is off, indicating...

Switching mechanism
Caution! Before working with the engine running, set the lever to the "P" position and pull the handbrake. Check the switching mechanism At selector lever positions "S", "D", "R" and the Tiptronic starter cannot be...
Caution! Before working with the engine running, set the lever to the "P" position and pull the handbrake. Check the switching mechanism At selector lever positions "S", "D", "R" and the Tiptronic starter cannot be...

General assembly diagram — gear shift mechanism
1. Shift mechanism: Gear selector cable. The gear selector cable cannot be removed from the gear shift mechanism and must be replaced as a single unit. Do not lubricate the control lever drive cable; check and adjust....
1. Shift mechanism: Gear selector cable. The gear selector cable cannot be removed from the gear shift mechanism and must be replaced as a single unit. Do not lubricate the control lever drive cable; check and adjust....

Removal and installation the gearshift housing
Pull the handbrake lever. Set the control lever to the "D/S" position. Switch off the ignition. Insert the "T30098" release tool under the gearshift mechanism housing and detach the housing by pressing in the direction...
Pull the handbrake lever. Set the control lever to the "D/S" position. Switch off the ignition. Insert the "T30098" release tool under the gearshift mechanism housing and detach the housing by pressing in the direction...

Removal and installation the selector lever handle
Remove the shift mechanism cover. Open the "arrow" clamp under the handle. Pull the selector lever handle "1" together with the selector lever boot upwards "arrow A" so as not to press the lock button "2". -Do not take...
Remove the shift mechanism cover. Open the "arrow" clamp under the handle. Pull the selector lever handle "1" together with the selector lever boot upwards "arrow A" so as not to press the lock button "2". -Do not take...

Removal and installation the shift mechanism
Remove the gearshift mechanism cover. Remove the selector lever handle. Set the control lever to position "P". Disconnect the battery ground wire with the ignition off. Remove the ashtray or compartment from the...
Remove the gearshift mechanism cover. Remove the selector lever handle. Set the control lever to position "P". Disconnect the battery ground wire with the ignition off. Remove the ashtray or compartment from the...

Removal and installation the drive cable
Filming is not allowed (disconnect) drive cable from the shift mechanism, it is replaced together with the shift mechanism as a single unit. Emergency release of the shift mechanism from position "P" The solenoid for...
Filming is not allowed (disconnect) drive cable from the shift mechanism, it is replaced together with the shift mechanism as a single unit. Emergency release of the shift mechanism from position "P" The solenoid for...

Safety instructions for mechatronics for dual clutch transmission «J743»
Danger! Do not remove the receiver. The receiver is under pressure and must not be opened. Do not loosen the screws of the mechatronics cover for the dual-clutch transmission "J743". Do not start the engine or tow the...
Danger! Do not remove the receiver. The receiver is under pressure and must not be opened. Do not loosen the screws of the mechatronics cover for the dual-clutch transmission "J743". Do not start the engine or tow the...
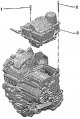
General installation diagram — mechatronics for dual clutch gearbox «J743»
Note: The "new" mechatronics unit for the gearbox is already filled with oil at the factory, do not drain the oil. The "removed" mechatronics unit is returned filled with oil (plug the vent with a suitable plug). When...
Note: The "new" mechatronics unit for the gearbox is already filled with oil at the factory, do not drain the oil. The "removed" mechatronics unit is returned filled with oil (plug the vent with a suitable plug). When...

Removal the mechatronics for the dual clutch gearbox «J743» (gearbox installed)
Note: Follow the instructions for the DSG "0CW" automatic transmission. The clutch automatically adjusts the working clearance. Fluctuations may adversely affect the clutch adjustment device. Even if the mechatronics is...
Note: Follow the instructions for the DSG "0CW" automatic transmission. The clutch automatically adjusts the working clearance. Fluctuations may adversely affect the clutch adjustment device. Even if the mechatronics is...

Install mechatronics for dual clutch gearbox «J743» (gearbox installed)
The T10407 crowbar is inserted between the dual clutch engagement levers and the gearbox housing. Note: When installing a new mechatronic unit, please note the following: After unpacking, do not throw away the packaging...
The T10407 crowbar is inserted between the dual clutch engagement levers and the gearbox housing. Note: When installing a new mechatronic unit, please note the following: After unpacking, do not throw away the packaging...

Adjusting the gear shifter
Caution! Risk of damage to the mechatronics for the dual clutch transmission "J743". Do not press on the actuator of the sensor when adjusting. Adjust all 4 gear shifters on the rear side of the mechatronics of the DSG...
Caution! Risk of damage to the mechatronics for the dual clutch transmission "J743". Do not press on the actuator of the sensor when adjusting. Adjust all 4 gear shifters on the rear side of the mechatronics of the DSG...

Removal the CP
Set the selector lever to position "P". Note: Do not remove the ignition key. Remove the engine cover. Remove the air filter. Remove the battery and battery bracket. Remove the cover of the drainage box. Disconnect the...
Set the selector lever to position "P". Note: Do not remove the ignition key. Remove the engine cover. Remove the air filter. Remove the battery and battery bracket. Remove the cover of the drainage box. Disconnect the...

Installation of the control unit
Installation in reverse order. Note: Replace self-locking nuts and screws during installation work. Replace screws tightened to the specified tightening angle, as well as sealing rings and gaskets. Secure all hose...
Installation in reverse order. Note: Replace self-locking nuts and screws during installation work. Replace screws tightened to the specified tightening angle, as well as sealing rings and gaskets. Secure all hose...

Transmission oil
Note: "7-speed dual clutch transmission 0CW" filled with long-term oil (fluids are designed for long service life). For this reason, there is no need to check the oil level; a plug of the threaded hole for checking the...
Note: "7-speed dual clutch transmission 0CW" filled with long-term oil (fluids are designed for long service life). For this reason, there is no need to check the oil level; a plug of the threaded hole for checking the...

Removal and installation the parking lock cover
The gearbox is installed. The selector lever is in the "P" position. Remove the engine casing. Remove the air filter. Remove the battery and battery bracket. Using the "MP8-602/1" door interior trim puller, disconnect...
The gearbox is installed. The selector lever is in the "P" position. Remove the engine casing. Remove the air filter. Remove the battery and battery bracket. Using the "MP8-602/1" door interior trim puller, disconnect...

Removal and installation the parking blocker
The gearbox is installed. Remove the cover of the parking blocker "1". Unscrew the screws "2", remove the parking blocker "1" from the mounting bushings "arrows". If the parking blocker cannot be removed by hand:...
The gearbox is installed. Remove the cover of the parking blocker "1". Unscrew the screws "2", remove the parking blocker "1" from the mounting bushings "arrows". If the parking blocker cannot be removed by hand:...
This section is available on russian, bulgarian, belarusian, ukrainian, serbian, croatian, romanian, polish, slovak, hungarian
Read similar sections on other Skoda models
➧ Transmission: Automatic gearbox Skoda Rapid 1 (2012-2022)
➧ Transmission: Automatic gearbox Skoda Kodiaq 1 (2016-2024)
Link to this section in various formats
TEXTHTMLBB Code
- General information
- User manual
- Car driving
- Maintenance
- Petrol engines 1.2 l
- Engine repair
- Cooling system
- Supply system
- Petrol engines 1.4 l
- Engine repair
- Supply system
- Petrol engines 1.8/2.0 l
- Engine repair
- Cooling system
- Supply system
- Diesel engines 1.6/2.0 l
- Engine repair
- Cooling system
- Supply system
- Transmission
- Mechanical gearbox 02S
- Automatic gearbox 0CW
- Automatic gearbox 0D9
- Chassis (running gear)
- Front suspension
- Rear suspension
- Brake system
- Steering
- Body and interior
- Doors, locks and windows
- Exterior (external elements)
- Interior (internal elements)
- Ventilation and air conditioning
- Electrical equipment
- Equipment and devices
- Headlights and lighting
- Wiring diagrams (basic)
- Wiring diagrams (comfort)
- General information
- Vehicle details
- Maintenance
- Power unit
- Petrol engines 1.6 l AEE
- Petrol engines 1.8 l AGN
- Diesel engines 1.9 l AGR
- Fuel system
- Exhaust system
- Cooling system
- Transmission
- Clutch
- Car gearbox
- Gearbox repair 02J
- Gearbox repair 02K
- Chassis (running gear)
- Wheels and tires
- Suspension and axles
- Brake system
- Body and interior
- Exterior (external elements)
- Interior (internal elements)
- Doors, locks and windows
- Electrical equipment
- Equipment and devices
- Electrical circuits