
Company vehicles Hyundai Company vehicles Kia Company vehicles Lada Company vehicles Mazda Company vehicles Mercedes-Benz Company vehicles Opel Company vehicles Mitsubishi
English Русский
Български
Беларускі
Український
Српски
Hrvatski
Română
Polski
Slovenský
Magyar
Articles   
Bookmark Contacts Sitemap
SkodaBook.ru


Fabia Rapid Octavia Superb Kodiaq Yeti Others
Octavia 1 (1996-2004) Octavia 3 (2013-2019)

Removal and installation the oil pan (Skoda Octavia 5E)

  • Main
  • Octavia
  • 5E (2013-2019)
  • Petrol engines 1.2 l
  • Engine repair
  • Removal and installation the oil pan
0
Contents: Only for vehicles with air…⬇ All ⬇ Installation ⬇ Tightening torques ⬇
Drain the engine oil. Remove the oil filter using the oil filter wrench "3417". Remove the poly V-belt.

Only for vehicles with air conditioning


Note: The refrigerant circuit of the air conditioning system is not depressurized. Do not damage the condenser, refrigerant lines and hoses. Do not twist or kink the lines and hoses.


Remove the air conditioning compressor. Secure the air conditioning compressor to the front support panel.

All


Unscrew the screws securing the gearbox "arrows". Disconnect the connector of the oil level and temperature sensor "G266".
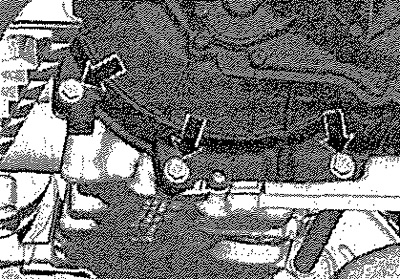
Unscrew the screws securing the gearbox «arrows».…


Unscrew all the screws securing the oil pan "arrows".
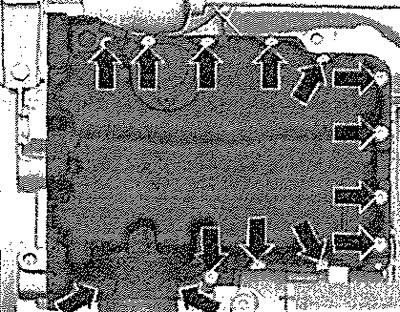
Unscrew all the screws securing the oil pan…


Unscrew the fastening screws from the gearbox side of the "arrow" using the "T10058" socket wrench.


Note: When dry, this sealant has high adhesive strength.
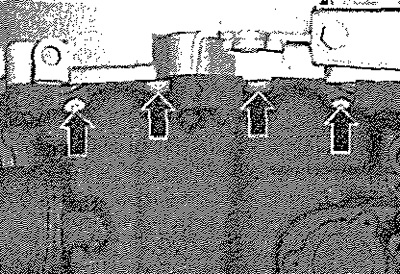

Note: When dry, this sealant has high adhesive…


Carefully pry the oil pan by the notch "arrow" with the help of the release lever and press the pan away from the cylinder block. Remove the oil pan. To do this, it may be necessary to first move the oil pan from its place with light blows of a hammer with a rubber striker.
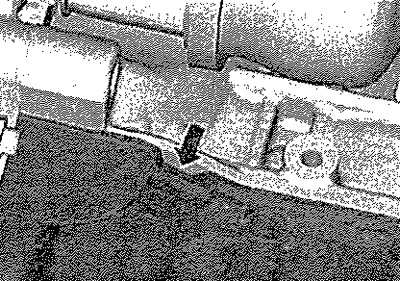
Carefully pry the oil pan by the notch «arrow»…


Remove sealant residue from the cylinder block and oil pan with a chemical sealant remover. Degrease the mating surfaces.

Installation


Note: The sealant must not be expired (see expiration date). After applying the sealant, 5 minutes are allotted for installing the pan. The oil pan is installed more easily and accurately if M6 threaded pins are screwed in as guides in 2 places on the cylinder block flange.


Cut off the tip of the tube of sealant at the mark located on its end (the hole diameter should be approximately 3 mm). Apply sealant, as shown in the figure, to the clean mating surface of the lower part of the oil pan. The sealant strip should be: 2..3 mm thick. In places of holes for fastening screws, apply sealant from the inside of the "arrow".

Note: The thickness of the sealant bead must not exceed the value specified above, otherwise sealant protruding from the joint may enter the oil pan and clog the oil intake screen.
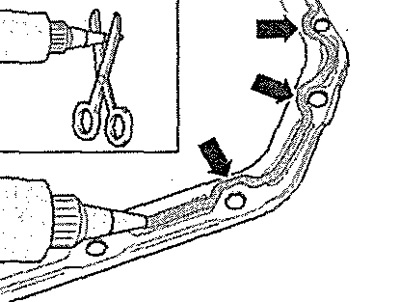

Note: The thickness of the sealant bead must not…


Immediately attach the oil pan and tighten it slightly with the oil pan mounting screws. Tighten the oil pan mounting screws to the specified torque.

Note: After installing the oil pan, allow the sealant to dry for about 30 minutes. Only then can you fill the engine with oil.


Install the oil filter and tighten it with the oil filter wrench "3417". Fill with engine oil. Install the air conditioning compressor. Install the poly V-belt.

Installation in reverse order.

Tightening torques
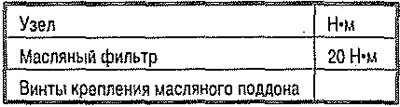


Tightening torques
This article is available at russian, bulgarian, belarusian, ukrainian, serbian, croatian, romanian, polish, slovak, hungarian
Article verified: Anatoly Ovchinnikov
Share with friends:
◀ Previous
Skoda Octavia 3: Engine repair
Next ►

Oil pan — torque and tightening order
Removal and installation oil seals with the cylinder head installed
Removal and installation cuff seals
Valve mechanism parts and components
Timing Belt Installation/Adjustment
Removal and installation the oil pump
Engine oil cooling radiator
Parts and components of the crankcase ventilation system
Removal and installation the oil separator
Oil filter and oil pressure sensor parts and assemblies
Link to this article in various formats
Reviews and comments of visitors
No comments yet


Add two numbers: 12 + 28


Octavia 3 (2013-2019) 
  • General information
  • User manual
  • Car driving
  • Maintenance
  • Petrol engines 1.2 l
  • Engine repair
  • Cooling system
  • Supply system
  • Petrol engines 1.4 l
  • Engine repair
  • Supply system
  • Petrol engines 1.8/2.0 l
  • Engine repair
  • Cooling system
  • Supply system
  • Diesel engines 1.6/2.0 l
  • Engine repair
  • Cooling system
  • Supply system
  • Transmission
  • Mechanical gearbox 02S
  • Automatic gearbox 0CW
  • Automatic gearbox 0D9
  • Chassis (running gear)
  • Front suspension
  • Rear suspension
  • Brake system
  • Steering
  • Body and interior
  • Doors, locks and windows
  • Exterior (external elements)
  • Interior (internal elements)
  • Ventilation and air conditioning
  • Electrical equipment
  • Equipment and devices
  • Headlights and lighting
  • Wiring diagrams (basic)
  • Wiring diagrams (comfort)
Octavia 1 (1996-2004) 
  • General information
  • Vehicle details
  • Maintenance
  • Power unit
  • Petrol engines 1.6 l AEE
  • Petrol engines 1.8 l AGN
  • Diesel engines 1.9 l AGR
  • Fuel system
  • Exhaust system
  • Cooling system
  • Transmission
  • Clutch
  • Car gearbox
  • Gearbox repair 02J
  • Gearbox repair 02K
  • Chassis (running gear)
  • Wheels and tires
  • Suspension and axles
  • Brake system
  • Body and interior
  • Exterior (external elements)
  • Interior (internal elements)
  • Doors, locks and windows
  • Electrical equipment
  • Equipment and devices
  • Electrical circuits
SkodaBook.ru © 2018–2026 | Mobile version | Articles on Skoda | Sitemap EN BG BY UA RS HR RO PL SK HU | Feedback | Site search | Bookmark
Fabia 1 (1999-2007) | Fabia 2 (2007-2014) | Rapid 1 (2012-2022) | Octavia 1 (1996-2004) | Octavia 3 (2013-2019) | Superb 2 (2008-2015) | Kodiaq 1 (2016-2024) | Yeti (2009-2017) | Favorit (1987-1994) | Felicia (1994-2001) |
By continuing to use the site, you agree to the use of cookies.