
Removing
1. Remove the timing belt from the timing belt pulley on the camshaft and from the timing belt pulley on the high pressure pump.
2. Remove the toothed drive belt pulley on the camshaft.
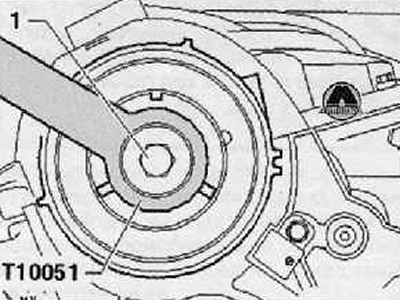
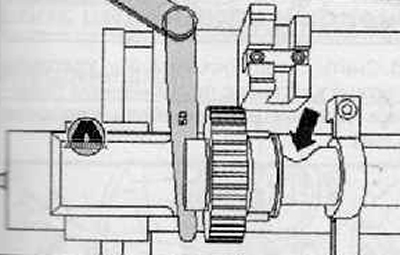
3. Loosen the screw (1) camshaft hub, to do this, hold the holding lever (Т10051), as shown in the figure below. The screw should be turned about two turns.
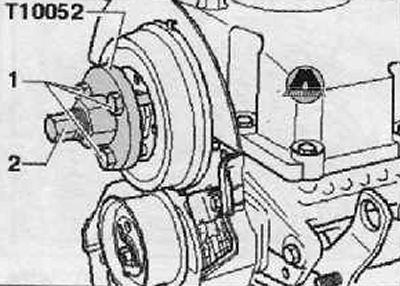
4. Install puller (Т10052) on the camshaft hub. screws (1) should be screwed into the hub.
5. To remove the camshaft hub, screw in the screw (2), holding on to the hexagon (open end wrench Ns 30) puller as shown in the figure below.
6. Remove the hub from the camshaft cone.
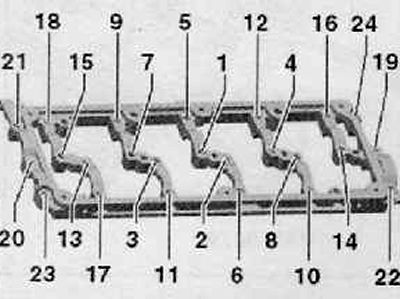
7. Loosen the camshaft bearing frame bolts in sequence (24...1), as shown in the figure below.
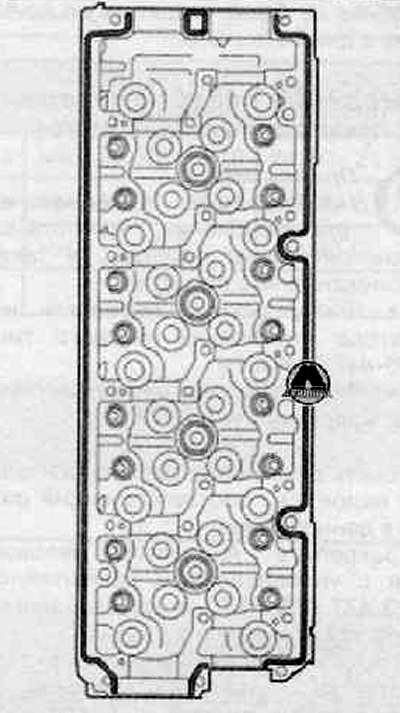
8. Completely unscrew the frame fastening bolts and remove it by disconnecting it from the cylinder head.
Note. If the camshafts are to be reinstalled, the camshafts must be marked and then removed.

Installation
Attention. Protective gloves and goggles should be used when working with seal remover and degreaser.
1. Remove sealant residues on the bearing frame and on the cylinder block with a chemical seal remover.
2. Clean the sealing surfaces so that they are free of grease and oil.
3. Lubricate the working surfaces of the camshafts with oil.
Attention. Camshafts can only be installed with a camshaft installer (Т40094) thus, as described below, the fact is that otherwise the thrust bearing in the bearing frame would have failed and the cylinder head would have to be replaced.
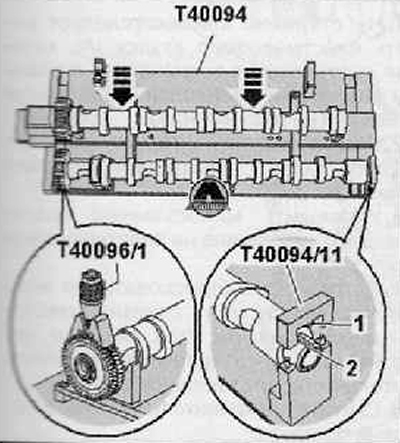
4. Tool for installing camshafts (Т40094) must be assembled as follows:
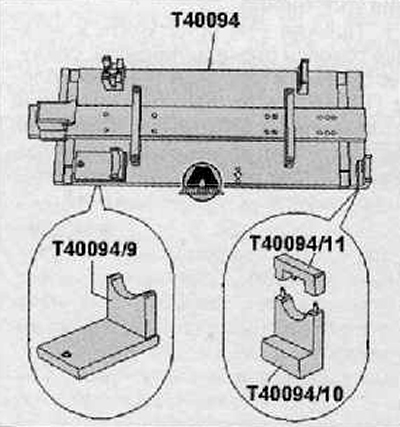
Connect pads (Т40094/9) And (Т40094/10) (with Т40094/11) on the main plate as shown in the figure below. If necessary, remove the covers screwed in place.
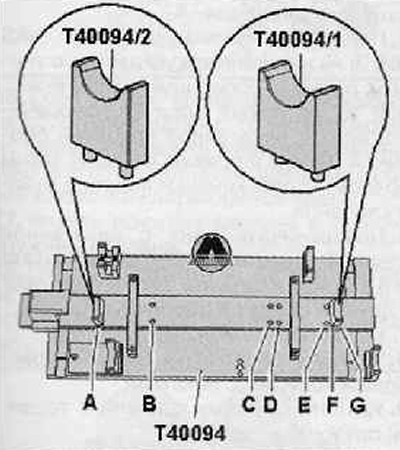
Install overlay (Т40094/1) into place (F) and overlay (Т40094/2) into place (A), as shown in the figure below.
Insert the camshaft that drives the intake valves into the linings (Т40094/1) and Т40094/2).
Note. excavation (arrow) for the cylinder head bolt must point outward.
To equalize the gap, put a feeler gauge 0.50 mm and a fastener (Т40094/8) should be slid into a spline in the camshaft that drives the intake valves.
6. Insert the exhaust camshaft into the linings (Т40094/9) And (Т40094), as shown in the figure below.
7. Lock the camshaft that drives the exhaust valves with a cover (Т40094/11). ledge (1) on the cover must fit into the slot (2) on the camshaft as shown in the figure below.
8. Move the intake camshaft towards the exhaust camshaft until the teeth mesh with each other (arrows), as shown in the figure below.
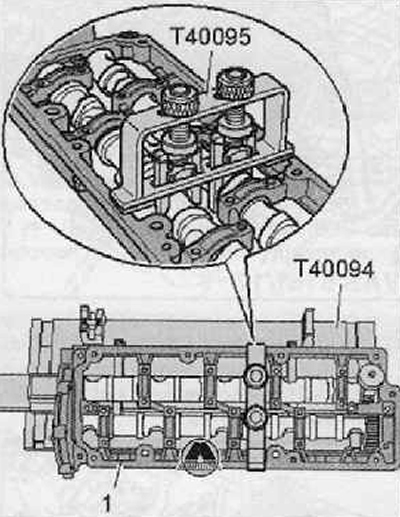
9. A bearing frame should be placed on the camshafts (1), shown in the figure below. All camshaft bearings must be in contact with the camshafts.
10. Installing the camshaft installer (Т40095), fix the camshafts in the bearing frame as shown in the figure below.
11. Removing the cover (Т40094/11), pull out the fastener (Т40094/8) from the intake camshaft.
Note. Pay attention to the expiration date of the sealing agent.
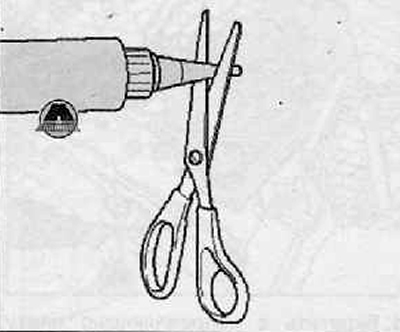
12. Cut off the tip with scissors (jet) tube on the front mark (∅ jet - approx. 2 mm).
Attention.
- Risk of contamination of the camshaft bearings by excessive sealant.
- Do not apply sealant tracks thicker than specified.
13. Tracks should be applied to the clean sealing surfaces of the cylinder head as shown in the figure below. The thickness of the caterpillar belts of the sealing agent: 2...3 mm.
Note. The bearing frame must be installed within 5 minutes of applying the silicone sealant.
14. Taking the camshafts together with the bearing frame, camshaft installer (Т40095) and tensioner (Т40096/1) from the camshaft installer (Т40094), insert them carefully into the cylinder head.
15. Tighten the bolts and nuts of the camshaft support frame in the sequence (1...24), as shown in the figure below. The bearing frame must lie with all surfaces against the cylinder head.
16. Finally tighten the bolts and nuts of the camshaft support frame in the sequence (1...24) with a tightening torque of 10 Nm.
17. Remove the special tool for installing camshafts (Т40095) and tensioner (Т40096/1).
18. Further installation is carried out in the reverse order of actions:
- Install O-ring (stuffing box) camshaft.
- Install a new cover.
- Install vacuum pump.
- Install cylinder head cover (for details, see the relevant section in this chapter).
Note.
- After installing the camshafts, you can not scroll or start the engine for 30 minutes. Gchdravliche-skie pushers should settle (otherwise the valves would hit the piston crown).
- After completing work on the valve train, carefully crank the engine at least twice to ensure that none of the valves hit the piston crown during start-up.