
Note: Before working on SRS components, be sure to disconnect the wires from the battery (see chapter 5) and wait at least three minutes after that. After installing the SRS components, first turn on the ignition and then connect the battery.
SRS control unit
1. Turn on the ignition and disconnect the negative cable from the battery (see chapter 5).
2. Remove the side moldings of the center console.
3. Unlock the lock (2 to resist. illustrations) connector (3) block SRS (1) in the direction of the arrow, give the nuts (4) and remove the control box.
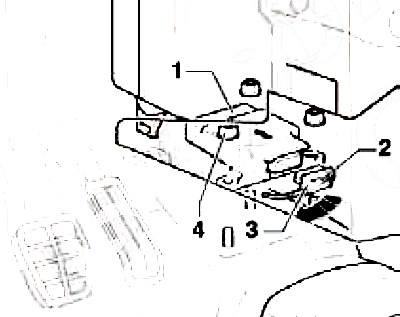
13.3 Removing the SRS control unit
4. Installation is carried out in the reverse order. Tighten nuts to 9 Nm. If a new SRS unit is installed, it must be programmed.
Side impact sensor (by pressure)
5. Turn on the ignition and disconnect the negative cable from the battery (see chapter 5).
6. Remove front door trim (see chapter 11).
7. Disconnect the connector (3 on resist. illustrations), drill out the rivets (1) and remove the sensor (2).
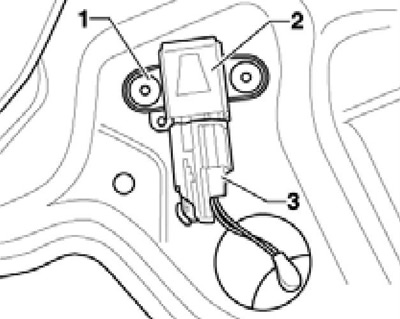
13.7 Removing the side impact sensor (by pressure)
8. Installation is carried out in the reverse order.
Side impact sensor (on acceleration)
9. Turn on the ignition and disconnect the negative cable from the battery (see chapter 5).
10. Remove the lower overlay of a rack In a body (see chapter 11).
11. Disconnect the connector (2 to resist. illustrations), remove the bolts (1) and remove the sensor (3).
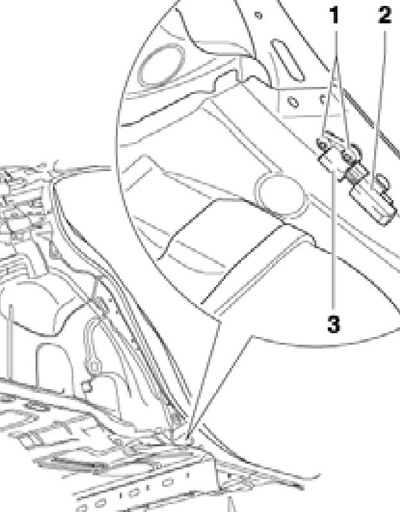
13.11 Removing the side impact sensor (on acceleration)
12. Installation is carried out in the reverse order. Tighten the bolt to 9 Nm.
Front impact sensor (on acceleration)
13. The front impact sensor is located on the bulkhead of the engine compartment.
14. Turn on the ignition and disconnect the negative cable from the battery (see chapter 5).
15. Disconnect the connector, unscrew the sensor mounting bolt and remove it.
16. When installing, tighten the bolt to 9 Nm.