



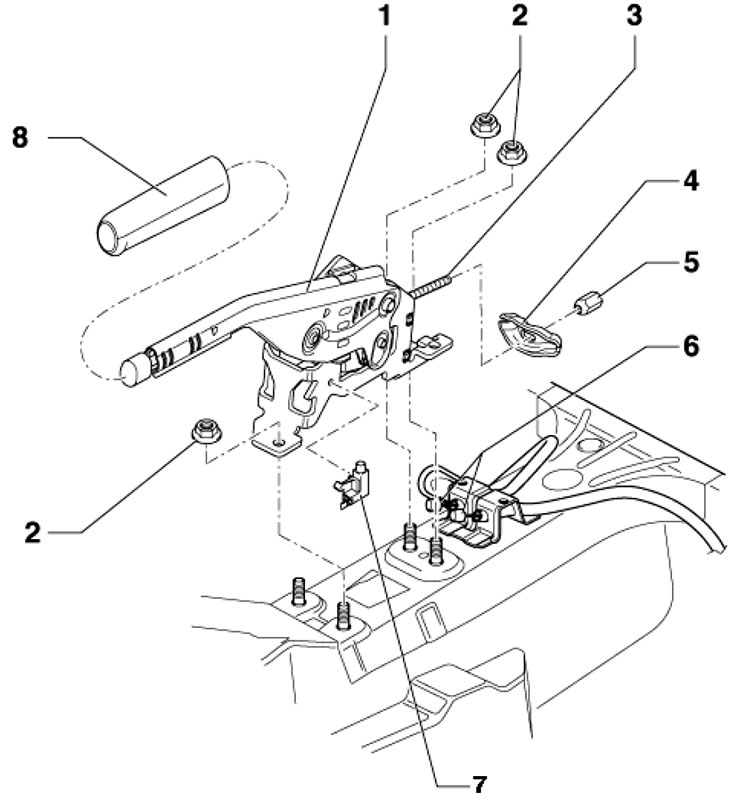
4.1. Parking brake parts 1. Parking brake lever, remove the center console before removing (see Chapter 11); 2. Nut, 20 Nm; 3. Tension pin; 4. Equalizer; 5. Adjusting nut; 6. Cable; 7. D/V parking brake indicator; 8. Lever cover 1, to remove, use a small screwdriver to press the fasteners at the bottom and slide the cover forward
Adjusting the parking brake
Note: Adjustment of the parking brake is only required after replacing its cable, replacing the caliper or brake disc.
2. Remove the center console (see Chapter 11).
3. Press the brake pedal firmly three times and apply and release the parking brake three times.
4. Tighten the adjusting nut (1 in illustration 4.7) so much so that the levers (1 in the illustration) raised from the stops (2) on the calipers. The distance (a) to the stop on the left and right calipers together should not exceed 3 mm and should not be less than 1 mm. Make sure that the rear wheels can rotate freely.
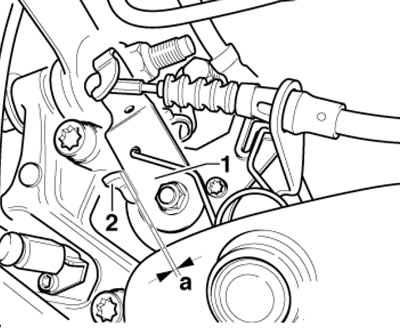
4.4. Adjusting the parking brake
5. Since automatic adjustment of the rear brake mechanism is used, further re-adjustment is not required.
Removal and installation the cable
6. Release the parking brake and remove the center console (see Chapter 11).
7. Loosen the adjusting nut (1 in the illustration) so that the corresponding cable (2) can be unhooked from the equalizer (3).
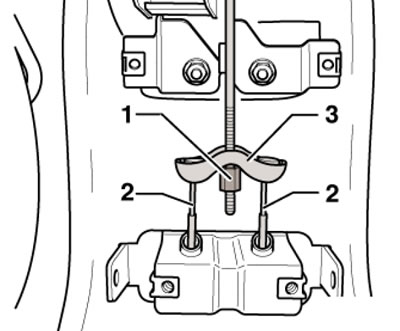
4.7. Adjustment unit
8. Press the lever (2 in the illustration) in the direction of the arrow and at the same time unhook the cable (3). Loosen the spring sleeve (1) of the cable on the caliper bracket.
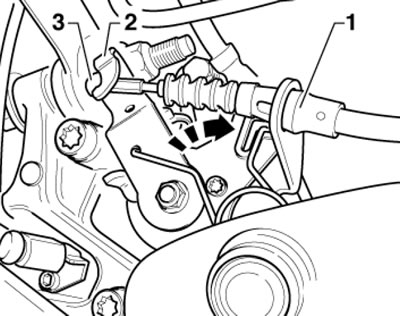
4.8. Separating the cable from the caliper
9. Loosen the cable on the bracket (3 in illustration 3.23 Chapter 8) on the rear suspension trailing arm and release it from the bracket. Unhook the cable from the holder and pull it out of the guide tube.
10. Installation is carried out in reverse order. Finally, adjust the parking brake.