



Removing and installing air recirculation flap control motor -V113-
Heater and air conditioning system with manual control and electric shutters.
Note: Instead of a potentiometer, the control motor is equipped with limit switches.
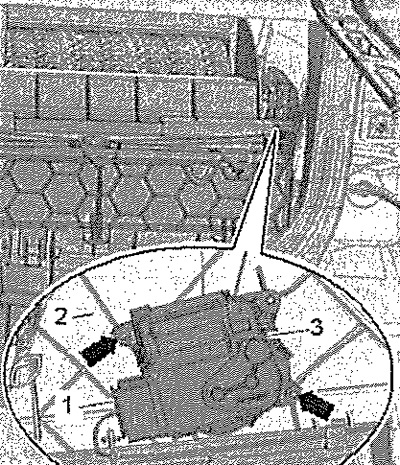
Switch off the ignition and all electrical consumers. Remove the front panel glove box and its frame on the passenger side. Remove screws -arrows- (1 Nm). Disconnect air recirculation flap control motor -V113- pos. -3- from the air intake pipe -2-. Disconnect connector -1-.
Installation
Installation in reverse order.
Note: Before installation, check the operation of the shutters and the hinge.
In order for air to enter the passenger compartment, the fresh air damper must be "open". The drive shaft -2- must rest against the stop -1- -arrow- as shown in the figure.
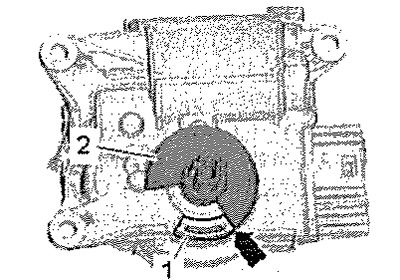
If the drive motor drive shaft is not in the extreme position, connect the connector and select the mode on the control panel in which to use. the motor is in the correct position. Then switch off the ignition again. Install the control motor on the fresh air box so that the drive shaft enters the mounting socket. Lay the wiring harness so that it does not come into contact with moving parts. Connect the Tester, interrogate and clear the event recorder, carry out the basic setting in the "Guided Fault Finding" mode". Check the correct operation of the heater and air conditioner module.
Removing and installing temperature flap control motor -V68- or left temperature flap control motor -V158-
Manually operated heating and air conditioning system with electric flap actuators - temperature flap control motor -V68-. Climatronic - Control motor for left temperature control flap -V158-. The installation work for both motors is the same.
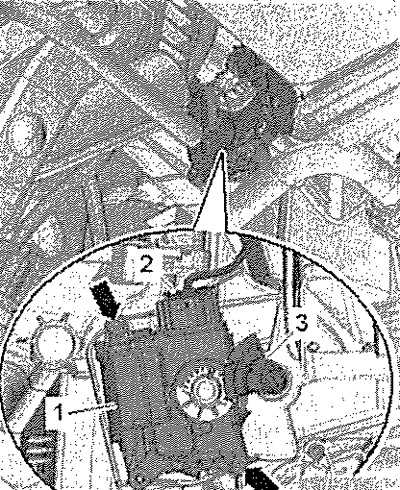
Switch off the ignition and all electrical consumers. Remove the leg airbag. Remove left footwell air duct. Remove screws -arrows- (1 Nm). Disconnect electrical connector -2-. Remove temperature flap control motor -V68- pos. -1 -.
Installation
Installation in reverse order.
Note: Before installation, check the operation of the shutters and the hinge.
Install the control motor -1- on the air distributor housing, while the gear -2- of the engine must engage with the gear -3- of the lever. The long tooth -4- must fit into the recess -arrow- on the operating lever. If the gear of the electric motor and the gear of the temperature control damper are not in the set position, connect the connector and select the mode in the control panel in which the electric motor takes the corresponding position. Then switch off the ignition again.
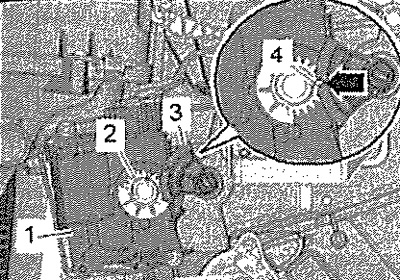
Lay the wiring harness so that it does not come into contact with moving parts. Connect the Tester, interrogate and clear the event recorder, carry out the basic setting in the "Guided Fault Finding" mode". Check the correct operation of the heater and air conditioner module.
Removing and installing right temperature flap control motor -V159-
Climatronic
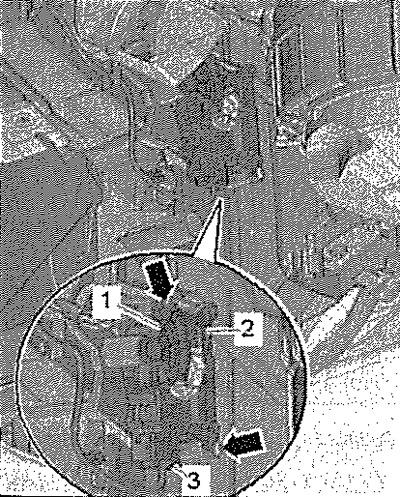
Switch off the ignition and all electrical consumers. Remove screws -2- and remove shield -1-. Remove the front panel glove box and its frame on the passenger side. Remove glove box coolant hose from heater and air conditioner module. Remove the right legroom air duct. Remove screws -arrows- (1 Nm). Remove electric motor -2- and disconnect connector -3-.
Installation
Installation in reverse order.
Note: Before installation, check the operation of the shutters and the hinge.
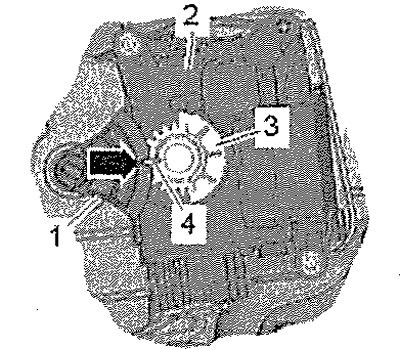
Install the control motor -1- on the air distributor housing, while the gear -3- of the engine must engage with the gear -1- of the lever. The long tooth -4- must fit into the recess -arrow- on the operating lever. If the gear of the electric motor and the gear of the temperature control damper are not in the set position, connect the connector and select the mode in the control panel in which the electric motor takes the corresponding position. Then switch off the ignition again.
Lay the wiring harness so that it does not come into contact with moving parts. Connect the Tester, interrogate and clear the event recorder, carry out the basic setting in the "Guided Fault Finding" mode". Check the correct operation of the heater and air conditioner module.
Removing and installing fresh air/recirculation/air intake damper control motor -V425-
Ciimatronic
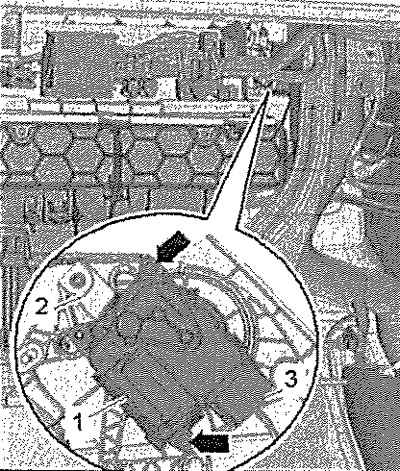
Switch off the ignition and all electrical consumers. Remove the front panel glove box and its frame on the passenger side. Release wiring harness from retainers. Remove screws -arrows- (1 Nm). Disconnect fresh air/recirculation/air intake damper control motor -1- from air intake. Disconnect electrical connector -3-.
Installation
Installation in reverse order.
Note: Before installation, check the operation of the shutters and the hinge. Make sure that the lever and shafts are correctly fixed in the mounting sockets.
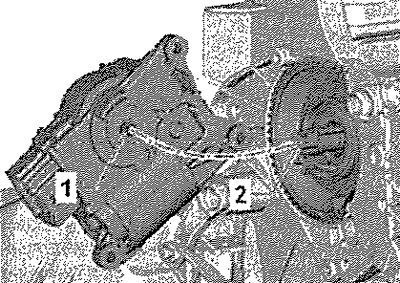
The swivel motor mount -1- can only be fitted to the selector lever -2- in a certain position. If the swivel mounting of the executive motor -1- is not in the end position, connect the connector and select the mode on the control panel in which to use. the motor is in the correct position. Then switch off the ignition again.
Lay the wiring harness so that it does not come into contact with moving parts. Connect the Tester, interrogate and clear the event recorder, carry out the basic setting in the "Guided Fault Finding" mode". Check the correct operation of the heater and air conditioner module.