



Note: For easier access, on some engines the casing and, if necessary, the suction hose must be removed.
Manufacturer Valeo
Disconnect the negative terminal from the battery. Cars with air conditioning - disconnect the refrigerant lines from the expansion valve.
Danger! The coolant temperature of a warm engine can exceed 100°C. The cooling system is under pressure - risk of burns! Before starting repair work, release the pressure and allow the coolant to cool.
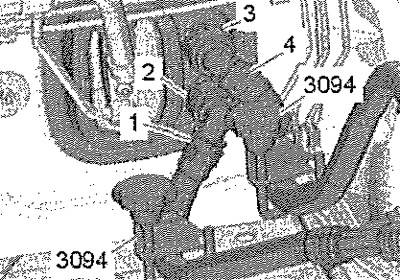
Mark coolant hoses "1" and "4".
Note: The heat exchanger is designed for the refrigerant to flow in a specific direction, so it is important not to mix up the hoses when connecting.
Clamp the cooling system hoses. Push out clamps "2" and "3". Disconnect coolant hoses "1" and "4" from the heater heat exchanger.
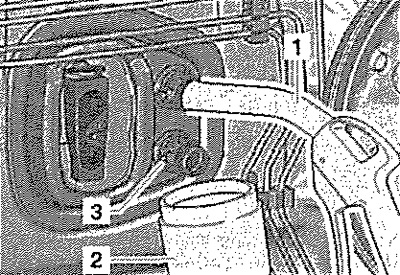
Attach the short hose "1" to the upper nipple. Place the container "2" under the lower nipple "3". Using a blow gun, carefully blow out the remaining coolant from the heat exchanger into the container "2". Close the open holes of the pipes and nipples with clean plugs, for example, from the plug set for the engine "VAS 6122". Remove the left side trim of the center console.
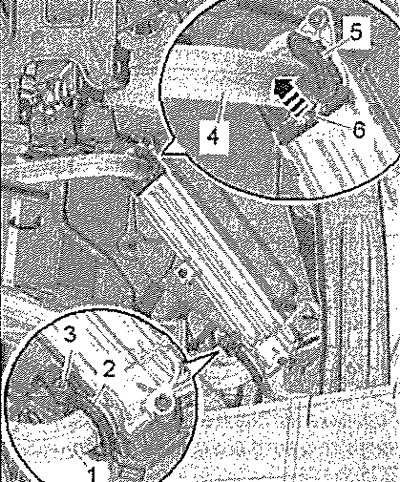
Remove the footwell airbag. Remove the left footwell air duct. If present, remove the auxiliary air heater heating element "Z35". Cover the carpet under the heat exchanger with a liquid-impermeable film covered with liquid-absorbing paper. Lift the retainer "6" "arrow" and disconnect the bracket "5". Disconnect the coolant pipe "4" from the heat exchanger. Loosen the screw "3" and remove the screw clamp "2". Disconnect the coolant pipe "1" from the heat exchanger. Close the open pipes and connectors with clean plugs from the plug kit for the engine "VAS 6122".
Unscrew screws "1", "3" and "5" (2 Nm). Unlock locks "4" "arrows", remove cover "2".
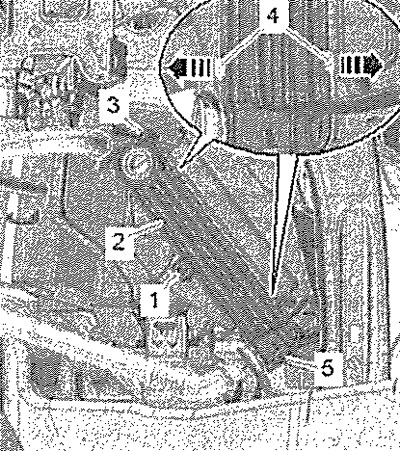
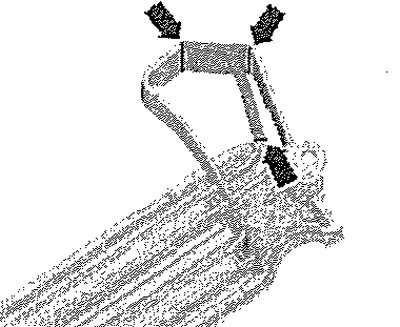
If you cannot remove the cover, cut the tabs on the cover "arrows". Remove the heat exchanger from the socket.
Installation
Installation in reverse order.
Note: Replace the sealing rings.
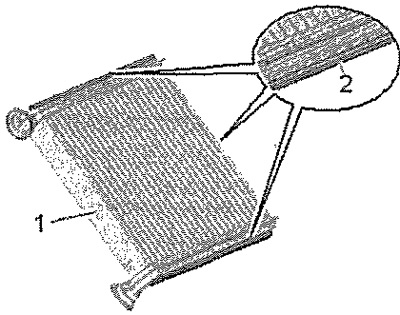
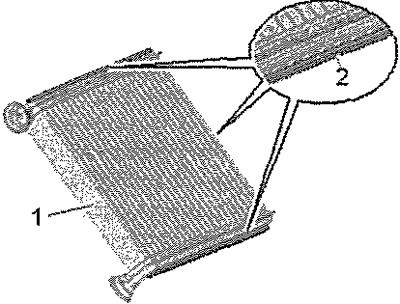
Check the socket with the heat exchanger and heating element "Z35" removed, remove any dirt or coolant residue. Check the foam gaskets "2" located on the heat exchanger "1" for damage, replace if necessary.
Note: If the foam gasket is not glued correctly, it may curl up when inserted. If the gasket is damaged or not installed correctly, cold air may pass by the heat exchanger.
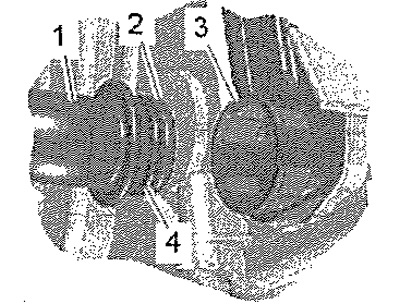
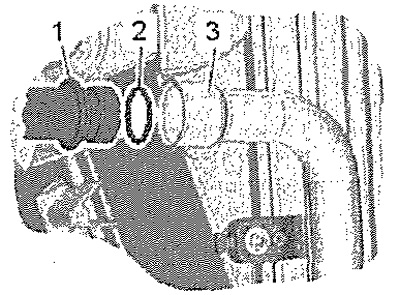
Check fittings "2" and "3" for dirt and damage. Clean and, if necessary, polish the contact surface with the sealing rings.
Lubricate new sealing rings "4" with coolant (or a small amount of silicone grease) and install it on the coolant pipe "1". Carefully install the heat exchanger until it stops in the heater and air conditioning module.
Insert coolant pipes "1" and "4" into the heat exchanger until they stop.
Caution! Heat exchanger leaks. Deformed sealing rings, skewed installation or coolant pipes not fully inserted can cause leaks.
Insert new clamps "5" and install them correctly. Install new screw clamp "2" and tighten screw "3" (6 Nm).
Note: The refrigerant pipes must not come into contact with the air distributor housing or other parts.
Fill with coolant. Finally, check the operation of the heating module and air conditioning system.
Manufacturer Denso
Disconnect the negative terminal from the battery. Cars with air conditioning - disconnect the refrigerant lines from the expansion valve.
Danger! The coolant temperature of a warm engine can exceed 100°C. The cooling system is under pressure - risk of burns! Before starting repair work, release the pressure and allow the coolant to cool.
Mark coolant hoses "1" and "4".
Note: The heat exchanger is designed for the refrigerant to flow in a specific direction, so it is important not to mix up the hoses when connecting.
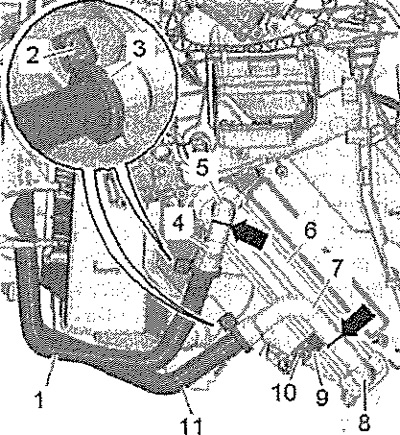
Clamp the coolant hoses. Push out the clamps "2" and "3". Disconnect the coolant hoses "1" and "4" from the heater heat exchanger. Attach the short hose "1" to the upper nipple. Place container "2" under the lower nipple "3". Using a blow gun, carefully blow out the remaining coolant from the heat exchanger into container "2". Close the open holes of the pipes and nipples with clean plugs, for example, from the "VAS 6122" engine plug kit. Remove the left side trim of the center console. Remove the foot airbag. Remove the left footwell air duct. If present, remove the heating element of the additional air heater "Z35". Cover the floor carpet in the area under the heat exchanger with a liquid-impermeable film covered with highly absorbent paper. Unscrew screws "2" and remove screw clamps "3". Disconnect coolant pipes "1" and "11" from pipes "4" and "7-".
Note: If the coolant pipes cannot be disconnected due to the glued sealing rings, disconnect the pipes at the marked places "arrows", for example, using pliers "T40147". Disconnect the separated coolant pipes "4" and "7" from the coolant pipes "1" and "11". If the coolant pipes are separated, then during reinstallation the heat exchanger "6" must be replaced.
Unscrew screw "10" and remove bracket "9". Remove heat exchanger "6" from the socket.
Installation
Installation in reverse order.
Note: Replace the sealing rings.
Check the socket with the heat exchanger and heating element "Z35" removed, remove any dirt or coolant residue. Check the foam gaskets "2" located on the heat exchanger "1" for damage, replace if necessary (the fig shows a heat exchanger manufactured by Valeo).
Note: If the foam gasket is not glued correctly, it may curl up when inserted. If the gasket is damaged or not installed correctly, cold air may pass by the heat exchanger.
Check pipe fittings "1" and heat exchanger "3" for damage or contamination. Clean and, if necessary, polish the sealing ring mating surfaces. Lubricate new sealing rings "1" with coolant (or a small amount of silicone grease) and install it on the coolant pipe. Carefully install the heat exchanger until it stops in the heater and air conditioning module.
Note: When installing the heat exchanger, do not damage the coolant fittings and pipes.
(Material is available on the website: SKODABOOK.RU)
Insert the coolant pipes into the heat exchanger fittings until they stop.
Caution! Heat exchanger leakage. Deformed sealing rings, installed at an angle or not fully inserted into the coolant pipe fittings may cause leaks.
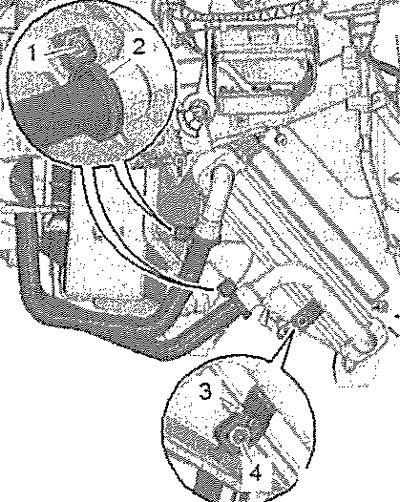
Install the heat exchanger bracket "3" onto the air distributor housing and tighten the screw "4" (2 Nm). Install new screw clamps "2" and tighten the screws "1" (6 Nm).
Note: The refrigerant pipes and screw clamps must not come into contact with the air distributor housing or other parts.
Fill with coolant. Finally, check the operation of the heating module and air conditioning system.