
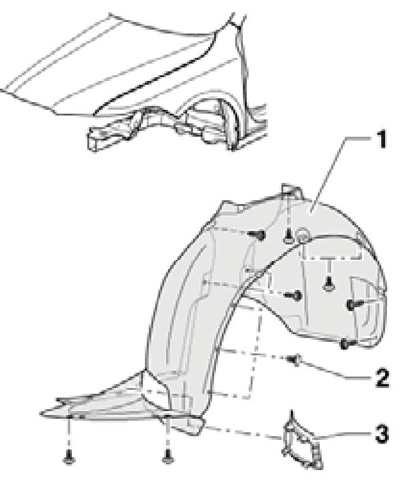
6.1a Screws (2) locker mounts (1) front left wheel arch
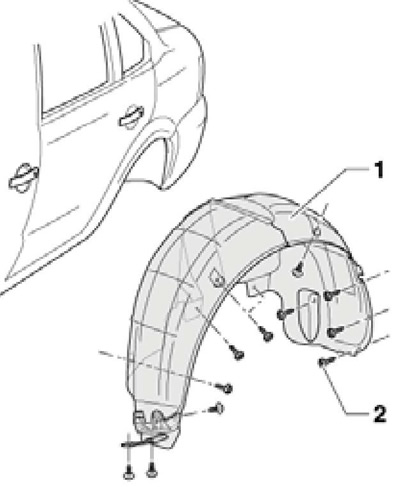
6.1b Screws (2) locker mounts (1) front left wheel arch
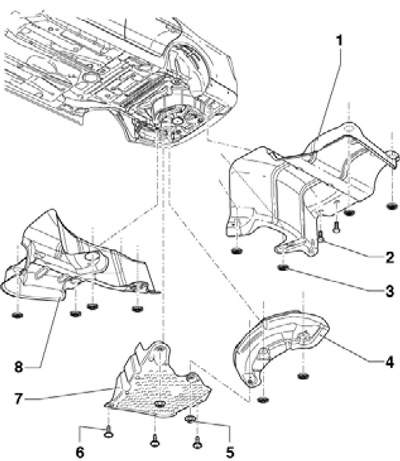
2. Details of the installation of soundproof panels under the engine compartment are shown on Ref. illustrations. To remove soundproofing, unscrew the bolts of its fastening. When installing, tighten the side bolts to 2 Nm and the rear bolts (in the presence of) - with a force of 6 Nm.
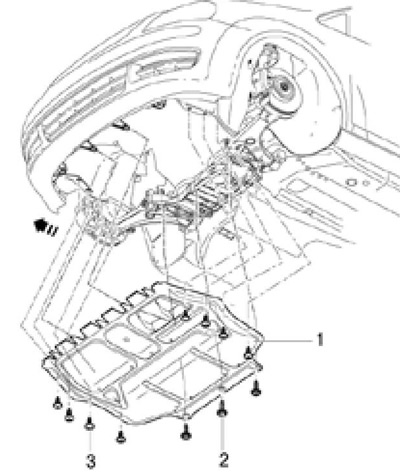
6.2a Bolts (2 and 3) soundproofing fixings (1) under the engine compartment of diesel models
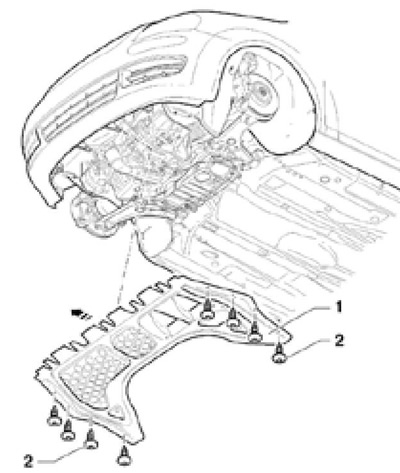
6.2b Bolts (2) soundproofing fixings (1) under the engine compartment of petrol models
3. Details of the installation of casings under the bottom are indicated on the resist. illustrations. When installing a new panel under the bottom (see illustration 6.3b) it should be drilled holes with a diameter of 7 mm for the installation of spacers.

6.3a Plastic nuts (2) casing fastenings (1 and 3) under the bottom, tighten with a force of 2 Nm
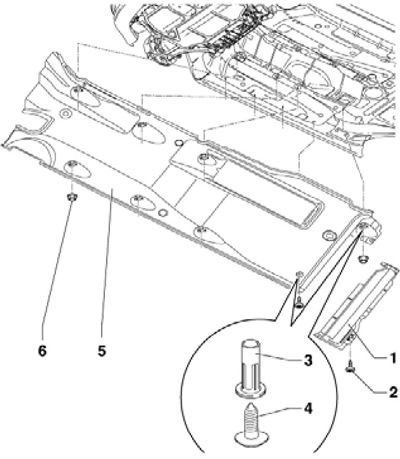
6.3b Installation details of the panel under the bottom of models with a body, starting from #023467
1 back pad
2 Bolt, 1.5 Nm
3 Threaded spacer N103 10204
4 Screw, 4.5 Nm
5 Front panel
6 Plastic nut, 2 Nm
6.3c Installation details of the heat shield under the luggage compartment
1, 4, 8 Thermal shield
2 Rear muffler bolts
3 Lock washers
5 plastic nuts
6 Bolts, 2 Nm
7 Lid
4. For removing windshield fairings (1 and 2 on resist. illustrations) remove the windshield wipers (see chapter 12) and sealant (2) hood.
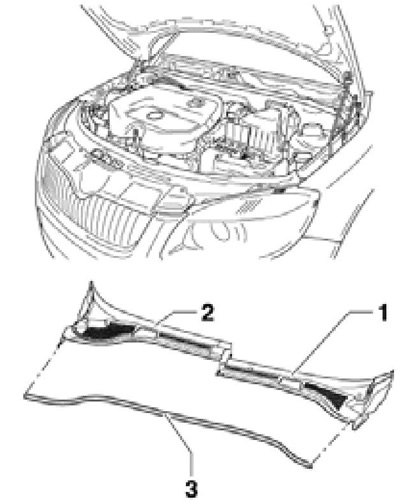
6.4 Fitting details for windshield fairings
5. Rear spoiler (1 per resist. illustrations) Hatchback models attached with adhesive tapes (2) and a strip of glue D172 090A2 (3). The spoiler cannot be removed without damaging it. When installing, keep the same distance on both sides (a = 4.2 mm) from the edge of the spoiler to the edge of the tailgate. Glue sets in about 2 hours (during this time the car should not move), and during the first day after gluing the spoiler, you should not wash the car.
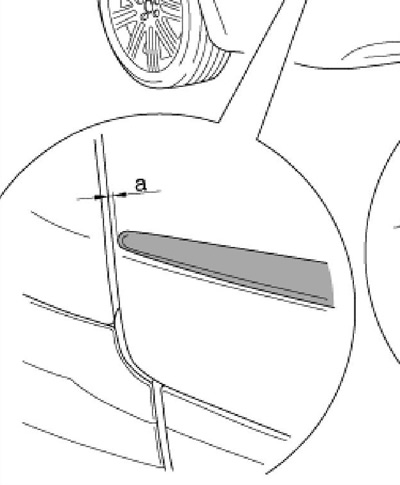
6.5 Spoiler installation details