



Note: The description of the removal of parts installed on the inside of the door is given in Parts B.
1. Details of installation and fastening of the tailgate are shown in the accompanying illustrations.
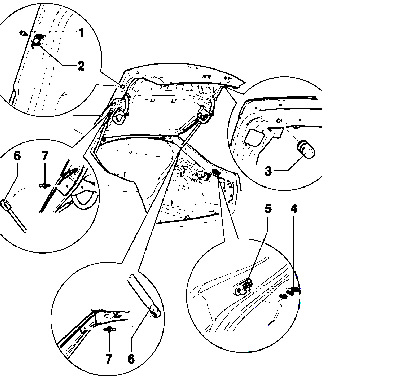
9.1a Tailgate Installation Details
1, 4 Bolt, 8 Nm
2, 5 Buffer-wedge for tailgate
3 Adjustment buffer
6 Gas-filled rack
7 Hinge, 20 Nm
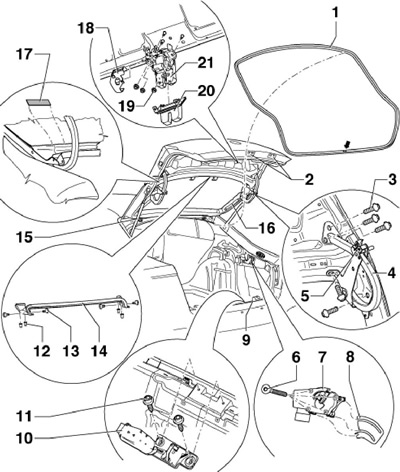
9.1b Tailgate Fastening Details
1 Main tailgate seal
2 Electric tailgate control keys
3 Hinge mounting bolts 4, 10 Nm
4 Tailgate hinge
5 Locking mechanism
6 Electric motor mounting bolt 7.3 Nm
7 Electric motor for tailgate drive
8 Adjusting washer
9 Microswitch for tailgate position
10 Thrust
11 Bolt for fastening the rod 10, 21 Nm
12 Seal retainer 14
13 Seal mounting bolt 14, 1 Nm
14 Tailgate cross seal
15/16 External/internal gas-filled strut
17 Butyl Seal
18 Protective cover
19 Nut, 21 Nm
20 Lock cover
21 Castle
2. To remove the tailgate pillar, open the tailgate and prop it up. Then lift the locking element with a screwdriver (2 on the accompanying illustration) and pull the rack (1) off the hinge (3).
Note: If the stand is to be reused, do not remove the pin from the hinge completely, otherwise it will be damaged.
Installation is carried out in reverse order.
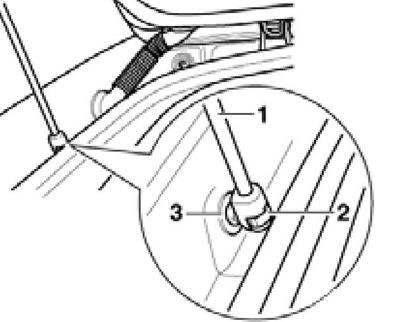
9.2 Removing the tailgate pillar
Removal the tailgate/trunk lid assembly
3. Turn off the ignition.
4. Remove the luggage compartment lid trim panel (see Part B), disconnect the electrical wiring connectors and pull the wiring out of the tailgate.
5. Unhook the cables from the rear shelf and have an assistant hold the tailgate open.
6. Remove the gas-filled struts (see paragraph 2), unscrew the hinge bolts (1 on the accompanying illustration) and remove the tailgate.
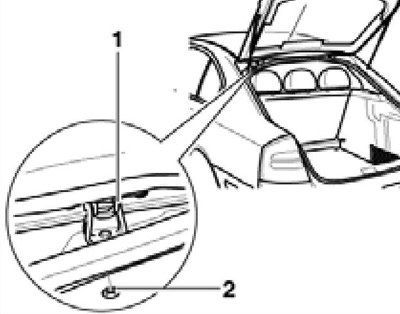
9.6 Fastening the tailgate hinge
Removal the trunk lid (lower part of the tailgate)
8. Remove the luggage compartment lid trim panel and intermediate hinge covers (see Part B).
9. Disconnect the wiring connectors and pull the wiring out of the tailgate after it is removed. The wiring harnesses are routed through the left hinge.
10. Unscrew the intermediate hinge bolts and remove the luggage compartment lid.
Installation
11. Installation is carried out in the reverse order. Maintain the gaps (see Specifications). Tighten the hinge fasteners with a force of 10 Nm. After installation, check the tightness of the tailgate seals: if there is a leak, move the electric motors 1 mm down and repeat the check. If necessary, replace the seals and return the electric motors to their original position.