
Removing
1. Remove the dashboard assembly (more, see relevant section in this chapter).
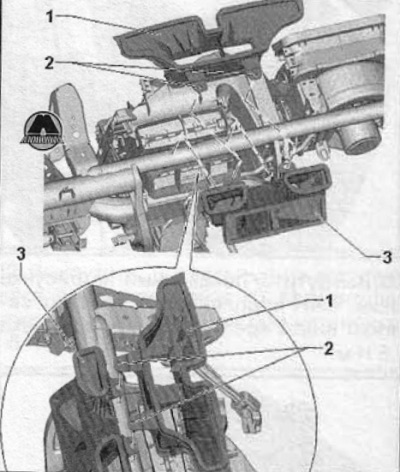
2. Unscrew the fastening screws (3), shown in the figure below. Tightening torque for mounting screws when installing 9 Nm.
3. Loosen the fastening screw (2), shown in the figure below, and then remove the support (1). Tightening torque of the fastening screw when installing 20 Nm.

4. Remove the left lower air duct of the ventilation system (from the driver's side) (for details, see the relevant section in chapter Heating, ventilation and air conditioning system).
5. Remove the steering column assembly from the instrument panel support cross member assembly (for details, see the relevant section in chapter Steering).
6. Remove wiper arms and wiper motor assembly (for details, see the relevant section in chapter Electrical equipment and electrical systems).
7. Remove the body cross member cover/ventilation air intake grille.
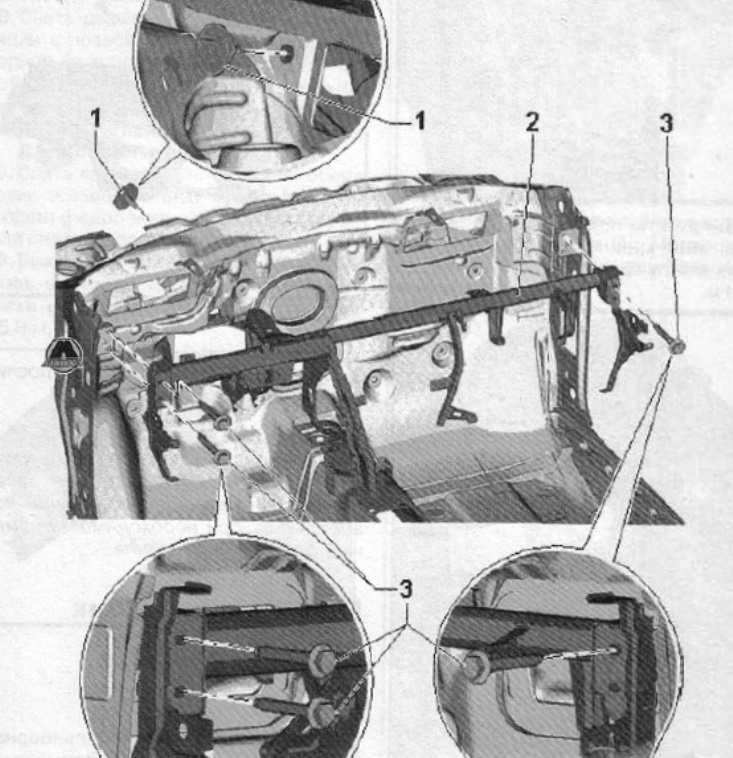
8. Unscrew the fastening screw (1), shown in the figure below, the air intake grilles on the driver's side as shown in the figure below. Tightening torque of the fastening screw when installing 20 Nm.
9. Press out extension pins (2), shown in the figure below.
10. Remove rivets.
11. Remove intermediate housing (3), shown in the figure below.
12. Remove the duct guide (1), shown in the figure below.
13. Unscrew the fastening screws (3), shown in the figure below. Tightening torque when installing the fastening screws: 20 Nm.
14. Unscrew the fastening screw (1), shown in the figure below. Tightening torque when installing the screw: 20 Nm.
15. Disconnect wiring harnesses. Then remove the transverse support of the dashboard from the passenger compartment.
Installation
Installation is carried out in the reverse order of removal.
Note. Before installation, check the technical condition of all fastening elements for damage, if necessary, replace the fastening elements.