



Removal and installation the crankshaft pulley
Note: Crankshaft pulley installation details are shown on illustrations 24.1.
1. Remove the sound insulation under the engine compartment, as well as the right front wheel arch liner (see Chapter 11).
2. On models with an additional heater, loosen the clamp (1 in illustration 15.12), unscrew the bolt (2) and remove the additional heater muffler.
3. Remove the accessory drive belt (see Section 24).
4. Remove the bolts (arrows in the illustration) and remove the air tube by lifting the clamps (1 and 2).
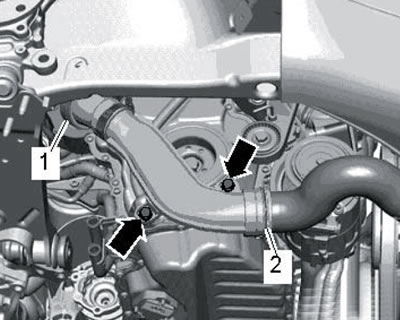
25.4. Air tube fastening
5. Using the T10355 key, turn the crankshaft clockwise to the position corresponding to the TDC of piston No. 1. In this case, the notch on the pulley should be opposite the mark on the lower timing chain cover (see illustration). Holding the pulley in this position with the T10355 key, unscrew the bolt that secures it and remove the pulley. After removing the pulley, do not turn the crankshaft to avoid disturbing the timing adjustment.
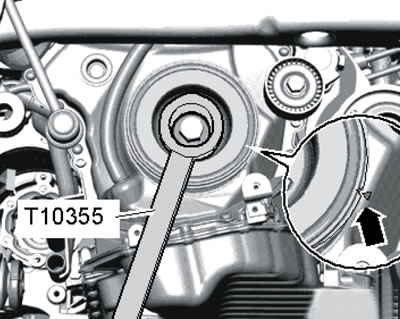
25.5. TDC marks
6. Installation is carried out in reverse order. Remove any remaining oil from the crankshaft journal with a clean cloth and install the pulley, paying attention to the shape of the teeth (arrow on the illustration). Use a new pulley mounting bolt and a new O-ring (1).
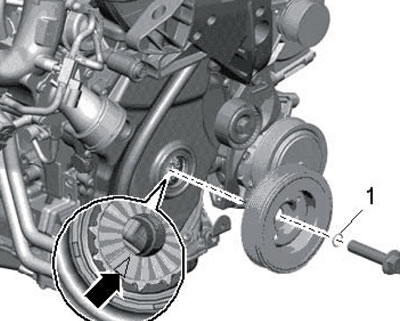
25.6. Installing the pulley
Replacing the front oil seal
Note: The front crankshaft oil seal is installed in the lower timing chain cover (see illustration 27.1).
7. Remove the crankshaft pulley (see subsection above).
8. Screw the pulley mounting bolt back in with the T10368 bushing and pull out the seal using the T20143 puller (see illustration).
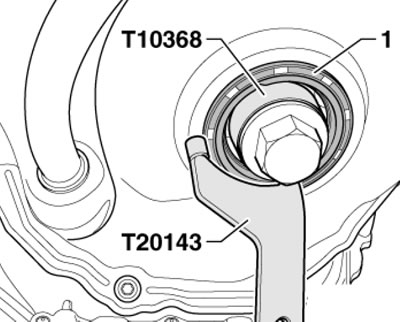
25.8. Removing the front oil seal
9. Clean the seal seating surface in the timing chain cover from oil and grease and press the new seal until it stops using the T10354 mandrel and the pulley mounting bolt (see illustration).
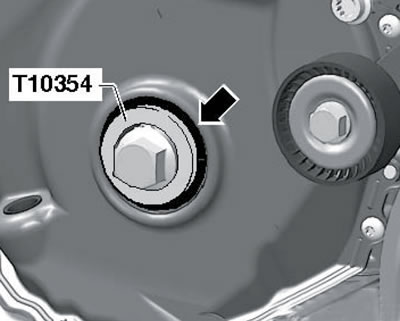
25.9. Installing the front oil seal
10. Install the pulley.