



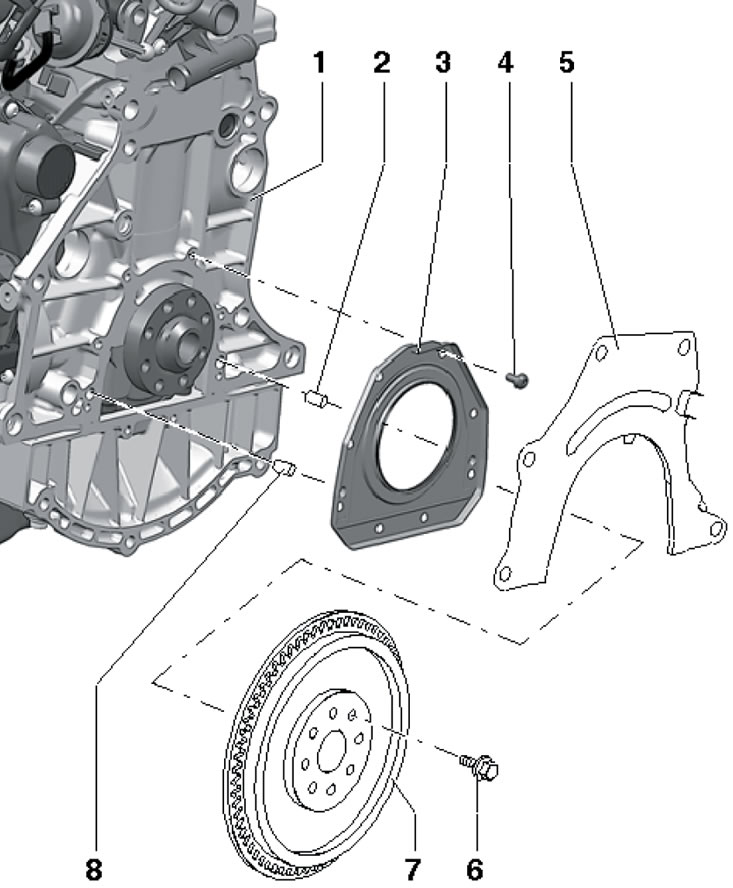
26.1. Rear sealing flange and flywheel installation details 1. Cylinder block; 2, 8. Centering sleeve; 3. Sealing flange, with integrated rear crankshaft oil seal; 4. Bolt, 9 Nm; 5. The intermediate plate must fit onto the centering bushings; 6. Flywheel mounting bolt, subject to replacement, 60 Nm, then tighten to an angle of 90°; 7. 2-mass flywheel
2. Removal and installation of the dual mass flywheel is performed in the same way as on the 1.2 l engine (see Section 8). The following describes the replacement of the sealing flange with the rear crankshaft oil seal.
Note: The rear crankshaft oil seal is integrated into the sealing flange and can only be replaced together with it.
3. Remove the flywheel (see Section 8) and remove the intermediate plate from the sealing flange.
4. Remove the bolts (1-8 in the illustration) and remove the sealing flange.
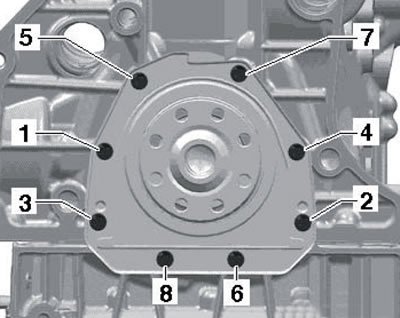
26.4. Sealing flange fastening bolts
5. Remove any remaining sealant from the mating surfaces on the cylinder block and on the top of the oil pan. Clean mating surfaces from oil and grease. It is recommended to use a chemical remover to remove sealant and grease.
6. Apply a bead of silicone sealant D174 003A2 with a diameter of 2-3 mm to the mating surface of the sealing flange (see illustration). The roller should not be thicker, otherwise it may be squeezed out and get into the lubrication system.
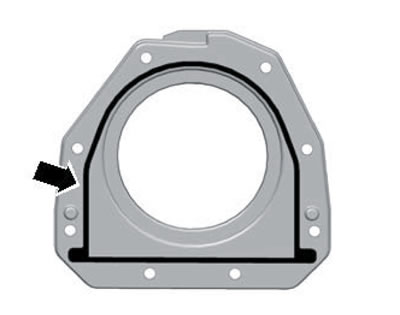
26.6. Sealant application scheme
(Information published on the website: «www.skodabook.ru»)
Note: After applying the sealant, the flange should be installed within 5 minutes. Wait at least 30 minutes for the sealant to dry before adding engine oil.
7. Place the T20097 guide sleeve on the crankshaft (see illustration) and slide the sealing flange through it.
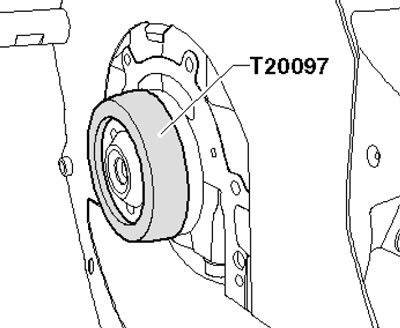
26.7. Guide bush for flange installation
8. Tighten the flange mounting bolts in the sequence (1-8 in illustration 27.15) first by hand, and then with a force of 9 Nm.
9. Install the intermediate plate and flywheel.