
Diesel engine
Crankshaft oil seal

I - stuffing box with a spring; II - stuffing box made of PTFE material; 1 - working edge; 2 - stuffing box
Installation of crankshaft seals
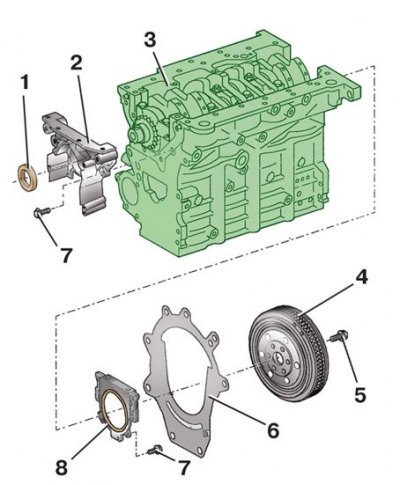
1 - front oil seal; 2 – a forward cover of the block of cylinders; 3 - block of cylinders; 4 - flywheel; 5 – a bolt of fastening of a flywheel; 6 - clutch housing shield; 7 – a bolt of fastening of the holder of a back epiploon; 8 - the holder of the rear oil seal with the oil seal assy
Please note that the engine is equipped with seals without compression springs, with a ribbed working edge 1. The working edges of these seals must not be lubricated before installation, the seat on the shaft must also be dry and clean.
1. Remove the right front fender latch.
2. Remove the camshaft drive belt (see subsection 2.4.1).
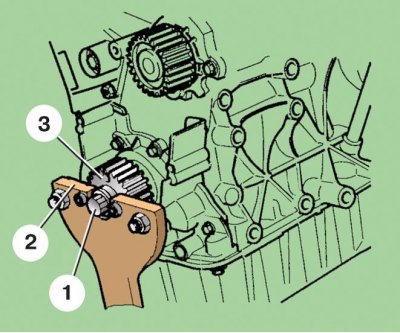
3. Remove the bolt 1 securing the crankshaft pulley, while holding the crankshaft from turning. At service stations, for this, devices T 30004 or MP 1-310 are used (2 - fixture; 3 - crankshaft pulley).
4. Remove pulley 3 of the crankshaft.
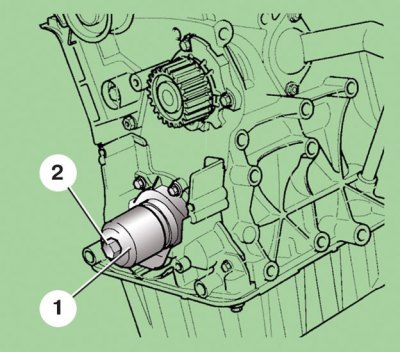
5. Remove the old stuffing box using MP 1-226 O-ring remover.
6. Wipe the crankshaft with a clean cloth.
7. Push the new oil seal onto the crankshaft with the sealing lip inside the cylinder block using a suitable mandrel, eg T 10053/1.
8. Press the stuffing box to the stop using mandrel 1. At service stations, for this purpose, mandrel T 10053 with bolt T 10053/2 is used (1 - mandrel T 10053; 2 - bolt T 10053/2).
If you cannot remove the old oil seal, you can remove the front cover of the cylinder block to replace it. To do this, remove the crankshaft pulley following the instructions in paragraphs 1-4, then carry out the following work:
1. Remove the crankcase (see subsection 3.1).
2. Unscrew the fastening bolts 7 and remove the front cover 2. The cover is installed on D176404 A2 silicone sealant without a gasket;
3. Remove the front oil seal 1 from the cover 2.
4. Thoroughly clean the seat under the oil seal in the cover and mating surfaces of the cover and cylinder block from oil and remnants of the old sealant.
5. Using a suitable mandrel, press the new oil seal into the cover until it stops.
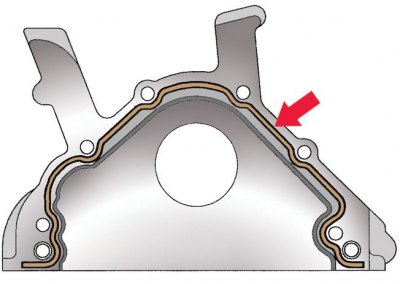
6. Apply silicone sealant to the cover (the place of application of the sealant is shown by the arrow). At the same time, do not apply too thick a layer of sealant, the layer thickness should be 2–3 mm.
7. Put a guide mandrel on the crankshaft so as not to damage the sealing lip, and install the cover in place. Bolts of fastening of a cover tighten in regular intervals crosswise the moment of 15 Нм.
8. Reinstall all removed parts in reverse order. Please note that the sealant dries within 30 minutes, so you can fill the engine crankcase with oil no earlier than 30 minutes after installing the crankcase.
Petrol engines 1.0 l, 37 kW and 1.4 l, 50 kW
1. Remove the right front mudguard.
2. Remove the alternator drive belt (see subsection 2.3).
3. Holding the crankshaft from turning, unscrew the bolt 18 (see fig. Cylinder block for 1.0 l, 37 kW and 1.4 l, 50 kW engines) pulley fasteners.
4. Remove the alternator drive pulley 17.
5. Remove gland 16 from cover 15 using an O-ring remover or prying with a screwdriver. If the oil seal cannot be removed, the timing gear cover 15 can be removed, but in this case the cover gasket 20 must be replaced.
6. Press in the new oil seal until it stops, with the working lip inward.
7. Install all removed parts in reverse order.