



Contents: Condensers with desiccant cartridge…⬇ Condensers with desiccant cartridge…⬇ Condensers with desiccant cartridge…⬇ Reasons to Replace Desiccant…⬇
Note: Repairs may only be carried out by specialist service centres that have the necessary equipment for working on the refrigerant circuit and qualified personnel. If the refrigerant circuit is disconnected, it is not necessary to replace the dehydrator. To prevent moisture from penetrating, seal all unsealed parts in the refrigerant circuit with suitable plugs. When replacing, observe the prescribed amount of oil in the refrigerant circuit. If the circuit is not opened for 10 minutes after evacuating the refrigerant, the pressure in the circuit may rise again due to the evaporation of residual refrigerant. Evacuate the refrigerant and immediately depressurise the circuit.
Condensers with desiccant cartridge - manufactured by Modine
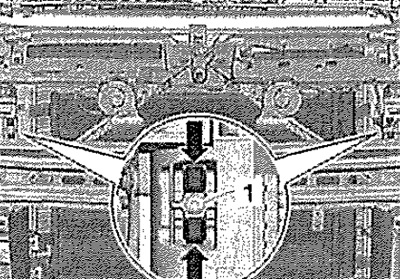
Remove the front bumper. Remove the bracket with the radiator fans. Remove the air duct on the engine compartment bulkhead. Pump out the refrigerant using an air conditioning system servicing stand. Disconnect the refrigerant pipes from the condenser. Press the clamps on the left and right sides of the "arrow" and press to release the radiator with the condenser from the wall mounts.
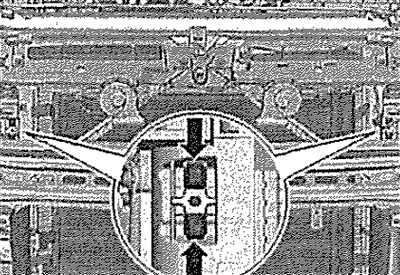
Note: If the "arrow" fasteners crack when compressed, then during reassembly, screw "1" (5 Nm) is used to secure the radiator to the wall.
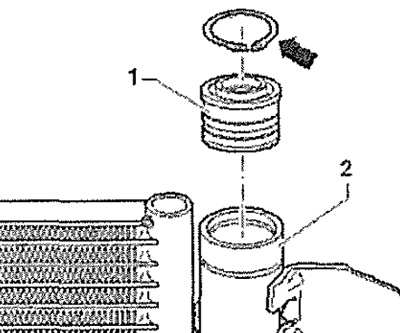
Tilt the radiator "3" with the condenser "2" "arrow" to gain access to the cover "1" of the dehydrator tank.
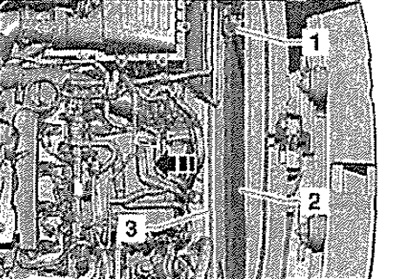
Unscrew cap "1".
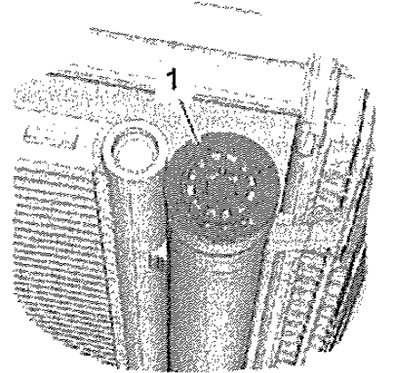
Push cover "1" into the receiver. Remove the thrust ring "arrow", and then remove cover "1" by pulling it out of the tank "2" by the previously screwed in M12 bolt.
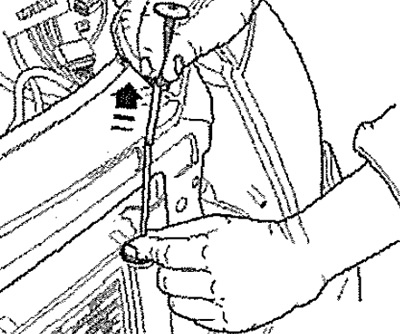
Remove the desiccant from the tank using a normal grip in the direction indicated by the "arrow".
View the original on the website www.SKODABOOK.ru
Bend the welding wire (0.2 mm) as shown in the figure.
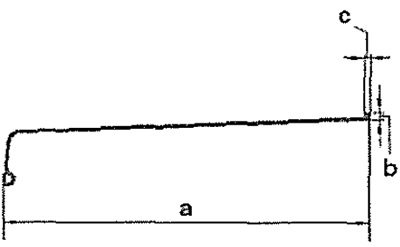
- a = 380 mm
- b = no more than 7 mm
- c - no more than 6 mm
Note: To avoid damaging the capacitor, hook the grid exactly as shown in the figure.
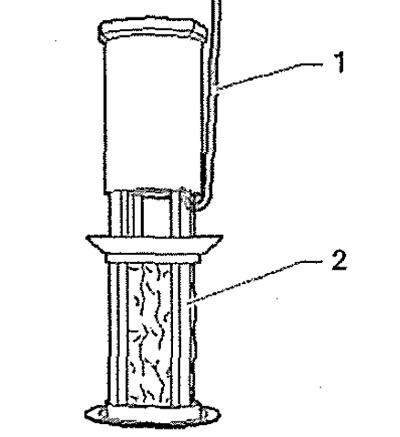
Carefully remove grid "2" from the capacitor using hook "1".
Installation
Installation in reverse order.
Note: Open the sealed package with the desiccant cartridge only immediately before installation in the tank and immediately close the cartridge with cap "1". Check the tank before installation - for dirt, damaged threads, and welded surfaces.
Install a new mesh in the tank, then a new dehydrator. Replace cap "1" with gasket. Before installation, apply a thin layer of oil for the refrigerant circuit to the cap gasket. Make sure that the gasket is seated correctly in cap "1". Install the thrust ring "arrow". Tighten cap "1" (5 Nm). Reinstall the remaining removed parts. Fill the refrigerant using a stand for servicing air conditioning systems.
Condensers with desiccant cartridge - manufactured by Denso
Remove the front bumper. Remove the bracket with the radiator fans. Remove the air duct on the engine compartment bulkhead. Pump out the refrigerant using an air conditioning system servicing stand. Disconnect the refrigerant pipes from the condenser. Press the clamps on the left and right sides of the "arrow" and press to release the radiator with the condenser from the wall mounts.
Note: If the "arrow" fasteners crack when compressed, use a screw to secure the radiator to the wall when reinstalling.
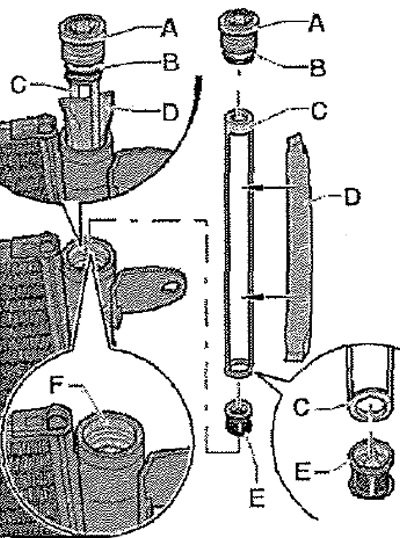
Tilt the radiator "3" with the condenser "2" "arrow" to gain access to the threaded plug "1" of the dehydrator cartridge. Unscrew the threaded plug "A". Move it upwards and remove the dehydrator body "C" with the cartridge "D" from the receiver. Move it upwards and remove the filter element "E" from the receiver, for example, using a grip. Close the receiver with a plug to prevent dirt and moisture from getting into it.
Installation
Installation in reverse order.
Note: Replace the threaded plug, sealing rings and desiccant cartridge every time the receiver is opened. Open the sealed bag with the desiccant cartridge only immediately before installing it in the tank and close the cartridge with the lid immediately. Moisten the sealing rings of the lid with oil for the refrigerant circuit. Check the tank before installation for dirt, thread damage, and jammed surfaces.
Insert filter element "E" into the condenser receiver (pay attention to the correct position). Remove the cartridge from the package, insert it into the body of the dehydrator "C" and immediately lower it into the receiver. Screw in the threaded plug "A".
Condensers with desiccant cartridge - manufactured by Keihin
Remove the front bumper. Remove the bracket with the radiator fans. Remove the air duct on the engine compartment bulkhead. Pump out the refrigerant using an air conditioning system servicing stand. Disconnect the refrigerant pipes from the condenser. Press the clamps on the left and right sides of the "arrow" and press to release the radiator with the condenser from the wall mounts.
Note: If the "arrow" fasteners crack when compressed, then during reassembly, screw "1" (5 Nm) is used to secure the radiator to the wall.
Tilt the radiator "3" with the condenser "2" "arrow" to gain access to the threaded plug "1" of the dehydrator cartridge. Unscrew the threaded plug "1". Using pliers with long jaws, remove the dehydrator cartridge from the tank with an upward movement.
Installation
Installation in reverse order.
Note: Replace the desiccant cartridge and sealing rings every time the receiver is opened. Open the sealed bag with the desiccant cartridge only immediately before installing the tank and close the cartridge with the lid immediately. Moisten the lid sealing rings with refrigerant circuit oil. Check the tank before installation for dirt, thread damage, and mating surfaces.
Remove the cartridge from the package, insert it into the dehumidifier body and immediately lower it into the receiver. Screw in the threaded plug "1".
Reasons to Replace Desiccant Cartridge
Replace the desiccant cartridge if: the refrigerant circuit has been purged or flushed, the air conditioning compressor has seized up, the system has been depressurized for an indefinite period of time (very slow leaks).
It is not necessary to replace the desiccant cartridge: the receiver was not damaged as a result of the accident, and the refrigerant circulation circuit can be repaired in a short time (within the established time limits), and vehicles not older than 5 years, the refrigerant circulation circuit is opened briefly to repair other components, vehicles not older than 5 years.