
Note: Repairs may only be carried out by specialized service centers with the necessary equipment for work on the refrigerant circuit and qualified personnel. To prevent the penetration of moisture, immediately close all depressurized components in the refrigerant circuit with suitable plugs. Mounting bracket for attachments. If the compressor needs to be removed only from the bracket to repair other components, it is not necessary to open the refrigerant circuit. Fasten the compressor with the pipes connected without tension to the body so that the supply hose is not too tight. On vehicles with a start-stop system, observe the conditions for deactivating this system. The need to flush the refrigerant circuit before installing the compressor.
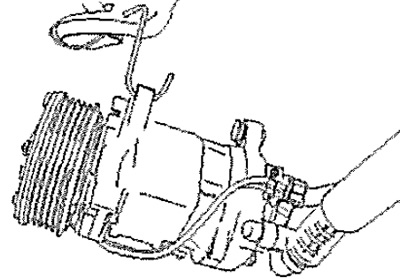
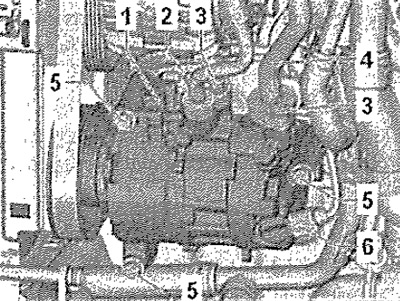
Remove soundproof cover. Remove the radiator fan bracket. Remove poly V-belt. Disconnect connector -6-.
Attention! If the circuit is not opened for 10 minutes after the refrigerant has been pumped out, the pressure in the circuit may rise again as a result of the evaporation of refrigerant residues. Evacuate the refrigerant and depressurize the circuit immediately afterwards.
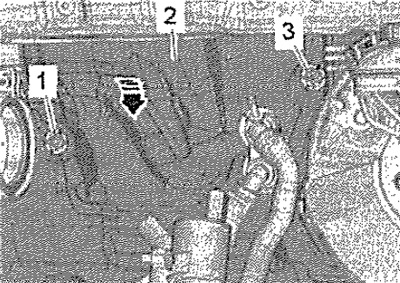
Extract the refrigerant using an air conditioning service stand. Detach refrigerant lines -2- and -4- from air conditioner compressor. Remove screws -5- (25 Nm) and remove compressor -1-.
Installation
Installation in reverse order.
Note: The compressor supplied by the spare parts service contains the required amount of oil. When replacing, observe the prescribed amount of oil in the refrigerant circuit. When installing a new air conditioner compressor, connect the tester, carry out the function "First activation of the air conditioner compressor" in the guided fault finding". Make sure that the centering sleeves -arrows- are correctly seated and that the mating surfaces are clean.
Attach the refrigerant lines to the compressor.
Carefully! Risk of damage to the air conditioner compressor. Do not start the engine if the refrigerant lines are not connected to the compressor and the holes in the compressor are plugged (danger of overheating in the internal lubrication circuit), Refrigerant oil may accumulate in the chamber of the removed compressor, depending on the position in which it is stored. Before installing the V-ribbed belt, rotate the air conditioning compressor pulley 10 times by hand to prevent damage to the compressor.
Charge the refrigerant using an air conditioning service stand. Before starting the engine, pay attention to the instructions for running in the compressor.
Checking the air conditioning compressor safety valve
Function: Protects the refrigerant circuit from too high pressure.
Danger! Beware of frostbite! When the engine is running and the pressure in the circulation circuit is too high, the safety valve will open and release the refrigerant. Stop the engine.
Checking the air conditioning compressor safety valve
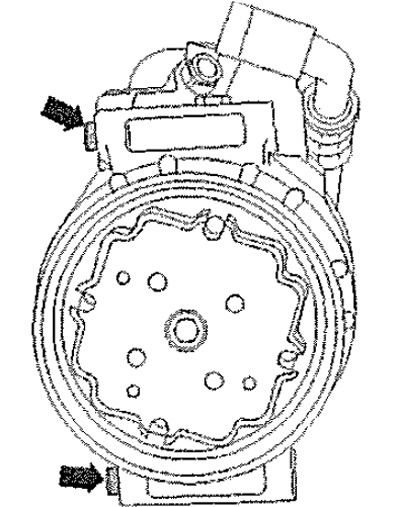
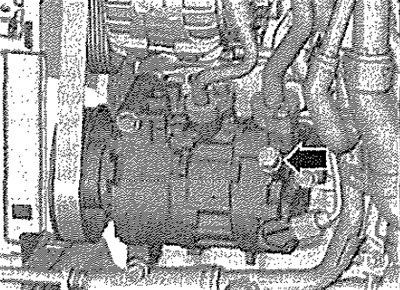
The actuation of the safety valve -arrow- is indicated by the presence of traces of oil from the refrigerant circuit in the area of the valve.
In this case, such a vehicle may be repaired only in specialized service centers that have the necessary equipment for working with the refrigerant circuit and qualified personnel.
Note: The location of the safety valve differs depending on the type of compressor. But the purpose and principle of action are the same.
Reasons for flushing the refrigerant circuit
The circulation circuit should be flushed with R134 refrigerant in the following cases: there is dirt and other contamination in the circulation circuit; when evacuating a sealed circuit, the vacuum gauge shows an increase in pressure (it grows with the evaporation of moisture that has entered the circuit); if there has been a depressurization of the circuit before (e.g. due to an accident); if the pressure and temperature measurements in the refrigerant circuit indicate that there is moisture in the circuit; there is no certainty about the amount of oil in the circuit; if the air conditioner compressor has been replaced due to a fault (e.g. excessive operating noise or failure of). Flushing is carried out after replacing the component in accordance with the repair manual for the respective vehicle.
Removal and installation of the expansion valve
Note: Repairs may only be carried out by specialized service centers with the necessary equipment for work on the refrigerant circuit and qualified personnel. To prevent the ingress of moisture, close all depressurized components in the refrigerant circuit with suitable plugs. Replace O-rings and soak with refrigerant before installation. For ease of access on some engines, the casing must be removed, and, if necessary, the suction hose.
Unscrew plate nuts -1- and -3-. Swing out heat shield -2- as far forward as possible -arrow-. Extract the refrigerant using an air conditioning service stand.
Attention! If the circuit is not opened for 10 minutes after the refrigerant has been pumped out, the pressure in the circuit may rise again as a result of the evaporation of refrigerant residues. Evacuate the refrigerant and depressurize the circuit immediately afterwards.
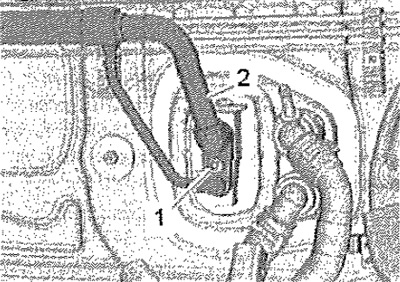
Remove screw -1-. Disconnect refrigerant line -2- with internal heat exchanger from expansion valve.
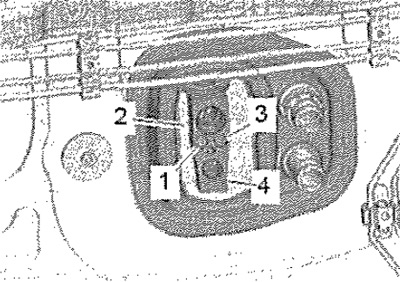
Remove screws -1 - and -3- (10 Nm). Detach expansion valve -4- from thermal insulation -2-.
Installation
Installation in reverse order.
Note: All fittings must be clean and undamaged. Install the O-rings correctly in the grooves of the respective pipeline.
Install new O-rings -1- and -3- on the pipes -4-. Insert flange with tubes -4- into expansion valve -2- and tighten screw -5- by hand.
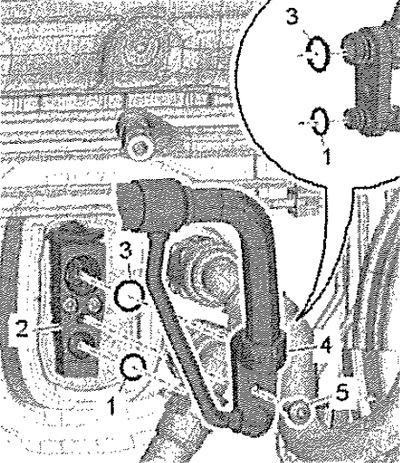
While holding the pipe -2- in the desired position, tighten the screw -1- (8 Nm).
Note: The expansion valve is available in different versions.