



Contents: Removal ⬇ Installation ⬇
Removal
1. Turn off the ignition and all electrical consumers. Then remove the key from the ignition switch.
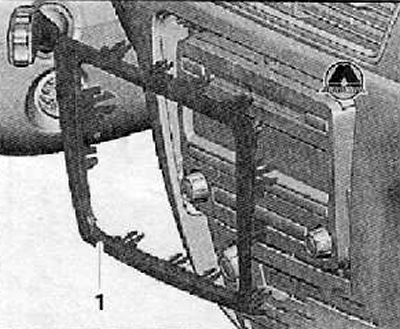
2. Carefully detach the central control panel trim frame (1) from the instrument panel and remove it, as shown in the figure below.
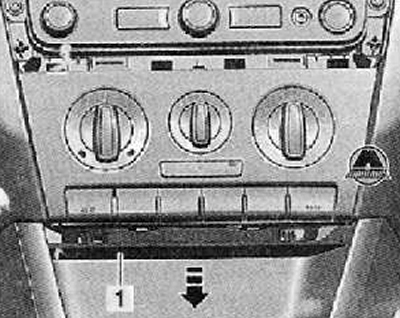
3. Using the special tool (3409), detach and remove the control module trim panel (1) in the direction of the arrow, as shown in the figure below.
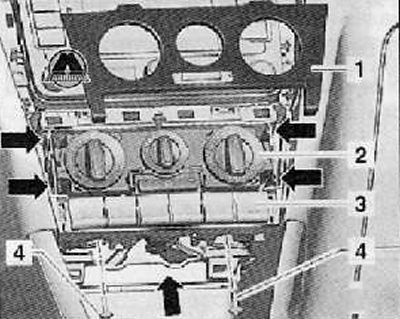
4. Disconnect from the clamps and remove the heating and ventilation control panel trim panel (1), as shown in the figure below.
5. Unscrew the mounting screws (4) shown in the figure below. The tightening torque of the mounting screws during installation is 1.5 Nm.
6. Press from the inside and remove the switch strip (3) shown in the figure below.
7. Carefully detach from the clamps (arrows) and, pulling towards you, remove the heating and ventilation system controller module (2) from the central panel, as shown in the figure below.
8. Disconnect the flexible shafts from the air distribution and air temperature flap controller.
To disconnect the flexible shafts, squeeze the plastic parts on the shafts (3) (arrow A) and pull the sleeve (4) to disconnect them from the controllers (arrow B), as shown in the figure below.
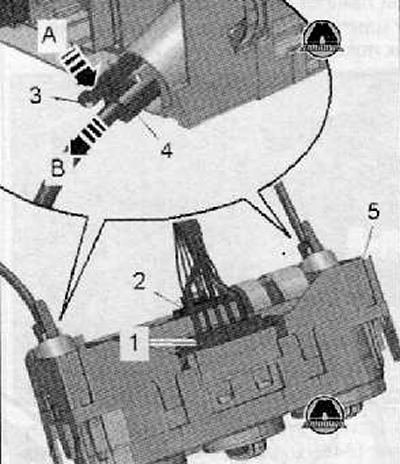
9. Disconnect the wiring harness connectors (1) and (2) as shown in the figure above.
Installation
Installation is carried out in the reverse order of removal.
Note: Flexible shafts can only be installed in one position.