
Removing
Attention.
- The coolant temperature can reach 100°C when the engine is warm! The cooling system is pressurized and there is a risk of serious injury if the work is not carried out carefully.
- Wait until the engine has cooled down before starting work.
1. Disconnect the negative terminal from the battery.
2. Relieve excess pressure from the cooling system by opening the cap of the expansion tank after wrapping it with rags.
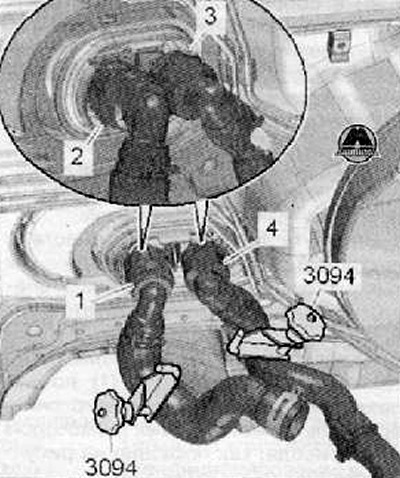
3. Using special clips for cooling system hoses (MP7-602), pinch the cooling system hoses connected to the heating system as shown in the figure below (if it is not possible to pinch the hoses, it is necessary to drain the coolant from the engine cooling system).
4. Loosen the clamps (2) And (3) heating hoses as shown in the figure below (depending on version).
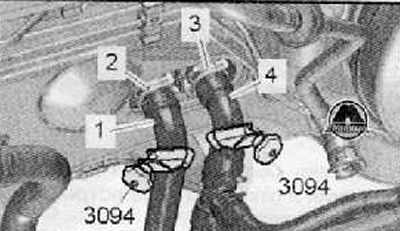
5. Move the clamps (2) And (3) on hose quick couplings as shown in the figure below (depending on version).
6. Place a clean cloth under the connection of the heating hoses to catch any escaping coolant from the heat exchanger.
7. Disconnect the heating hoses (1) And (4), as shown in the pictures above.
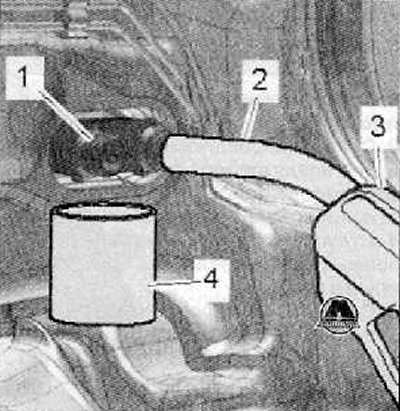
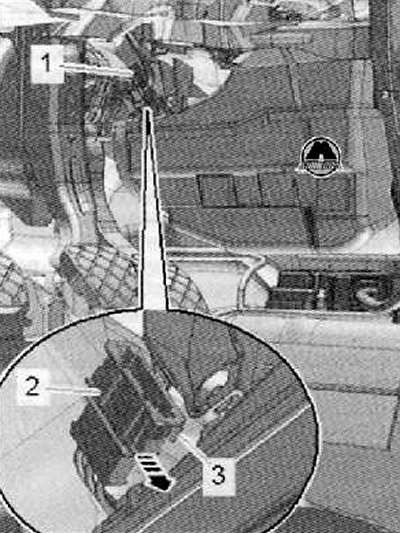
8. Using compressed air, very carefully squeeze out the remaining coolant from the heat exchanger of the heating system, as shown in the figure below. To do this, connect a hose (2) with compressed air (3) to the heat exchanger fitting on the side of the inlet hose, and the liquid collection container (4) put under the return connection (1), as shown in the figure below.
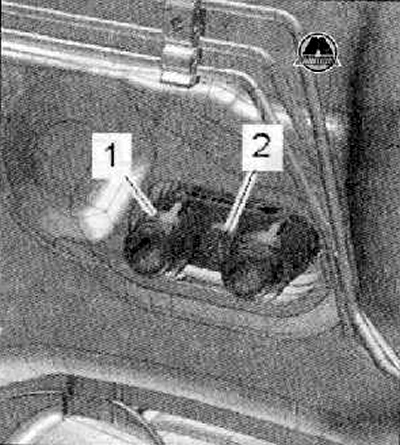
9. Unscrew the fastening screw (2), and remove the combined fitting (1) to connect the cooling system hoses to the heat exchanger as shown in the figure below. Tightening torque of the fastening screw when installing 20 Nm.
10. Remove center floor console (for details, see the relevant section in chapter Body).
Cars with additional heating element (RTS)
11. Remove the retaining clip (3), press on the wiring harness connector (2) in the direction of the arrow, and then disconnect the wiring harness connector as shown in the figure below.
12. Unscrew the fastening nut and disconnect the wire «masses» from the heating element on the bottom of the left heating element support.
Continuation for all cars
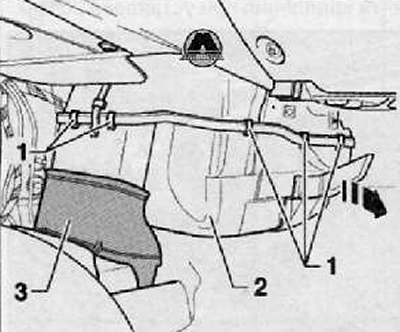
13. Remove the guide duct (3) for air ducts in the footwell area of the rear passengers (more, see relevant section in this chapter).
14. Release the fastening clips (1) right, left and back, as shown in the figure below.
15. Slightly lower the lower part of the heat exchanger housing (2) downwards, then pull towards you to remove from the grips at the front, as shown in the figure below.
16. Gently turn the lower part of the housing together with the heat exchanger (2) to the right side (arrow), as shown in the figure below.
17. Remove the heat exchanger from the housing.
Installation
Installation is carried out in the reverse order of removal. Pay attention to the following points:
Before installing the rubber seal of the front transverse wall, it is necessary to lubricate the edges of the seal with a neutral soapy solution.
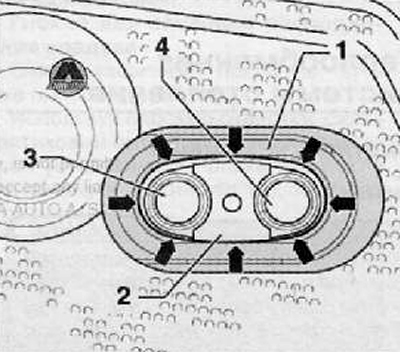
Gently press on the seal (1) front wall from the outside to fix it in the support slot (2) heat exchanger housing (arrows), as shown in the figure below.
Replace all O-rings on heater heat exchanger connections.
Connect the cooling system hoses to the heat exchanger fittings properly: outlet (3), inlet (4), as shown in the figure below.
Note. If the heat exchanger has been replaced with a new one, all coolant must be drained and the cooling system filled with fresh coolant.
After assembly, check the cooling system, all its connections, for leaks, if necessary, add coolant to the required level and perform operations to remove air from the cooling system.
Be extremely careful when connecting the negative terminal to the battery.