



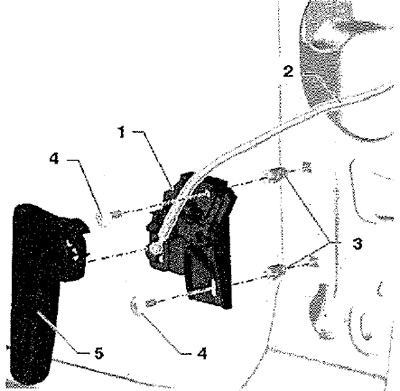
1. Support
2. Cable. Removal: Remove cable "2" from support bracket "1". Turn the cable so that its spherical end can be removed from the support bracket lever. Remove the spherical end from the support bracket lever. Installation is in the reverse order.
3. Spacer insert
4. Screw: Tightening torque: 2 Nm
5. Handle
Removal and installation
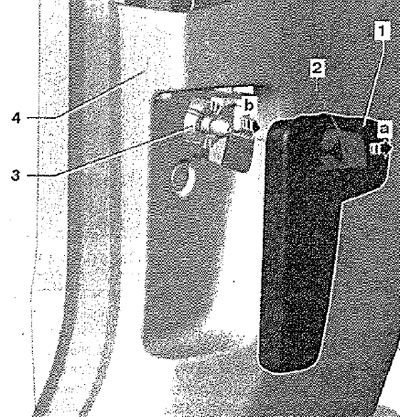
Pull the handle "1" and unlock the hood. Insert a small screwdriver into the gap between the drive lever "1" and the clamp "2". Remove the locking clip "2" from the handle (pos. 1) "arrow". Remove the handle from the support bracket "3". For further work with the support bracket "3", remove the lower part of the A-pillar trim "4".
Installation
The lower part of the A-pillar trim "4" is installed. Insert the locking bracket "2" into the handle. Place the handle "1" on the support bracket "3".