
Note: Depending on the model variants, slight differences must be taken into account when removing and installing the bonnet latch. The drive cable -3- cannot be removed from the bonnet latch.
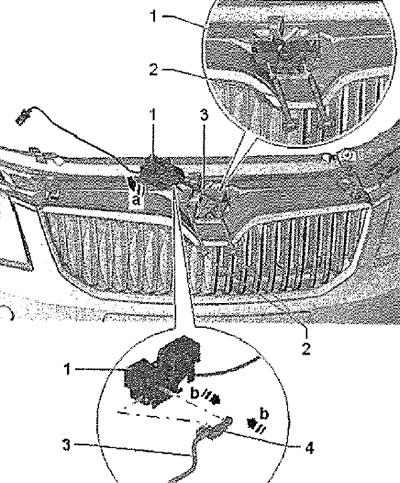
Open the hood. Disconnect drive cable -3- at cable connector. If equipped, disconnect the hood contact switch connector. Remove screws -2- (12 Nm) and remove the bonnet latch -1- in the -arrow a- from the front support panel. Disconnect end -4- of cable -3- from bonnet latch -1- -arrow a-.
Installation
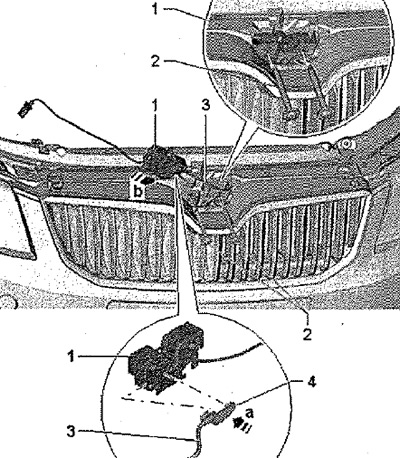
Fasten the end -4- of the cable -3- in the hood latch (if disconnected) -arrow a-. Insert the bonnet lock -1 - into the front carrier panel - see arrow b-. Depending on the optional equipment, connect the bonnet contact switch connector. Tightening torque for screws -2- (12 Nm). Insert drive cable -3- into cable connector. Adjust lock. Before closing the hood, check the operation of the release handle and cable.
Cable separation
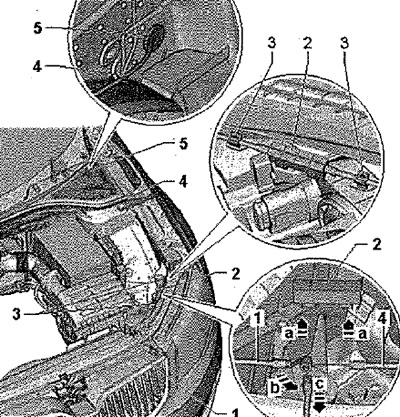
Open the hood. Unclip cable connector -2- above headlight on driver's side from dash panel carrier -arrow a-. Remove drive cables -1- and -4- from cable connector -2- in -arrow a-. Pull cable -1 - 90°aside in direction of -arrow b- and pull out of bracket in direction of arrow -c-.
Installation
Installation in reverse order.
Note: When installing the cable -4-, the sleeve -5- must be correctly fastened. When attaching cable -4-, do not forget clamps -3-.
Before closing the hood, check the operation of the release handle and cable.
Removal and installation of the lock bracket
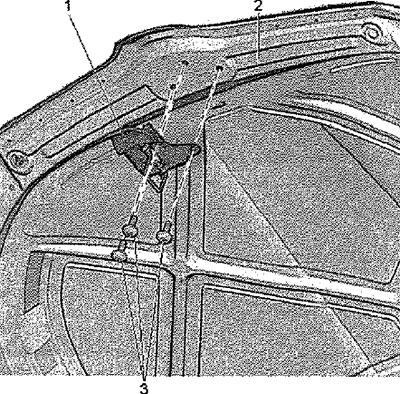
Release screws -3-. Remove the lock bracket -1- from the hood -2-
Installation
Tightening torque for screws -3- (9 Nm). Adjust the position of the bracket relative to the lock.