
Note: The radiators for the coolant and charge air circuits are removed together.
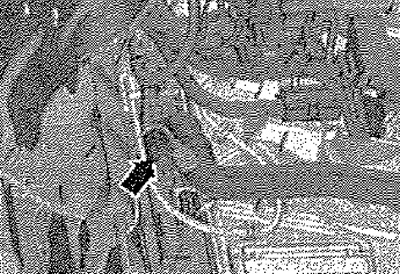
Drain coolant. Remove the front bumper. Unscrew bolts -1, 3-. Release catch -arrow- and remove cover -2-.
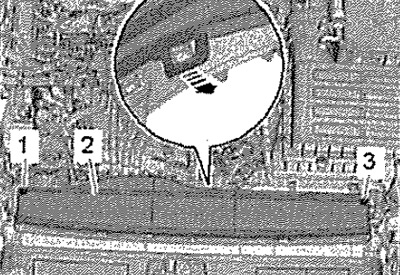
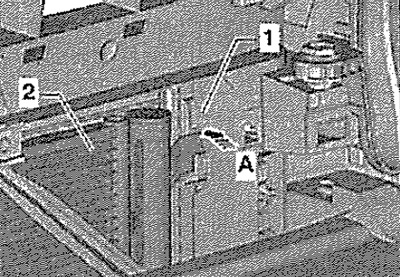
Release coolant hose -2-. Unlock retainers -arrows- and remove top section of air duct -1-.
Unscrew left and right screws -arrow-. Unhook and remove bottom part -1- of air duct. Remove fan frame.
Vehicles with cooling radiator versions 1 and 2
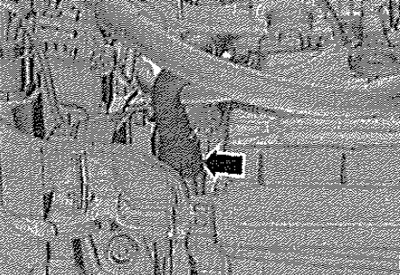
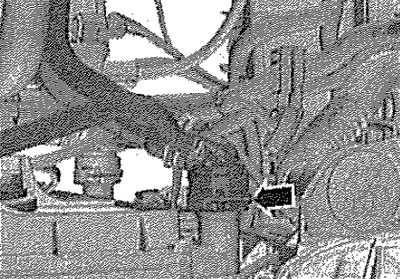
Raise retaining clip -arrow-, disconnect upper right coolant hose from charge air cooler.
Vehicles with radiator version 3
Raise retaining clip -arrow-, disconnect lower left coolant hose from radiator.
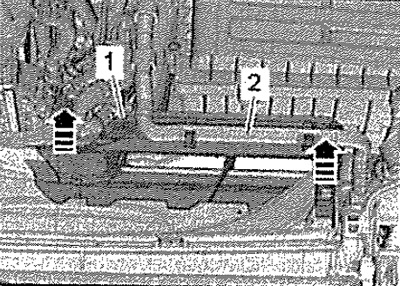
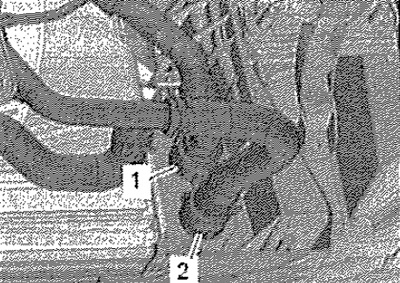
Raise retaining clips -1, 2-, disconnect lower left coolant hose from radiator.
All
Raise retaining clip -arrow- and disconnect upper left coolant hose from radiator.
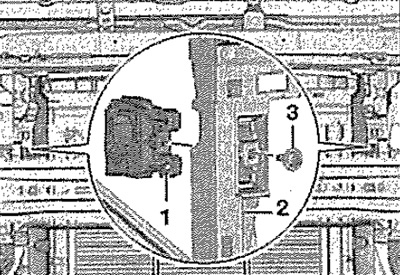
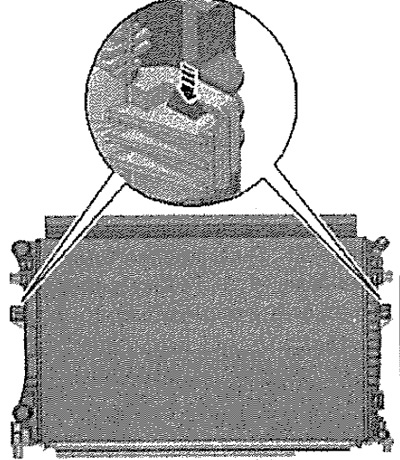
Press latches -arrows- left and right, press upper part of radiator slightly back.

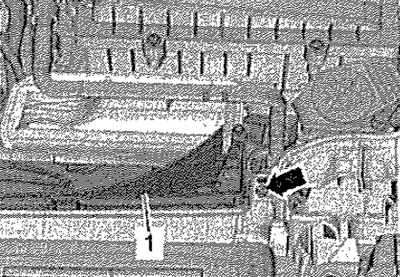
Note: Radiator support -1- does not need to be replaced if the mounting is broken. Replace fastening with special screw -3-.
Release catches on right and left -arrow A- and remove condenser -2-. Press the radiator down until the lower support is compressed and hang out the condenser -2-. Tie the capacitor to the front carrier panel.
Vehicles with cooling radiator versions 1 and 2
Press the locks on the radiator -arrow- at the same time on the left and right and remove the coolant and charge air coolers.
Vehicles with radiator version 3
Unlock locks for charge air cooler -1- -arrow A- Remove charge air cooler from coolant radiator -2- -arrow B- and hang it up -arrow C-. Remove both radiators.

Installation
Installation in reverse order.
Note: Replace sealing rings after removal.
Install the front bumper. Install the fan frame. Connect the coolant hose with quick coupling. Fill up the coolant.
Note: After replacing the radiator, the entire coolant must be replaced.