
Company vehicles Hyundai Company vehicles Kia Company vehicles Lada Company vehicles Mazda Company vehicles Mercedes-Benz Company vehicles Opel Company vehicles Mitsubishi
English Русский
Български
Беларускі
Український
Српски
Hrvatski
Română
Polski
Slovenský
Magyar
Articles   
Bookmark Contacts Sitemap
SkodaBook.ru


Fabia Rapid Octavia Superb Kodiaq Yeti Others
Octavia 1 (1996-2004) Octavia 3 (2013-2019)

Removal and installation the engine control unit «J623» (Skoda Octavia 5E)

  • Main
  • Octavia
  • 5E (2013-2019)
  • Petrol engines 1.2 l
  • Supply system
  • Removal and installation the engine control unit «J623»
0
Contents: Control unit without protective…⬇ Control unit with protective housing ⬇ Heating shear bolts with an…⬇

Control unit without protective housing


Note: If the engine control unit is being replaced, connect the tester to the vehicle and perform the "Replace control unit" function. If the engine control unit comes into contact with the positive terminal of the battery, the control unit will fail.


Unlock the fastening in the "direction of the arrow" and remove the control unit "1". Unlock and disconnect the connectors of the engine control unit "J623".
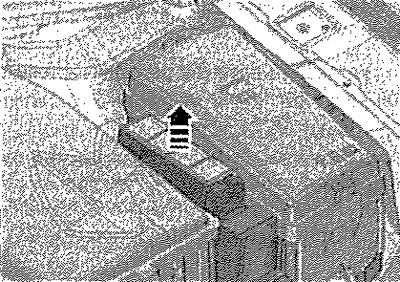
Unlock the fastening in the «direction of the…


Installation


Installation in reverse order. After installing the engine control unit, the following work must be performed. Connect the tester. Activate the control unit in the "SWM" and "Guided functions" mode, the "Control unit replacement" function.

Control unit with protective housing


Note: If the engine control unit is being replaced, connect the tester to the vehicle and perform the "Control unit replacement" function.


Unscrew the shear bolts of the "arrow" to remove the protective housing "1" as follows.
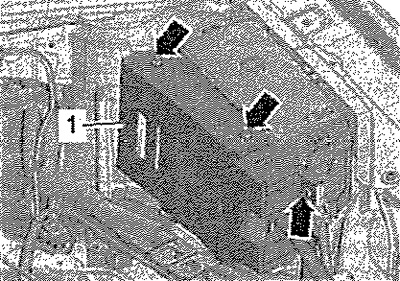
Unscrew the shear bolts of the «arrow» to remove…


Cut a slot for a screwdriver in the head of the shear bolt -1 using a mini drill "2".


Note: The threads of the shear bolts are coated with thread locking compound. Heating the shear bolt while grinding the slot for the screwdriver makes it easier to unscrew. If the shear bolts do not unscrew, heat them with an industrial hair dryer.
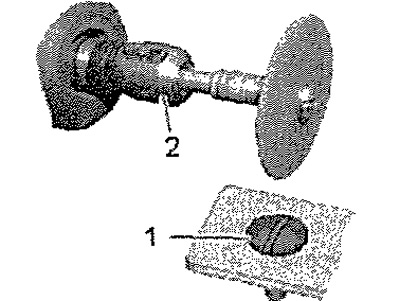

Note: The threads of the shear bolts are coated…


Heating shear bolts with an industrial hair dryer


Set the temperature setting potentiometer "2" to maximum heat output and the air quantity two-position switch "3" to position 3.
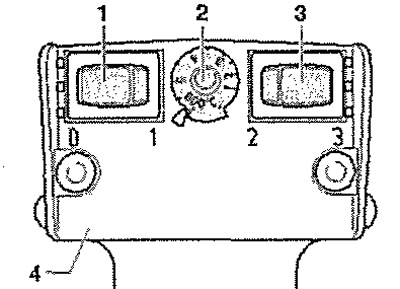
Set the temperature setting potentiometer «2» to…


Heat the head of the shear bolt -1 for approximately 20-30 seconds.
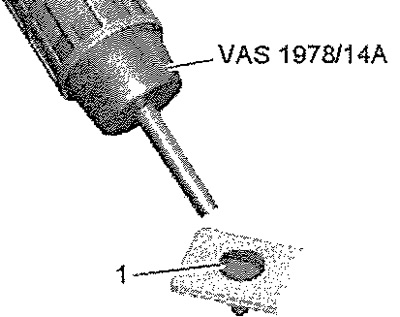
Heat the head of the shear bolt -1 for…


Next, if the bolts are loose: Unscrew the shear bolt "1" with screwdriver "2".
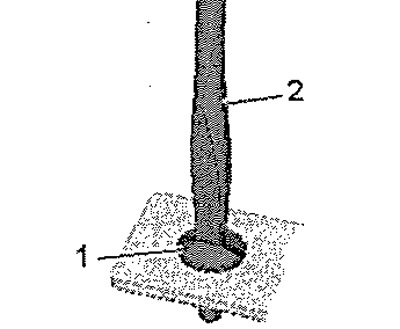


Next, if the bolts are loose: Unscrew the shear…


Remove the protective casing "1".

Attention! If the engine control unit comes into contact with the positive terminal of the battery, the control unit will fail.


Unlock the fastening in the "direction of the arrow" and remove the control unit "1". Unlock and disconnect the connectors of the engine control unit "J623".
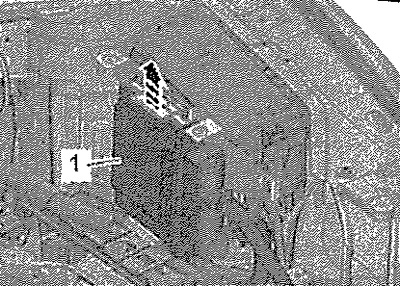
Unlock the fastening in the «direction of the…


Installation


Installation in reverse order. Always close the engine control unit "J623" with the protective cover again. Clean the threaded holes for the new shear bolts from any remaining thread locking agent. You can clean the threads with a tap. Use new shear bolts during installation. After installing the engine control unit, the following work must be performed. Connect the tester. Activate the control unit in "SWM" and "Guided functions" mode, "Replace control unit" function.
This article is available at russian, bulgarian, belarusian, ukrainian, serbian, croatian, romanian, polish, slovak, hungarian
Article verified: Anatoly Ovchinnikov
Share with friends:
◀ Previous
Skoda Octavia 3: Supply system
Next ►

Removal and installation the lambda probe «G39» / «G130»
Lambda probe parts and components
Removal and installation of high pressure line
Removal and installation the high pressure fuel pump
Parts and units of high pressure pump
Neutralizer parts and components with attachments
Parts and units of the middle and rear mufflers
Removal and installation the neutralizer with the inlet pipe
Removal and installation middle or rear mufflers
Parts and components of the ignition system
Read similar articles on other Skoda models

➧ Diesel engine fuel injection system control unit, fuel temperature… Skoda Fabia 1 (1999-2007)
➧ Electronic engine control unit, fuel injectors Skoda Rapid 1 (2012-2022)
➧ Removal and installation of the air conditioning fan and its… Skoda Superb 2 (2008-2015)
➧ Electronic engine control unit, Engine temperature regulator actuator Skoda Kodiaq 1 (2016-2024)
➧ Engine control unit Skoda Yeti (2009-2017)
➧ Checking engine emission control systems Skoda Felicia (1994-2001)
Link to this article in various formats
Reviews and comments of visitors
No comments yet


Add two numbers: 10 + 46


Octavia 3 (2013-2019) 
  • General information
  • User manual
  • Car driving
  • Maintenance
  • Petrol engines 1.2 l
  • Engine repair
  • Cooling system
  • Supply system
  • Petrol engines 1.4 l
  • Engine repair
  • Supply system
  • Petrol engines 1.8/2.0 l
  • Engine repair
  • Cooling system
  • Supply system
  • Diesel engines 1.6/2.0 l
  • Engine repair
  • Cooling system
  • Supply system
  • Transmission
  • Mechanical gearbox 02S
  • Automatic gearbox 0CW
  • Automatic gearbox 0D9
  • Chassis (running gear)
  • Front suspension
  • Rear suspension
  • Brake system
  • Steering
  • Body and interior
  • Doors, locks and windows
  • Exterior (external elements)
  • Interior (internal elements)
  • Ventilation and air conditioning
  • Electrical equipment
  • Equipment and devices
  • Headlights and lighting
  • Wiring diagrams (basic)
  • Wiring diagrams (comfort)
Octavia 1 (1996-2004) 
  • General information
  • Vehicle details
  • Maintenance
  • Power unit
  • Petrol engines 1.6 l AEE
  • Petrol engines 1.8 l AGN
  • Diesel engines 1.9 l AGR
  • Fuel system
  • Exhaust system
  • Cooling system
  • Transmission
  • Clutch
  • Car gearbox
  • Gearbox repair 02J
  • Gearbox repair 02K
  • Chassis (running gear)
  • Wheels and tires
  • Suspension and axles
  • Brake system
  • Body and interior
  • Exterior (external elements)
  • Interior (internal elements)
  • Doors, locks and windows
  • Electrical equipment
  • Equipment and devices
  • Electrical circuits
SkodaBook.ru © 2018–2026 | Mobile version | Articles on Skoda | Sitemap EN BG BY UA RS HR RO PL SK HU | Feedback | Site search | Bookmark
Fabia 1 (1999-2007) | Fabia 2 (2007-2014) | Rapid 1 (2012-2022) | Octavia 1 (1996-2004) | Octavia 3 (2013-2019) | Superb 2 (2008-2015) | Kodiaq 1 (2016-2024) | Yeti (2009-2017) | Favorit (1987-1994) | Felicia (1994-2001) |
By continuing to use the site, you agree to the use of cookies.