
Removing
1. Remove the soundproofing cover on the assembly.
2. Remove the fender liner of the right front wheel arch (for details, see the relevant section in chapter Body)
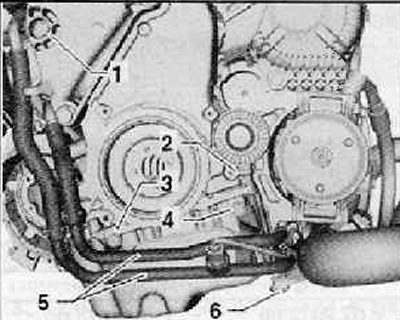
3. Unscrew the fastening bolts (3, 4, 6), shown in the figure below.
4. Carefully move the pipes of the engine cooling system to the side (5) so that access to the mounting bolt is opened (2) accessory drive ribbed belt guide pulley as shown in the figure below.
Attention.
- If the removed auxiliary drive belt is planned to be reinstalled, then before dismantling it, it is necessary to put an arrow on its surface indicating the direction of rotation of the belt.
- If you install the belt in the opposite direction, it may fail prematurely.
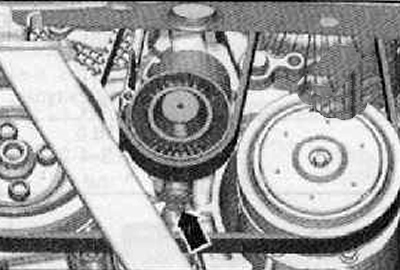
5. Loosen the idler pulley/attachment belt mounting bolt (arrow), until the belt tension is released as shown in the figure below.
6. Remove the implement drive belt.

Installation
1. Installation is made in reverse order to removal.
Note. Before installing the accessory drive belt, make sure that all attachments are properly installed.
The figure below shows the sequence for installing the attachment drive belt on the pulleys.
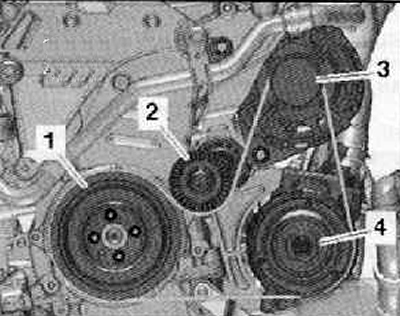
1. Crankshaft pulley
2. Guide / intermediate pulley
3. Alternator pulley
4. Air conditioning compressor pulley
2. Apply special lubricant to the intermediate pulley guide.
3. Install the rail onto the mounting bracket.
4. Install and tighten the attachment drive belt idler pulley bolt.
5. Lower the fastening bolt (arrow) a quarter of a turn, then tighten with a tightening torque of 30 Nm + 90°.
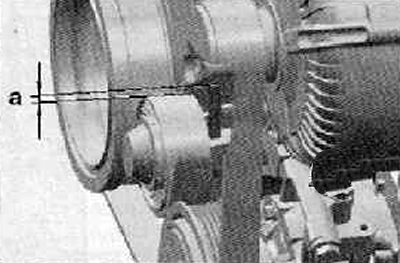
6. Measure the distance from the end of the mounting bolt to the rail as shown in the figure below. Distance a should be approximately 2.5 mm.
7. Check and verify that the implement drive belt is properly installed.
8. Start the engine and check the attachment drive belt.