Contents: Trunk lighting ⬇ Fasteners for Octavia ⬇ Luggage nets ⬇ Fastening of longitudinal pocket ⬇ Double Hook Folding ⬇ Folding hooks (Combi) ⬇ Securing the flooring: Odavia/Combi ⬇ Double-sided floor covering ⬇ Luggage net ⬇ Removal and installation the luggage…⬇ Unrolling the trunk curtain/rolling…⬇ Removal the side covers/correct…⬇ Positioning the removed luggage…⬇ Placing the roof rack removed from…⬇ Placing the removed luggage…⬇ Storage compartment in the luggage…⬇ Increasing trunk volume ⬇ Securing luggage items ⬇ Storage compartments under the…⬇ Multifunctional pocket (Combi) ⬇ Positions of the transformable boot…⬇ Transformable boot floor folded:…⬇ Dividing the trunk with a…⬇
Trunk lighting
The light turns on and off when the trunk lid is opened or closed. If the trunk lid is open and the ignition is off, the lamp goes out automatically after about 10 minutes.
Vehicle category N1
In category N1 vehicles not equipped with a protective grille, the load must be secured using loops and eyes that comply with EN12195 (1-4). For reliable operation of the vehicle, the electrical wiring must be in good working order. Therefore, care must be taken to ensure that it is not damaged when unfolding the luggage compartment or when loading and unloading.
Fasteners for Octavia
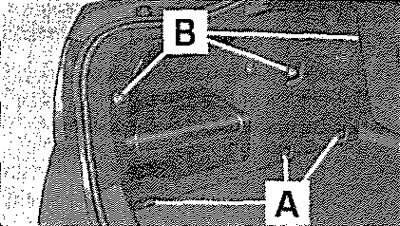
Fastening elements for Combi: complete set without transformable floor/complete set with transformable floor
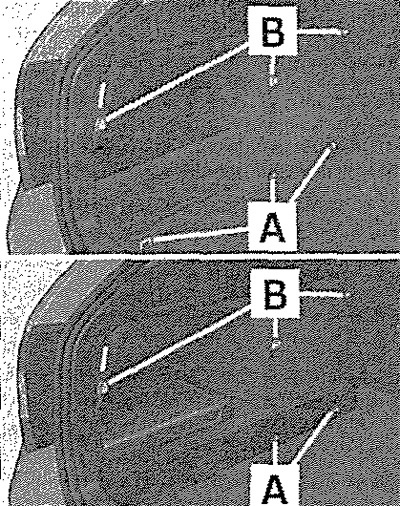
The following fasteners are located in the luggage compartment:
A. Loops for securing luggage and luggage nets
B. Fastening elements and eyes (1) only for fastening luggage nets
Caution! The maximum permissible static load on one loop D is 3.5 kN (350 kg).
(1) The front upper tie-down eye is located behind the rear seatback.
Luggage nets
Examples of mesh fastening
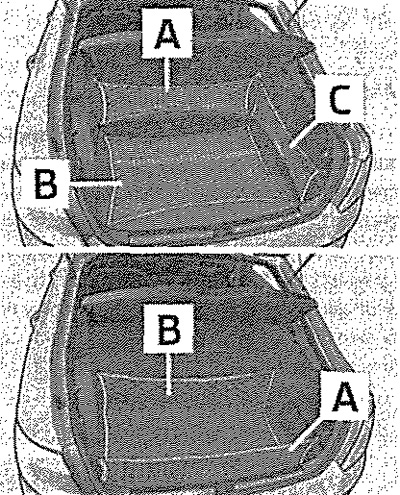
A. Transverse pocket
B. Floor grid
C. Longitudinal pocket
Fastening of longitudinal pocket
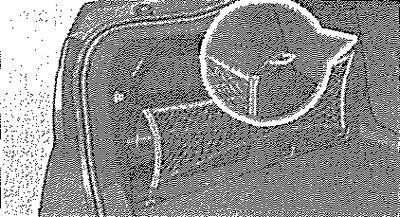
Double Hook Folding
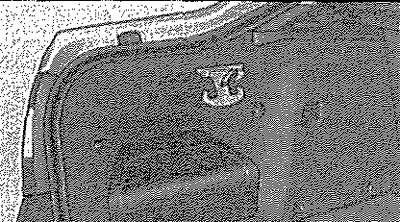
The folding double hook is designed to attach small items, such as bags. Depending on the configuration, the double hook can be located on only one or both sides of the trunk.
Folding hooks (Combi)
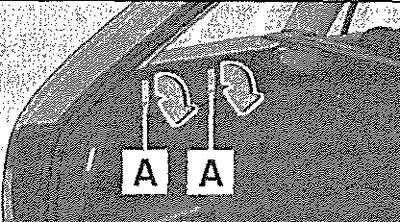
There are fold-down hooks on both side walls of the luggage compartment for attaching small items such as bags, etc. Press the bottom of the hook A and turn the hook downwards in the direction of the arrow. The front fold-down hooks also serve to secure the rear bar of the multifunctional compartment.
Securing the flooring: Odavia/Combi
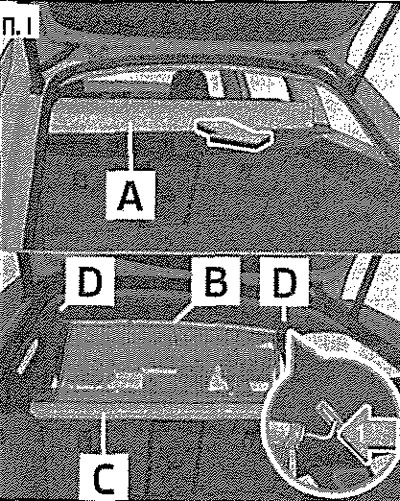
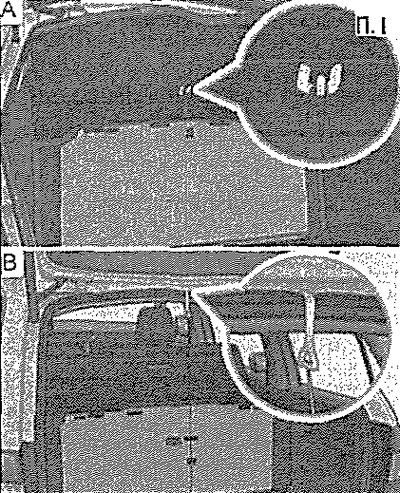
The raised boot floor can be secured (for example, if you need to take out or put in a spare tire): Octavia: loop on a hook on the luggage compartment shelf; Combi: hook on the trunk door frame.
Caution! The floor covering in the Combi can only be secured when the variable boot floor is folded into the upper position.
Double-sided floor covering
The luggage compartment may contain a double-sided mat. One side of the mat has a fabric covering, the other side is washable (convenient care). The washable side is used to transport wet or dirty items.
Luggage net
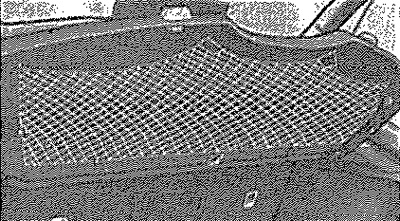
The luggage net is located on the underside of the luggage compartment shelf. The luggage stack is designed to carry light items.
Removal and installation the luggage compartment shelf
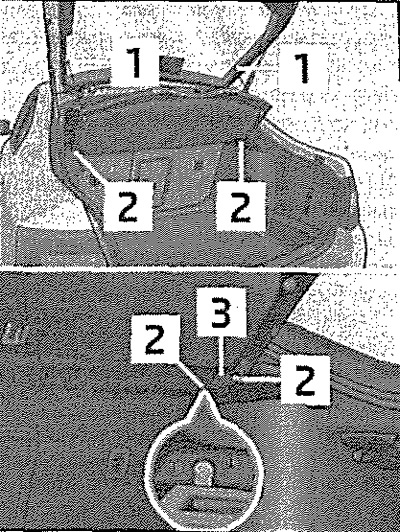
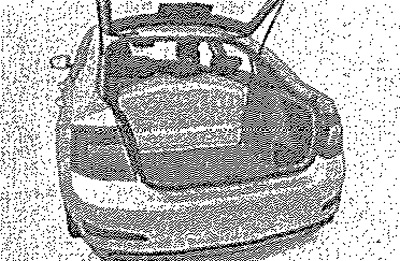
Fitting the luggage compartment shelf behind the rear seat
Unhook the restraining straps 1. Press the lower part of the shelf in the support area 2. Remove the luggage compartment shelf. The removed shelf can be placed behind the back of the rear seat.
Installation
Place the shelf on the support surfaces on the side trim. Position the shelf fasteners 3 over the spores 2 on the side trim. Press the top of the shelf so that the fasteners are fully fixed on the supports. Hook the shelf hangers 1 onto the trunk lid.
Unrolling the trunk curtain/rolling the trunk curtain
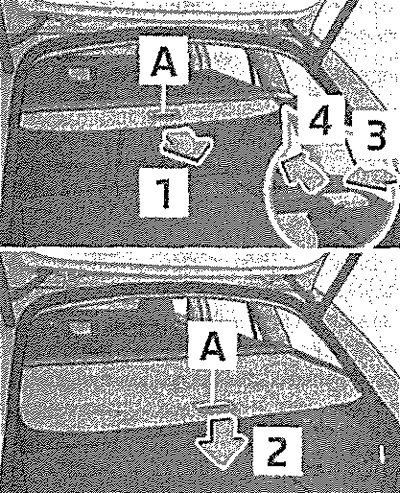
Take hold of handle A and pull the curtain in the direction of arrow 1 until it locks into place with an audible click.
Winding up
Press the curtain in the area of handle A in the direction of arrow 2. The curtain will roll up automatically.
Removal/installation
The fully rolled up luggage compartment cover can be removed (for example, for transporting bulky luggage). Press the end of the crossbar in the direction of arrow 3 and remove the curtain in the direction of arrow 4. Install in the reverse order. The removed curtain can be placed in the compartment under the transformable floor of the trunk.
Removal the side covers/correct placement of the roof rack removed from the roof
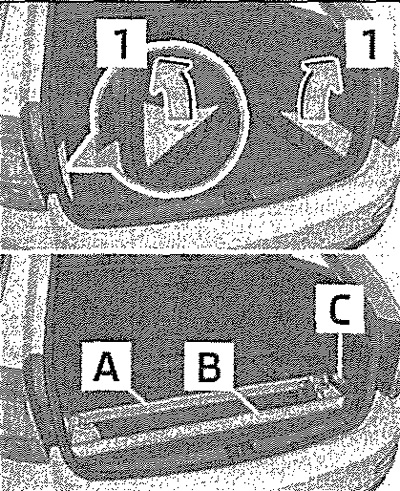
Positioning the removed luggage cover/correct positioning of the removed roof rack and luggage cover
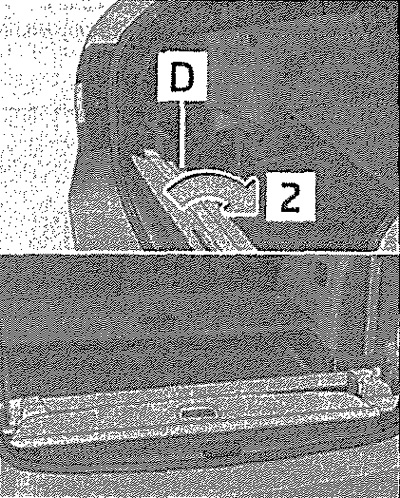
If the vehicle is equipped with a transformable boot floor, the removed roof rack and boot curtain can be stored in the recesses of the side boot lids.
Placing the roof rack removed from the roof
Fold the transformable floor in the upper position. Remove the side covers of the luggage compartment in the direction of arrows 1. Insert the front crossbar of the luggage compartment A removed from the roof into the front recesses of the covers. Insert the rear crossbar of the luggage compartment B removed from the roof into the rear recesses of the covers. Install the side covers in place in the direction opposite to arrows 1. Fold the transformable floor in the upper position.
Placing the removed luggage compartment cover
Fold the transformable floor in the upper position. Remove the side covers of the luggage compartment in the direction of arrows 1. Slide the front part of the luggage compartment cover on the left under part D of the side cover. Turn the rear part of the cover in the direction of arrow 2. Install the side covers in place in the opposite direction to arrows 1. Fold the transformable floor in the upper position. If the removed roof rack and the cover are stored in the luggage compartment at the same time, the rear part of the cover must cover the rear cross member of the luggage compartment.
Note: Before storing the roof rack in the luggage compartment, remove the key from its support bracket, otherwise it may be damaged. The key to the roof rack can be stored in recess C.
Storage compartment in the luggage compartment
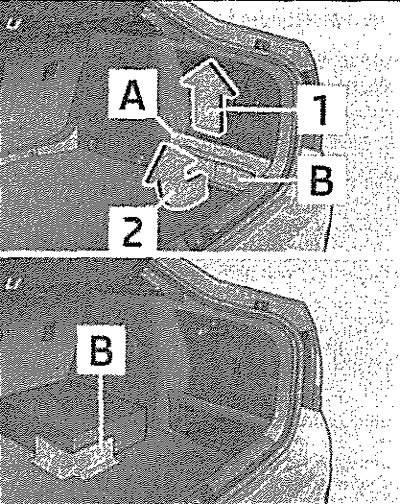
Removing the storage compartment and the Cargo element/example of securing luggage using the Cargo element.
Increasing trunk volume
Remove the cover of the storage compartment A in the direction of arrow 1.
Securing luggage items
Remove the Cargo B element (part of the glove compartment cover) in the direction of arrow 2. Secure the Cargo element with the fastener to the boot flooring. Depending on the configuration, the storage compartment may be located on only one or both sides of the boot.
Storage compartments under the flooring
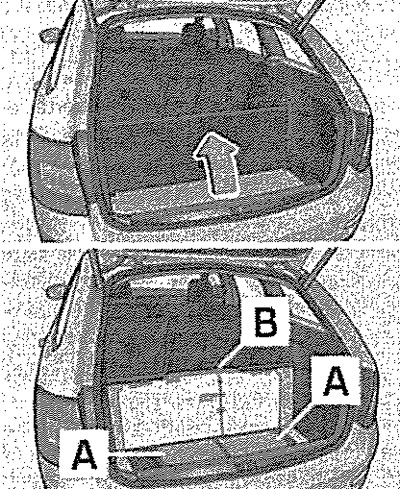
Raising the flooring/storage compartments under the flooring
Storage compartments are located under the boot floor (when equipped without a spare wheel). Dividing the trunk with a transformable floor. Lift the flooring in the direction of the arrow. Hook the hook B onto the upper edge of the transformable floor. Storage compartments A allow you to transport luggage that does not fit in height when placed on the floor, i.e. use the trunk height as much as possible.
Multifunctional pocket (Combi)
Extending/retracting the multifunctional pocket
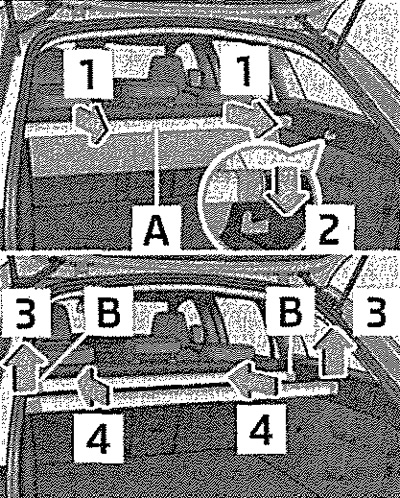
Removal the multi-functional pocket
The multifunctional pocket under the roll-up luggage compartment cover is designed for clothing and light items without sharp edges.
Unwinding
Fold down the front hooks on both sides of the trunk. Grasp the rear bar A with both hands and pull out the entire pocket in the direction of arrow 1. Put the rear bar on both hooks as far as it will go in the direction of arrow 2.
Retracting
Remove the rear panel from the hooks in the direction of arrow 3. Slide the entire multi-functional pocket in the direction of arrow 4. Align the rear panel with the front panel and press at both ends B. Fold back the front hooks on both sides of the trunk.
Removal/installation
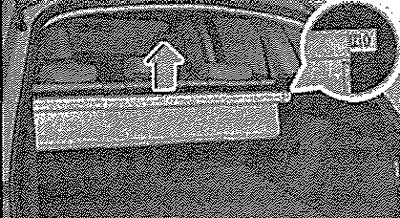
Remove the roll-up luggage compartment cover. Remove the multi-functional pocket from the guides in the direction of the arrow. Install in reverse order. When installing, insert the edge of the bar marked with the R t sign into the right guide and the edge marked with the T L sign into the left guide. The arrows must point forward.
Positions of the transformable boot floor
Transferring the transformable floor to the upper position/transformable floor in the upper position
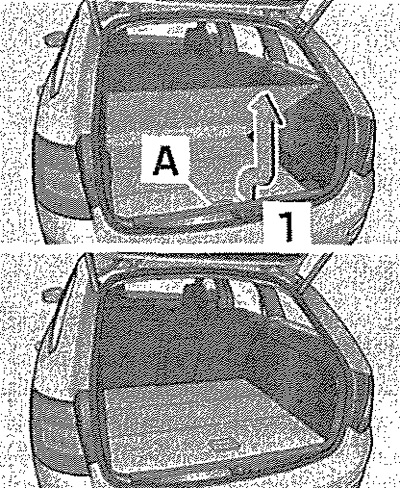
Transferring the transformable floor to the lower position/transformable floor in the lower position
The transformable boot floor can be moved to an upper or lower position.
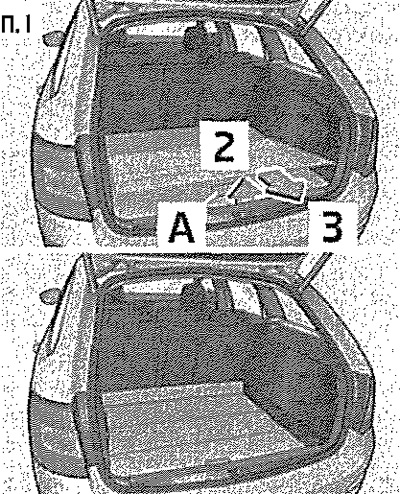
Translation to the upper position
Take the transformable floor from behind by handle A. Raise the transformable floor by about 20 cm, pull it towards you and lift it up along arrow 1 to the height of the roll-up curtain until it locks with an audible click. After the click, the transformable floor can be folded in the upper position by pressing it forward. The space under the transformable floor can be used to store any items.
Translation into the lower position
Check that the space under the transformable floor is free. Take the transformable floor from behind by handle A. Lift the transformable floor by about 10 cm in the direction of arrow 2 and pull it towards you in the direction of arrow 3. The transformable floor itself lowers to the lower position, in which it can be folded by pressing it forward. The transformable floor in both positions can be folded or used to divide the trunk space.
Folding the transformable floor
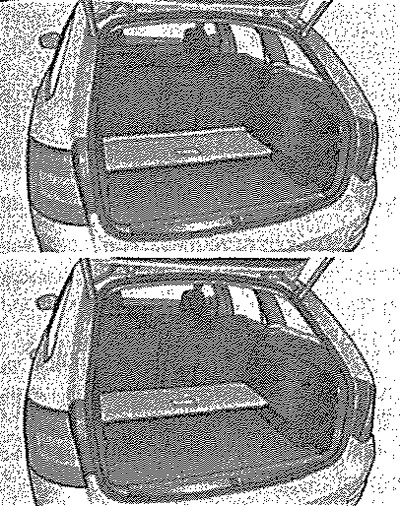
Transformable boot floor folded: lower position/upper position
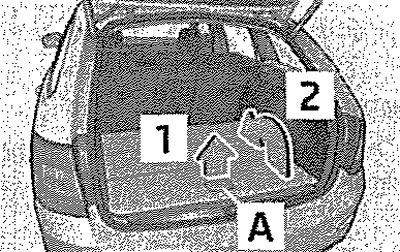
The transformable boot floor can be folded in either the lower or upper position. Take the transformable floor at the rear by the handle A and lift it in the direction of arrow 1. Fold the transformable floor in the direction of arrow 2.
Dividing the trunk with a transformable floor
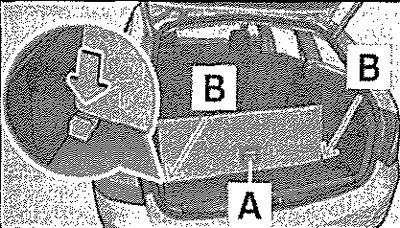
The trunk space can be divided by a transformable floor, which can be in the upper or lower position. Lift the rear part of the transformable floor by handle A. Insert the rear edge of the transformable floor into the grooves B in the direction of the arrow. The transformable floor is fixed in the grooves B to prevent displacement.