
Clip for parking ticket
The clip serves to secure, for example, a parking ticket.
Attention! Before driving, be sure to remove the ticket from the clip so as not to limit the visibility area.
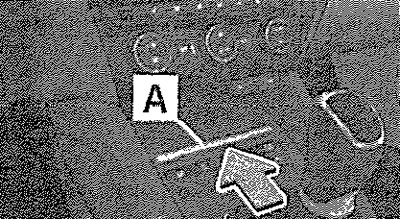
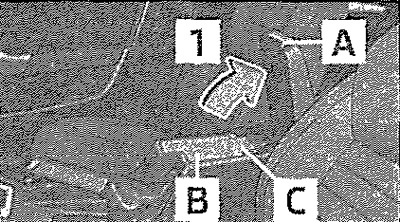
Glove box on the driver's side
Opening the glove box on the driver's side
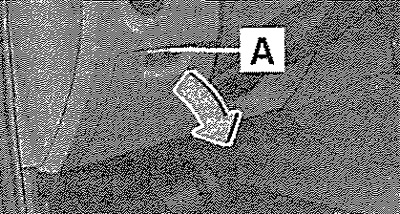
Opening
Lift handle A and open the drawer in the direction of the arrow.
Closing
Raise the lid until it clicks into place.
Storage pocket: front door/back door
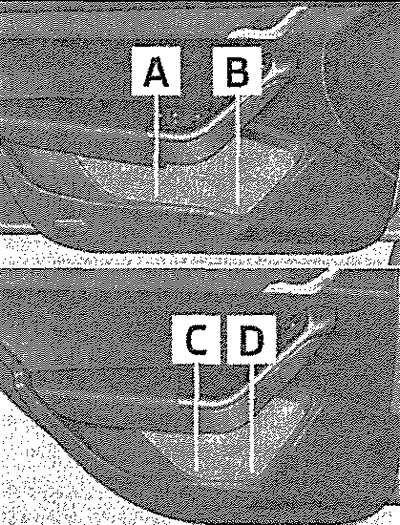
Bottle holders are molded in areas B and D.
Driver's seat: Compartment for signal vest
The vest compartment is located under the driver's seat.
Unclosable storage compartment in the front of the center console
Open storage compartment

An open storage compartment is located at the front of the center console.
Stowage compartment in the front center console
Opening the storage compartment
Opening and closing
Press the edge of cover A in the direction indicated by the arrow. Closing is carried out in the opposite direction. This compartment is designed to store small items such as a mobile phone. This department may be «let down» amplified signal from the rooftop antenna to improve the working conditions for your mobile phone.
Cup holders: in the center console at the front/in the armrest at the rear
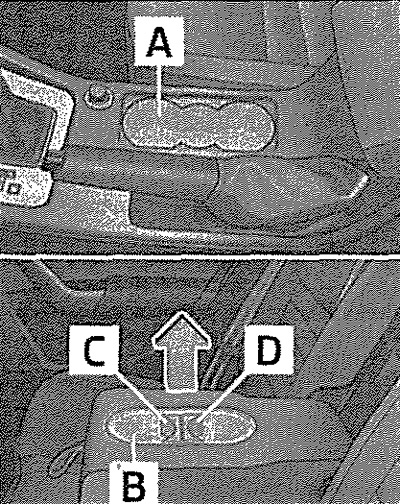
A. Cup holders in the center console, front
B. Cup holders in the rear center armrest
C. Retrievable Element
D. Retrievable item
You can put two containers of drinks in the cup holders. Removable elements C and D can be used to change the size of the individual compartments.
Cigarette lighter
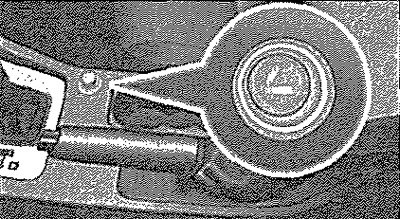
Control
Push the cigarette lighter button. Wait until the button returns to its original position. Remove and use the cigarette lighter immediately. Plug the cigarette lighter into a socket.
Note: The cigarette lighter socket is not suitable for use as a 12 volt outlet.
Ashtrays: front/rear
Removal and installation of a forward ashtray
Remove the ashtray upwards in the direction of the arrow. Installation in reverse order
Removal and installation of a back ashtray
Open the storage compartment. Grasp the insert at the point indicated by the arrows and pull it out in the direction of arrow 1. Install in reverse order.
Carefully! Do not remove the ashtray by the front cover - it may break.
12 V socket: in front of the center console/in the luggage compartment
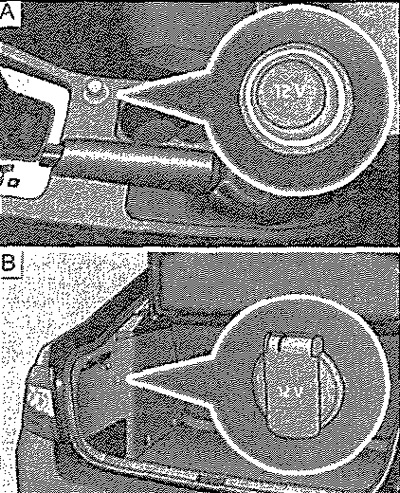
Using a 12V outlet
Remove the outlet cover or open it. Plug in the socket of the electrical appliance. The 12V socket and the device connected to it can be used even when the ignition is off, including without a key in the ignition.
Caution: Only authorized plugs may be connected to the socket. accessories with a total power of up to 120 watts.
Waste container / container opening
The waste container can be installed in door upholstery pockets.
Installing a trash container
Install the container with the front part on the wall of the storage compartment. Press the container at the back in the direction of arrow 1. If necessary, slide the container in the direction of arrows 2.
Removing the trash can
Remove the container in the opposite direction of arrow 1.
Opening and closing the waste container
Open the container in the direction of arrow 3. Closing is carried out in the opposite direction.
Package replacement
Removing the container from the storage compartment. Squeeze both latches of the inner frame of the container body in the direction of the arrows 4. Pull the bag together with the inner frame down in the direction of the arrow 5. Remove the frame bag. Insert the new bag into the frame and turn in the direction of the arrows 6 over the frame. Install the bag together with the inner frame into the container body in the direction of arrow 7. Both locks of the inner frame must click into place.
Stand for multimedia devices
The multimedia device stand is located at the front of the center console. The stand can be used for mobile phone, MP3 player or similar devices.
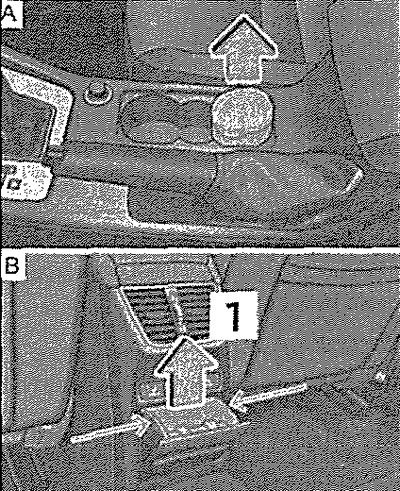
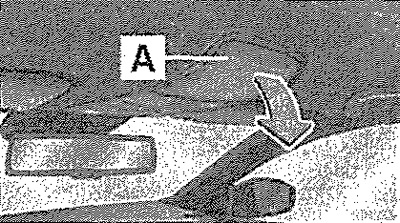
Stowage compartment under the front armrest
Opening the storage compartment
Pull the armrest cover by handle A in the direction of the arrow and open,
Closing
Open the lid all the way. Only then can it be lowered down in the direction opposite to arrow 1. Area B of the storage compartment is designed to accommodate items whose overall dimensions do not exceed 98 x 104 x U2 mm. Area C of the stowage compartment is designed to accommodate smaller items.
Opening the glasses compartment
Press the cover of the glasses compartment in area A. The compartment opens in the direction of the arrow.
Closing
Lift the eyeglass compartment cover against the arrow until it clicks into place.
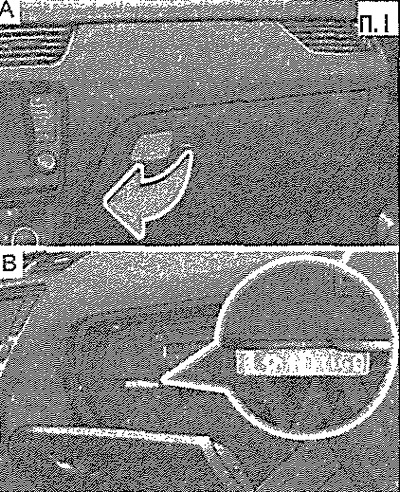
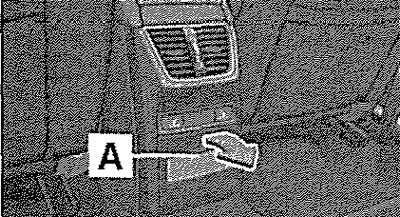
Glove box on the front passenger side
Glove box opening / glove box cooling control
The glove compartment contains a holder for a pen and credit cards. Pull the cover handle in the direction of the arrow and lower the cover down.
Closing
Raise the lid until it clicks into place.
Cooling
Rotary deflector opens or closes the air supply.
When the deflector is open and the air conditioner is switched on, cooled air is supplied to the storage compartment. If the deflector is opened when the air conditioner is switched off, outside air or air from the interior will enter the storage compartment. If the air conditioner is operating in heater mode, or if the glove box is not cooled, we recommend that you close the deflector.
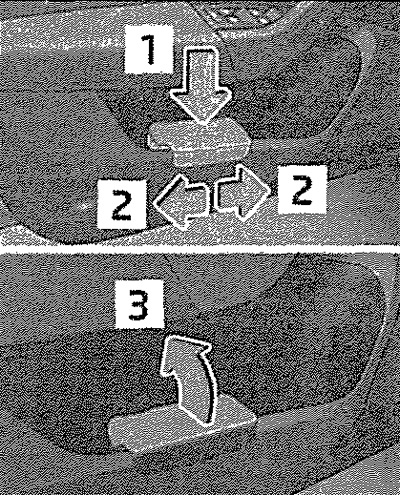
Front passenger seat: opening storage compartment
Opening
Pull the handle in the direction of arrow 1. The compartment cover will open in the direction of arrow 2.
Closing
Grasp the handle and close the drawer against the direction of the arrow 2. Do not release the handle until the drawer is closed,
Clothes hooks
Clothes hooks are located on the B-pillars and on the handrails above the rear doors.
Front seat back pockets
On the back of the front seatbacks there are pockets for storing, for example, maps, magazines and other similar items.
Stowage compartment at the rear of the center console
Opening the storage compartment
The storage compartment has a removable insert. Pull the top of recess A and open the compartment in the direction of the arrow. Closing is carried out in the opposite direction.
230 V socket at the rear of the center console
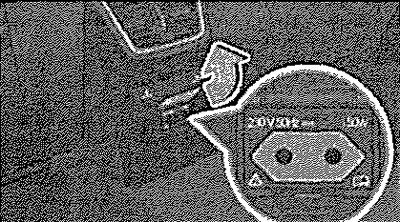
Application. Open the outlet cover in the direction of the arrow. Plug in the socket of the electrical appliance.
The 230 V socket can only be used when the ignition is on. When the plug of the electrical consumer is inserted into the socket, the safety interlock is released and the socket turns on.
Led indicator
Steady green: The outlet is powered on. Flashing red: The power outlet is temporarily off. The socket power is turned off automatically when the current exceeds the allowable value, in case of overheating, or when the battery is very discharged. When the causes of the power failure are removed, the outlet will automatically power back on. The connected consumers start working again.
Attention! Only authorized electrical devices may be connected to the outlet. accessories equipped with a two-prong 230 V plug, with a total power of up to 150 W. The socket and electrical appliances connected to it only work when the ignition is switched on!
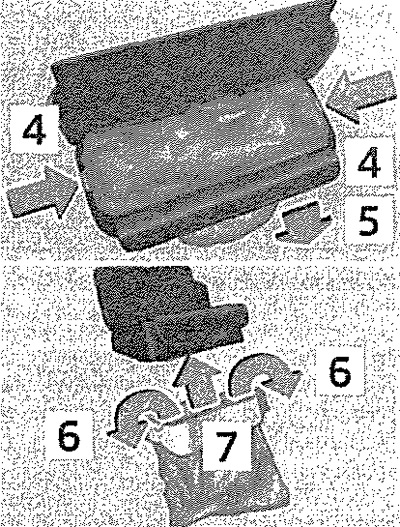
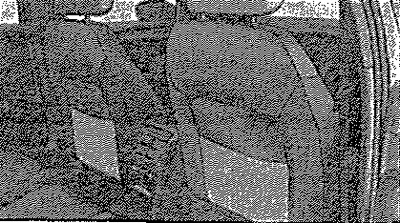
Rear seat with a hatch in the back for transporting long items
Rear seat: Lid handle/Luggage compartment: Release button
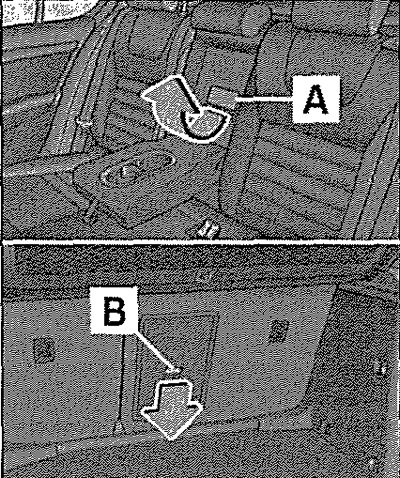
After folding the armrest and the cover, an opening is formed in the back of the rear seat, through which you can insert a removable cover with skis. The armrest and lid can be folded out of the passenger compartment or from the trunk.
Opening from the salon
Fold out the rear armrest (not all the way). Pull handle A in the direction of the arrow and fold down the cover.
Opening from the trunk
Slide release button B in the direction of the arrow and open the cover (with armrest) forward.
Closing
Raise the lid and armrest all the way up until it locks with a distinct sound. Make sure the armrest clicks into place after closing. This can be recognized by the fact that the red field above release button B is no longer visible from the boot.
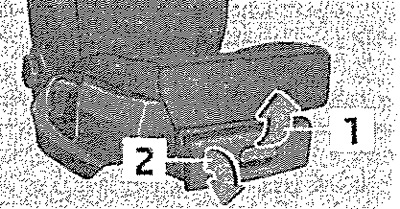
Removable ski bag
Fixing the ski bag
The removable cover serves exclusively for transporting skis.
Loading
Open the tailgate. Fold out the rear armrest and hatch in the back of the seat. Lay out the empty bag so that the end with the zipper is in the trunk. Insert the skis from the trunk into the removable bag. Close the cover.
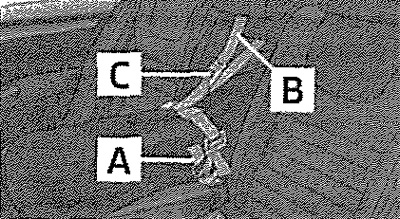
Fixation
Tighten band A at the free end around the skis in front of the ski bindings. Tilt the seat back slightly forward. Pass the lashing strap B through the hatch in the seatback over the top of the backrest. Then fold the seatback back until the lock button clicks into place - check the fixation by pulling the seatback forward. Insert the fastening strap B into the lock C until you hear a distinct click.
Attention! After loading the skis, the bag must be fixed with a fastening strap B. Tape A must tightly wrap around the skis. Make sure tape A wraps around the skis in front of the ski bindings (see also the inscription on the removable cover). The total weight of the transported skis must not exceed 24 kg. A removable cover is provided for four pairs of skis. Put the skis in a removable bag with the curved ends forward, and the poles with the points back. If there are several pairs of skis in a removable bag, then make sure that the ski bindings are located at the same level. The removable cover must not be folded or stored when wet.