



Contents: Tyre pressure reference value…⬇ Calibration ⬇ Tire pressure indication ⬇ Luggage compartment: Spare wheel ⬇ Removal the wheel ⬇ Laying the wheel ⬇ Spare wheel ⬇ Solid wheel cap ⬇ Installation ⬇ Wheel bolt caps ⬇ Installation ⬇ Wheel bolts ⬇
Tyre pressure reference value setting key
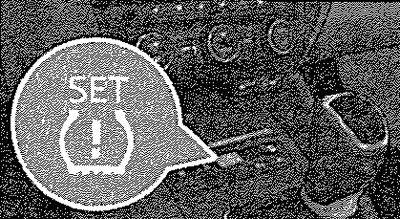
Calibration
If the tire pressure changes, after replacing one or more wheels, if the position of one of the wheels on the vehicle changes, or if the control lamp lights up while driving, it is necessary to calibrate the system as follows. Inflate all tires to the required pressure. Turn on the ignition. Start the system calibration. On vehicles with preparation for installation of the head unit in service conditions: press the button with the symbol and hold it for more than 2 seconds. When the button is pressed, the control lamp lights up
 .
.
At the same time, the system memory is cleared and a new calibration is started. This is confirmed by a sound signal and the control lamp going out
 .
.
If after calibration the lamp does not go out, the system is faulty. Contact the service station.
Tire pressure indication
The warning lamp lights up if one of the following events occurs: The tire pressure is too low. The tire structure is damaged. The vehicle has one-sided overload. The wheels on one axle are under increased load (for example, when towing a trailer or when driving uphill or downhill). Snow chains are fitted. A spare wheel is fitted. One of the axle wheels has been replaced. In vehicles with Infotainment (1), it is possible to find out which tyres need checking.
Warning! When the counter light is on, you should immediately reduce your speed and avoid sharp steering wheel turns and braking. At the earliest opportunity, be sure to stop, check your tires and their pressure. Under certain circumstances, (for example, with a sporty driving style, when driving on winter or dirt roads) counter, the lamp may light up with a delay or not light up at all.
(1) Only applies to vehicles with Infotainment Blues and Swing.
Caution! The tire pressure monitoring indicator does not replace regular checking of the tire pressure, as the system cannot recognize a uniform loss of air pressure in the tires. The system may not give a warning signal if the pressure drops too quickly, for example if a tire suddenly collapses. In this case, stop the car carefully without turning the steering wheel or braking abruptly. A basic setting must be performed every 10,000 km or once a year to ensure that the tire pressure monitoring system is working properly.
Luggage compartment: Spare wheel
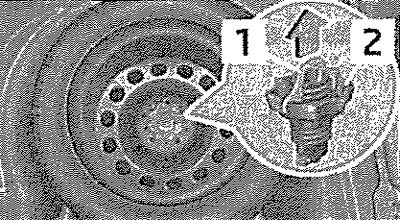
The spare wheel is located in a niche under the false floor in the luggage compartment and is secured with a special nut.
Removal the wheel
Open the trunk door. Raise the trunk floor. Remove the tool box. Pull out the lock 1 in the direction of the arrow. Loosen the nut 2 counterclockwise. Remove the wheel.
Laying the wheel
Place the removed wheel with the disc facing down in the spare wheel well. Tighten nut 2 clockwise until the wheel is securely fastened. Push lock 1 in the opposite direction to the arrow. Place the container with the on-board tool in the wheel and secure it with tape. Lower the boot floor. Close the boot lid. Install a working wheel of the appropriate size and design as soon as possible. If the spare wheel is different in size or design from the other wheels, (for example, winter tires or tires with a directional tread pattern are installed), then such a spare wheel can only be used for a short time and with special care when driving the car.
Spare wheel
A warning label is attached to the rim of the space-saver tire. If it is necessary to use a space-saver tire, please note the following: Once the tire has been installed, do not cover the warning label on the rim. Be especially careful when driving. The pressure in the space-saver tire is equal to the maximum pressure in the tire with a standard tire. Use the space-saver tire only to get to the nearest service center, as it is not designed for long-term use.
Solid wheel cap
Install the bracket from the on-board tool kit onto the reinforced edge of the wheel cap. Insert the wheel wrench into the bracket, rest it against the wheel and detach the cap from the disk.
Installation
First, install the cap on the rim with the side with the hole for the tire valve. Then press the cap onto the rim so that it is fixed around the entire circumference.
Caution! Use only hand pressure, do not hit the wheel cap! Avoid strong impacts when the cap is not yet secured to the rim. The guides and centering elements of the cap may be damaged. When using a security bolt, make sure that it is in the hole in the cap next to the valve. If additional wheel caps are installed, make sure that there is sufficient air flow to cool the brake system.
Wheel bolt caps
Remove the cap
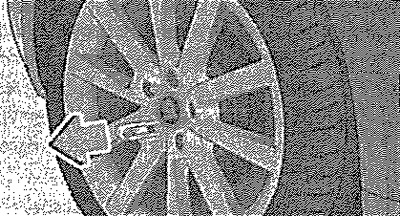
Place the puller on the cap so that the inner hooks of the puller are against the flange of the cap. Remove the cap.
Installation
Slide the caps onto the wheel bolts until they stop. The wheel bolt caps are stored in a plastic container inside the spare tire, or in the spare tire well.
Wheel bolts
Wheel rims and wheel bolts are structurally compatible with each other. Therefore, when installing other rims, such as alloy wheels or rims with winter tires, use the appropriate wheel bolts - the correct length and with the appropriate thrust surface profile. The reliability of the wheel fastening depends on this.