Contents: Removal ⬇ Installation ⬇
Removal
1. Remove the front door trim panel (for more details, see the relevant section in this chapter).
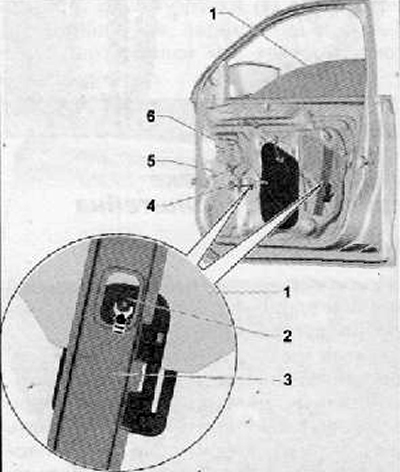
2. Remove the service hole plug (4) shown in the figure below.
3. Remove the front door cover (5) shown in the figure below (for more details, see the relevant section in this chapter).
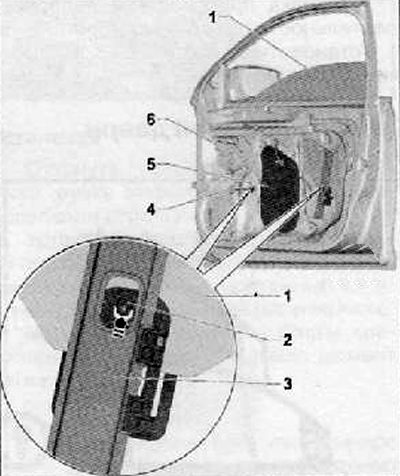
4. Lower the door window (1) until the fastening elements (2) are accessible through the service holes in the glass guides (3), as shown in the figure below.
5. Press the lock (at the point indicated by the arrow) inwards and at the same time, unlock the glass (2) using a flat screwdriver, as shown in the figure below. Repeat this operation with the second door glass retainer.
Note: If the servo motor is damaged and, as a result, it is impossible to lower the glass to the required position, it is necessary to remove the servo motor. After this, the glass can be moved manually by pressing on it.
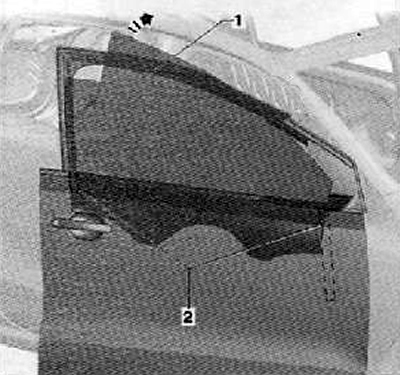
6. Lift the rear part of the glass in the direction of the arrow (1) and turn it to remove it from the guides (2) as shown in the figure below. Remove the glass from the door assembly.
Installation
1. Insert the glass (1) into the door opening in the guide groove (2), moving it in the direction of the arrow "a", as shown in the figure below
Note: Check and ensure that the window is properly installed in the guide channel.
2. Press evenly on the door glass so that it fits into the grips of the fastening elements (arrow b), as shown in the figure below.
3. Align the door glass with the door frame (arrow c) as shown in the figure below.
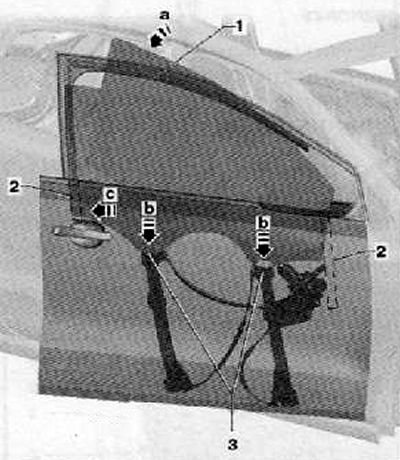
4. Press evenly on both sides of the glass, gently pressing it into the grips until they lock into place with a distinctive click.
5. Further installation is carried out in the reverse order of removal.