
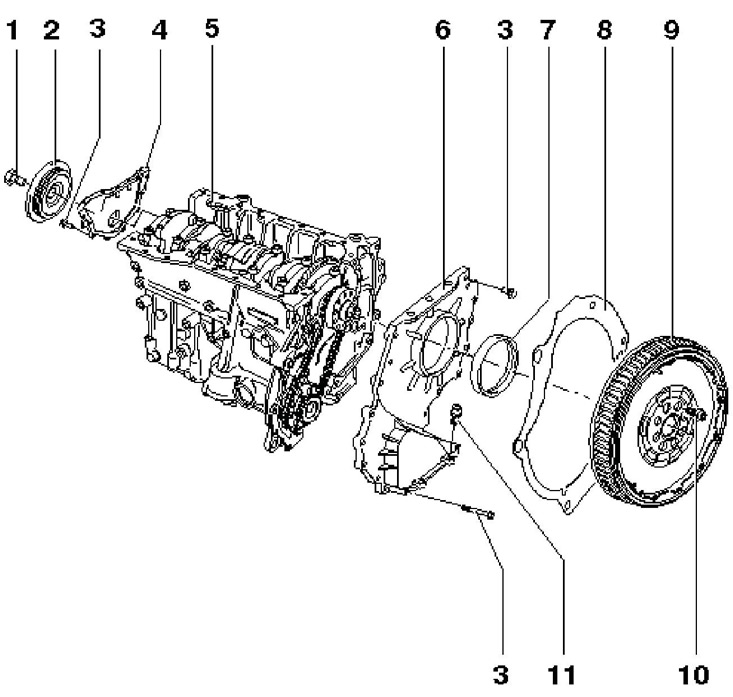
7.1 Installation details of crankshaft oil seals
1. Pulley bolts 2, 7 pcs, 60 Nm, then tighten 180°
2 crankshaft pulley
3 Bolt, 10 Nm
4 Front sealing flange of the crankshaft, to be replaced, installed on the sealant D176 501A1
5 Cylinder block
6 Crankshaft rear sealing flange
7 Crankshaft rear oil seal, installed on a dry shaft journal, not additionally lubricated
8 Intermediate plate, not installed
9 2-mass flywheel
10 Bolt, to be replaced, 60 Nm, then retighten 90°
11 Bolt, 23 Nm
2. Remove the accessory drive belt (see Section 6).
3. Remove the front right wheel arch locker (see chapter 11).
4. Holding the crankshaft pulley from turning with T10172, unscrew its fastening bolts and remove the pulley.
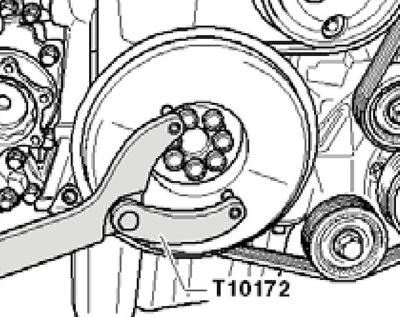
7.4 Holding the crankshaft pulley
5. Remove the engine oil pan (see Section 13).
6. Turn out bolts of fastening of a forward sealing flange and remove it.
Note: Do not remove the guide bush from the new sealing flange until it has been installed.
7. Remove sealant residues from mating surfaces on cylinder block and sump using an appropriate chemical agent. Degrease mating surfaces. Use a clean cloth to wipe off any remaining grease from the end of the crankshaft.
8. Cover the front oil seal in the front sealing flange with a clean cloth and apply a bead of D176 501A1 silicone sealant 2-3 mm in diameter to the flange, as indicated on the resist. illustrations.
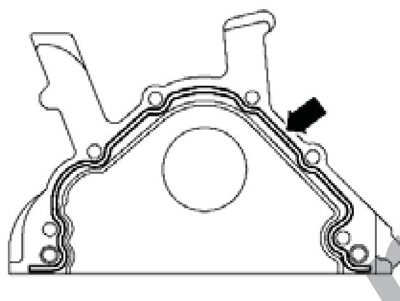
7.8 Scheme for applying sealant to the front flange
Note: The flange must be installed within 5 minutes after applying the sealant.
9. Position the sealing flange (1 per resist. illustrations) with gland guide (2) on the crankshaft. Carefully slide the flange with the stuffing box through the guide sleeve and tighten its fastening bolts with a force of 10 Nm.
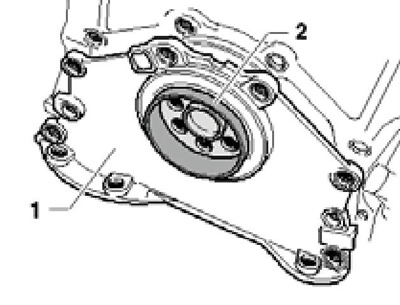
7.9 Fitting the front pulley with oil seal
10. Install the oil pan and crankshaft pulley. While holding the pulley from turning with tool T10172, tighten the new bolts of its fastening with a force of 60 Nm, and then tighten them by an angle of 180°.
11. Install the accessory drive belt.