Removing
1. Remove front door trim panel assembly (for details, see the relevant section in this chapter).
2. Remove front door cover (for details, see the relevant section in this chapter).
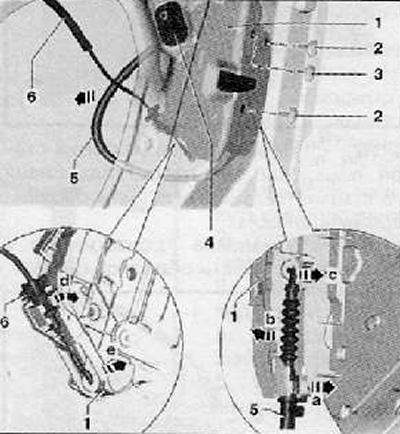
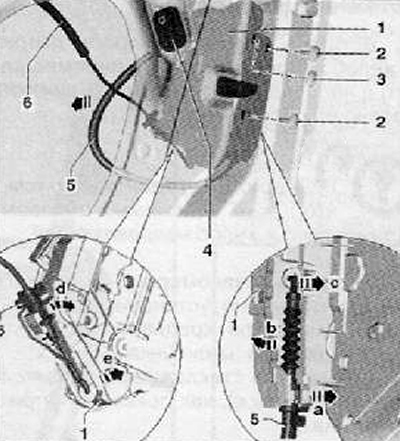
3. Remove the plug from the door (3), shown in the figure below.
4. Disconnect the wiring harness connector (4), as shown in the figure below.
5. Unscrew the fastening bolts (2), shown in the figure below.
6. Remove the front door lock assembly (1), as shown in the figure below.
Note. If necessary, disconnect the Bowden cable from the lock.
7. Disconnect the Bowden cable from the mounting bracket. For this:
Bend, as shown in the figure below, the Bowden cable (5) at a 45°angle and remove it from the mounting bracket (arrow a), as shown in the figure below.
Turn the Bowden cable (arrow b) until he is released from the grip on the door lock (1) (arrow with), as shown in the figure below.
8. Disconnect the Bowden cable from the lock. For this:
Bend the Bowden cable (6) at a 45°angle and remove it from the bracket as shown in the figure below.
Turn the Bowden cable (arrow d) until he is released from the grip on the door lock (1) (arrow e), as shown in the figure below.
Installation
1. Installation is made in reverse order to removal.
2. Tighten the fastening screw (2) with a tightening torque of 20 Nm.
Note. It is imperative to check the functional test of the door lock, otherwise, if the Bowden cables were not connected properly, the door simply will not open.