

Pic. 11.5. Door glass and power window components - show front, rear similar
1. Window/glass; 2. Seal; 3. External seal; 4. Internal seal; 5. Sealing channel power window; 6. Power window channel; 7. Power window mechanism; 8. Facing; 9. Sleeve; 10. Window regulator handle.
Removing
Glass
1. Open the door, and fully raise the glass, then remove the inner handle of the door lock actuator (Chapter 17), door trim panel (Chapter 22) and a polyethylene membrane.
2. Remove the outer and inner seals, then peel off the plastic wicking strip.
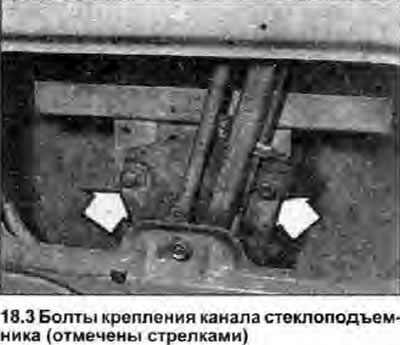
3. Before unscrewing the two bolts securing the power window channel to the power window, lower the glass to the middle position and make alignment marks on the channel and power window (photo).
4. Take the glass out of the door (photo).

Power window
5. Open the door, and fully raise the glass, then remove the inner handle of the door lock actuator (Chapter 17), door trim panel (Chapter 22) and a polyethylene membrane.
6. Before unscrewing the two bolts securing the power window channel to the power window, lower the glass to the middle position and make alignment marks on the channel and power window.
7. Raise the glass completely and secure it with adhesive tape, then lower the window lifter to the middle position again.
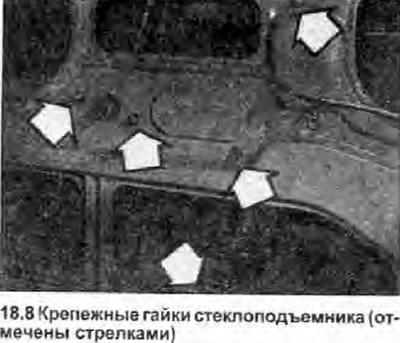
8. Loosen the fixing nuts (photo), and remove the power window.
Installation
Glass
9. Install in the reverse order of removal, apply a little grease to the power window mechanism, align the marks made before removal and tighten the two bolts. Make sure the glass moves easily and without jerks.
Power window
10. Install in the reverse order of removal, apply a little grease to the power window and install it, lightly tightening the mounting bolts. Raise and lower the glass several times to check for ease of movement. If necessary, loosen the mounting nuts and bolts and correct the position of the components.