
Removing
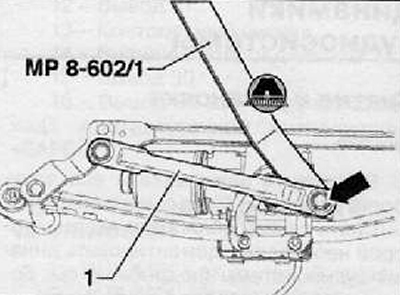
1. Using a special puller (MP8-602/1), disconnect the rod (1) from the hinge (arrow), as shown in the figure below.
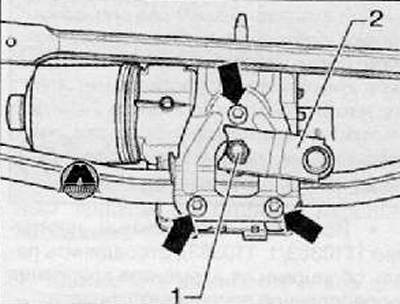
2. Loosen the fastening nut (1) and disconnect the crank (2) from the windshield wiper motor shaft, as shown in the figure below. The tightening torque of the fastening nut during installation is 18 Nm.
3. Unscrew the fastening screws (arrows) and remove the windshield wiper motor from the base on the link and arm system as shown in the figure below. Tightening torque for mounting screws when installing 8 Nm.
Installation
1. First of all, you need to connect the wiring harness connector to the electric motor and turn it on to set it to its original position.
2. Disconnect the wiring harness connector from the windshield wiper motor again. Install the electric motor on the supporting part of the system of rods and levers, then install and tighten the fastening screws (arrows) with a tightening torque of 8 Nm as shown in the figure below.

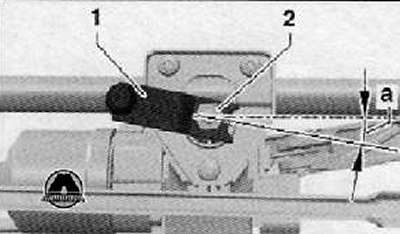
3. Install the crank on the windshield wiper drive motor shaft (1) so that the angle between the longitudinal axis of the crank and the longitudinal axis of the electric motor is 7° (corner «A»), as shown in the figure below.
4. Install and tighten the crank nut (2) with a tightening torque of 18 Nm.
5. Press and install the rod (1) on a hinge (arrow), as shown in the figure below.
