



2. Remove the screws (see accompanying illustration) and remove the cover behind the pedals.
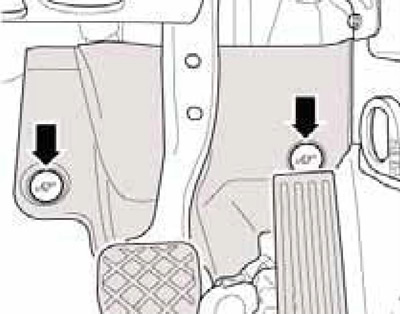
5.2 Fastening the pad behind the pedals
3. Unscrew the bolt (1 on the accompanying illustration) and disconnect the joint (2) from the steering gear.
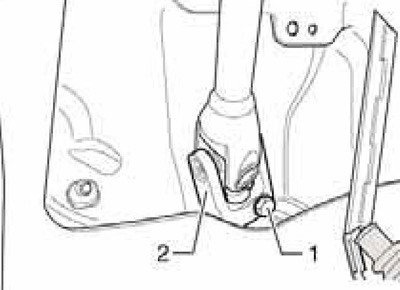
5.3 Steering gear hinge bolt
4. Remove the sound insulation under the engine compartment (see Chapter 11).
5. Disconnect the anti-roll bar from its struts.
6. Give the nuts (see illustration 4.5 Chapter 8).
7. Loosen the tie rod end nut on the steering knuckle, leaving it screwed on a few turns. Then press the tie rod end joint out of the steering knuckle using tool #3287A (see accompanying illustration), finally loosen the nut and separate the tie rod end from the steering knuckle.
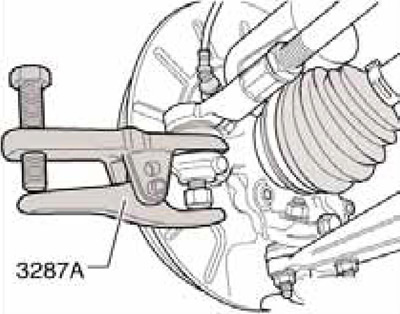
5.7 Separating the tie rod end from the steering knuckle
8. Fix the position of the subframe with consoles (see Section 3).
9. Remove the bolts (11 and 16 in illustration 3.11) anti-roll bar mounts on the subframe, unscrew the bolts (14) and remove the rocker support from the transmission.
10. Support the subframe with a VAG1383A transmission jack, placing a wooden block between them (1 in illustration 3.12).
12. Remove the bolts (1 on the accompanying illustration) exhaust system bracket. Loosen the bolts (2) and lower the subframe slightly, paying attention to the electrical wiring.
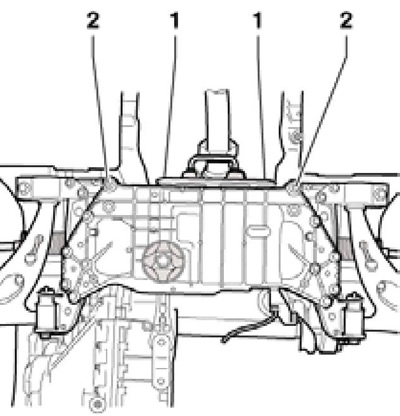
5.12 Fastening the subframe and exhaust system bracket
13. Raise the stabilizer (1 on the accompanying illustration) forward through the console (2) and remove from the subframe.
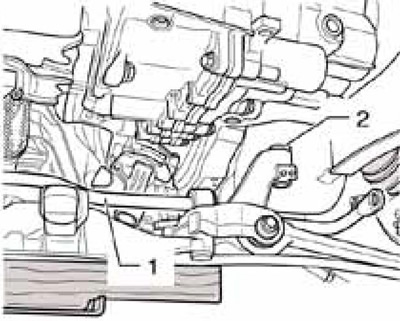
5.13 Removing the stabilizer
14. Installation is performed in the reverse order. After installation, apply the basic settings for the front suspension height sensor (using the diagnostic tool, see Chapter 5) and conduct a road test (see Chapter 1), during which check the position of the steering wheel. Finally, adjust the front wheel alignment angles (see Part D).