



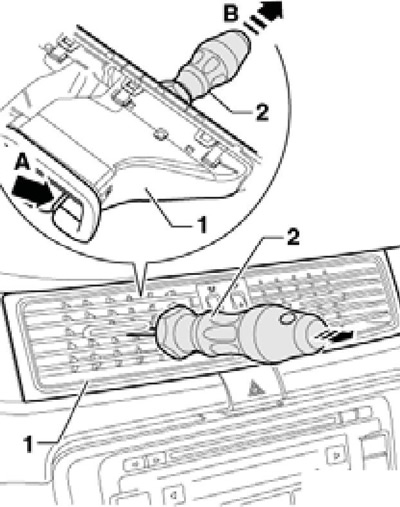
10.1 Removing the side deflector
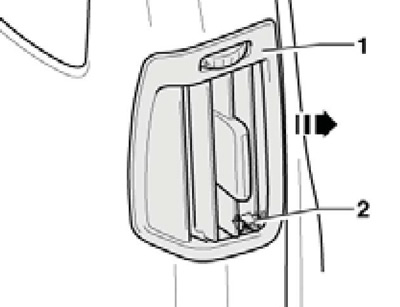
2. To remove the deflector (1 on the accompanying illustration) at the rear of the B-pillar, remove the upper B-pillar trim (see Chapter 11), disconnect the connector (2) and carefully press the deflector out from the back of the trim. When installing, press the deflector into the trim, pressing on the frame (not on the ribs).
10.2 Removing the central deflectors
3. To remove the air duct to the rear footwell, remove the appropriate front seat and the console between the front seats (see Chapter 11). Then lift the floor covering, unhook the air duct from the crossbar and pull it out of the air conditioning system housing (see accompanying illustration).
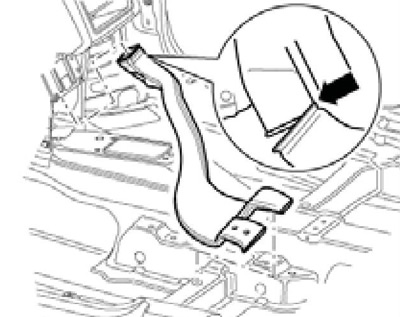
10.3 Removing the air duct to the rear footwell
4. To remove the final air duct to the B-pillar deflector, remove the corresponding front seat (see Chapter 11), deflector (see paragraph 2) and the linings in the lower parts of the A and B pillars (see Chapter 11). Then unscrew the bolt (1 on the accompanying illustration), lift the floor covering and pull the end duct (2) out of the intermediate duct (3).
Material is available on the website [SKODABOOK.RU]
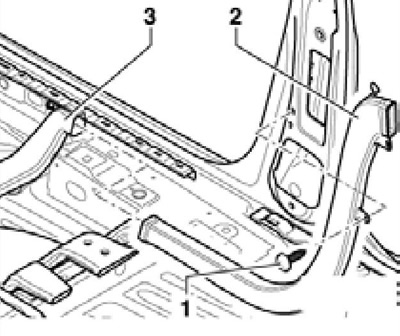
10.4 Removing the final air duct to the deflector in the B-pillar
5. To remove the intermediate air duct to the deflector in the B-pillar, remove the final air duct (see paragraph 4) and the console between the front seats (see Chapter 11). Then lift the floor covering, give the nut (1 on the accompanying illustration) and pull the air duct (2) out of the air conditioning system housing.
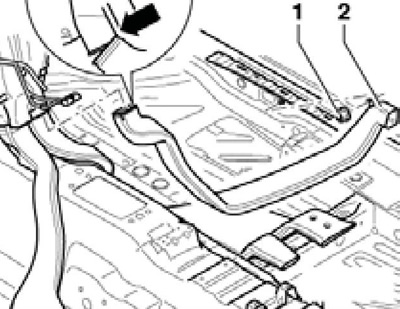
10.5 Removing the intermediate air duct to the deflector in the B-pillar
6. To remove the air duct (1 on the accompanying illustration) remove the driver's storage box from the left front footwell (see Chapter 11) and unscrew the screw (2).
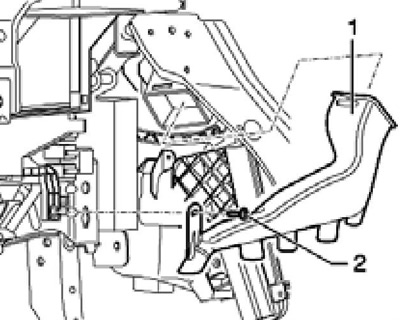
10.6 Fastening the air duct to the left footwell
7. To remove the air duct (1 on the accompanying illustration) to the right front footwell remove the main storage compartment (see Chapter 11), remove the shield (1 in illustration 15.1 Chapter 1) of the climate control system housing by unscrewing the two plastic bolts (2), and then unscrew the bolts (2 on the accompanying illustration). On models with a cooled glove box, pay attention to the correct position of the air hose when installing.
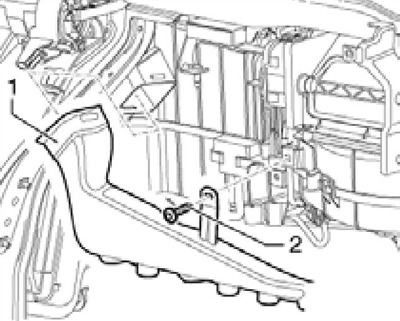
10.7 Fastening the air duct to the right foot well
8. To remove the air intake grille, remove the windshield fairing grille (see Chapter 11), disconnect the connector or remove the air quality sensor "G238" (if available, see Section 14), give me the nuts (see accompanying illustration) and pull the grille up. When installing, make sure that the gasket is correctly positioned on the grille. Tighten the nuts with a force of 2.5 Nm.
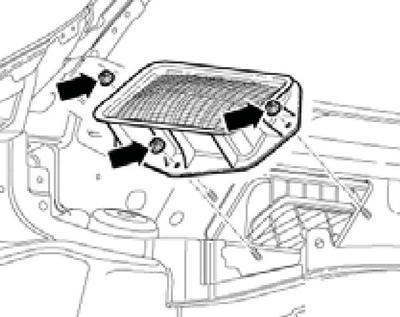
10.8 Air intake grille fastening