
General information
The functions of the anti-theft alarm system are integrated in the onboard supply control unit -J519-. After replacing the convenience system central control unit -J393- or the onboard supply control unit -J519-, the anti-theft alarm system must be adapted using the Tester.
Fault recognition and indication
The alarm system is equipped with self-diagnosis, which makes troubleshooting easier. To search for a fault, use the "Guided Fault Finding" function in the Tester".
Note: After the alarm system has been triggered, the source of the alarm stored in the onboard supply control unit -J519- is displayed. To search for the source of the alarm, use the Tester in the "Guided Functions" function" — "Blocks of measured values". Before starting installation work, the vehicle must be unlocked using the radio remote control unlock button.
Removing and installing alarm siren -H12-
Note: The alarm siren -H12- has an independent battery that cannot be replaced separately.
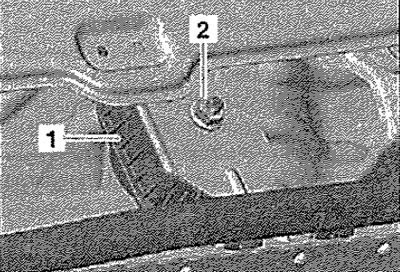
Switch off the ignition and all electrical consumers. The vehicle must not be locked with the central locking remote control. Remove the plenum box cover. Unscrew nut -2- and remove alarm siren -1-. Disconnect connector.
Installation in reverse order.
Removing and installing interior monitor sender -G273- and vehicle inclination sender -G384-
Note: The interior monitor senders -G273- and vehicle inclination sender -G384- form a single unit and cannot be replaced separately.
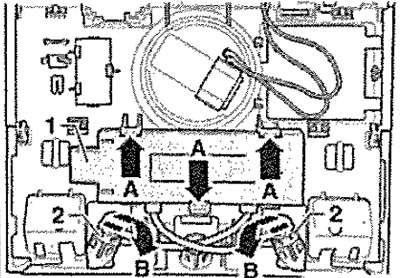
Switch off the ignition and all electrical consumers. Remove the dome light at the front of the headlining. Unlock interior monitor sensors -2- from lower latches and fold out slightly -arrows B- and release from holder. Press locking lugs -arrows A- and remove vehicle tilt sensor -1- with interior monitor sensors -2- from interior light.
Installation
Installation in reverse order. If the sensor is replaced, carry out an online adaptation (parameterization) using the tester.