
Removing and installing parking aid control unit -J446- or parking aid and parking aid control unit -J791-
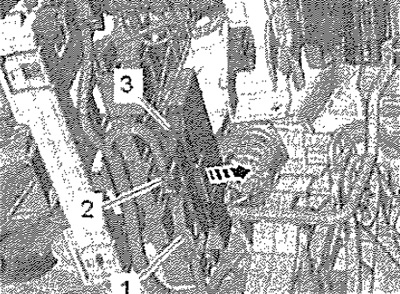
Switch off the ignition and all electrical consumers. If fitted, remove the protective trim under the dash panel on the driver's side. Vehicles with left-hand drive - the control unit is located on the relay and fuse box: having folded back the bracket, unlock and disconnect the connectors -1 - and -2-; Press locking lug -arrow- and remove control unit -3- from holder.
Installation
Installing in reverse order If parking assistance control unit -J446- has been replaced: Code control unit.
Removing and installing parking aid front warning buzzer -H22-
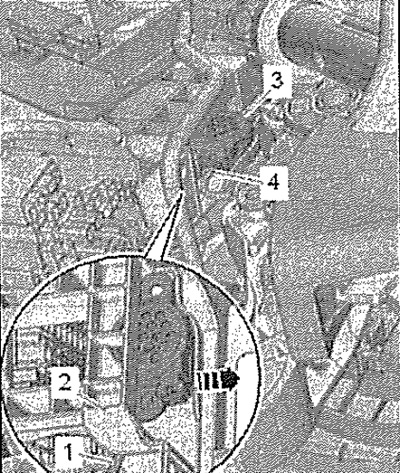
Switch off the ignition and all electrical consumers. The warning buzzer -3- is located behind the fuse box. Using a thin screwdriver -1-, press warning buzzer -3- out of holder -2- -arrow-. Disconnect connector. Remove the glove box on the front passenger side and its frame from the front panel.
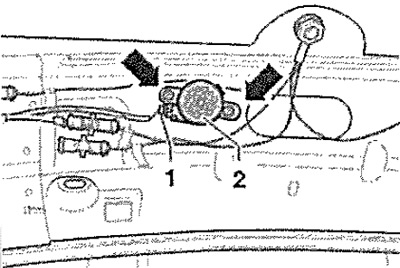
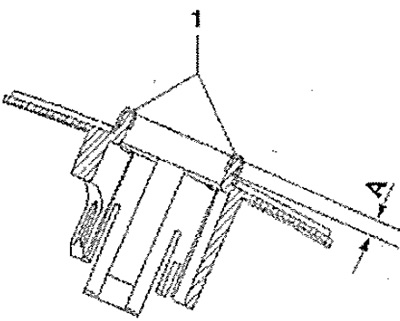
Using a small screwdriver, press warning buzzer -1- out of fuse holder support -arrow A-. Disconnect connector.

Installation in reverse order.
Removing and installing parking aid rear warning buzzer -H15-
Switch off all electrical consumers and remove the ignition key. Disconnect the B-pillar top trim and remove the C- and D-pillar top trim (Combi). Loosen the fixing of the headlining and carefully hang its rear part downwards. Loosen and remove spacer clips -arrows-. Disconnect connector -1- and remove warning buzzer -2-.
Installation in reverse order.
Removal and installation of sensors of the parking assistance system and the parking assistant
Note: Sensors placed on painted surfaces - before installation, the front surface of the new sensor must be painted in the same color as the bumper. Parking assistance sensors may be coated with a layer of paint up to a maximum thickness of 100 nm. Before painting the sensor, tape the back of the sensor (connection clamps). Only the top is painted (visible) part of the sensor membrane. To make it easier to remove the clips -arrows A-, you can take larger pliers with bent jaws.
Switch off the ignition and all electrical consumers.
Removing the front sensor
Parking aid sensor - Remove front bumper. Parking aid sensor - Remove front fender liner. Unlock catches -arrows A-. Remove sensor -1- from outer side of bumper to inside. Disconnect connector -2-.
Removing the rear sensor
Parking aid sensor (except Octavia RS) - Disconnect the lower part of the bumper and slightly press it down. Parking aid sensor for Octavia RS - remove the rear bumper. Parking aid sensor - remove rear fender liner. Unlock catches -arrows A-. Remove sensor -1- from outer side of bumper inwards. Disconnect connector -2-.
Installation in reverse order.
Parking Assist Sensor Bracket - Hole Drilling, Matching, Mounting Position, Bonding Process
When replacing the bumper, the new sensor holders must be glued into the new bumper.
Mounting position of sensor brackets

The installation position is determined by the protrusion on the bracket -2- and the contour of the bracket on the bumper -1-.
The process of gluing sensor brackets
Note: The parking aid sensor brackets have a countersunk collar, the front surface -1- of which is painted in the same color as the bumper. The parking aid sensor brackets do not have a recessed collar -1-. Therefore, in order to precisely center the bracket in the bumper, it is necessary to use a centering mandrel, or to glue a holder with an embedded parking aid sensor on which the decoupling ring sits (black silicone ring). The temperature of the bumper and sensor holder during bonding must be between 15°C and 30°C.
Clean marked bonding area -1- and thoroughly degrease with isopropanol (technical alcohol). Activator 3M "primer for plastics 4298UV" or "primer K520" Apply evenly to the marked bonding area -1-. Let the activator dry for approx. 5 minutes.
Note: Pay attention to the mounting position and the matching of the sensor bracket. The contact pressure and holding time are decisive for the quality of the bonding!
Remove the protective film from the double-sided adhesive tape and hold the sensor bracket -2- firmly in the bumper for approx. 10 s.