
Company vehicles Hyundai Company vehicles Kia Company vehicles Lada Company vehicles Mazda Company vehicles Mercedes-Benz Company vehicles Opel Company vehicles Mitsubishi
English Русский
Български
Беларускі
Український
Српски
Hrvatski
Română
Polski
Slovenský
Magyar
Articles   
Bookmark Contacts Sitemap
SkodaBook.ru


Fabia Rapid Octavia Superb Kodiaq Yeti Others
Octavia 1 (1996-2004) Octavia 3 (2013-2019)

Removal and installation the fuel tank (Skoda Octavia 5E)

  • Main
  • Octavia
  • 5E (2013-2019)
  • Petrol engines 1.2 l
  • Supply system
  • Removal and installation the fuel tank
0
Contents: Car with independent heater ⬇ All ⬇ Installation ⬇
Caution! To reduce weight, the fuel tank must be empty when removed. If necessary, pump out fuel from the tank.


Turn off the ignition and all electrical consumers and remove the ignition key from the lock. Remove the rear seat. Disconnect the cover "1" of the flange at the "arrow" fixing points using the wedge "3409". Disconnect the connector "1" of the fuel pump.
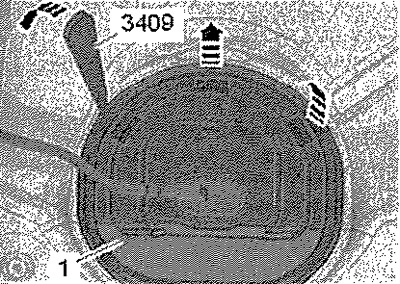
Turn off the ignition and all electrical…


Car with independent heater


Disconnect connector "2" of the independent heater metering pump.
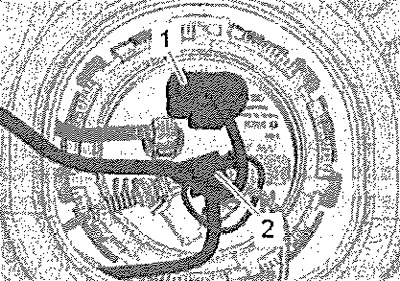
Disconnect connector «2» of the independent…


All


Press the fastening "2" upwards in the direction of "arrow A", grasping it with your finger between the supporting base of the body and the fuel tank. At the same time, carefully remove the fuel pump control unit from the clamp "J538" "1" via wiring "3" "arrow B". Remove the fuel pump control unit "J53B" between the fuel tank and the supporting base. Open the fuel tank flap. Clean the area around the filler neck.
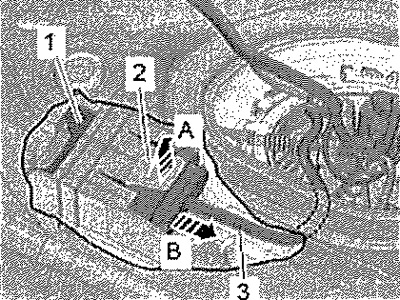


Press the fastening «2» upwards in the direction…


Unscrew the cap "1" of the filler neck.

Note: To prevent dirt from entering, cover the filler neck opening with a clean cloth.
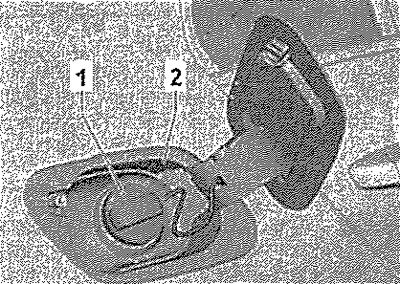

Note: To prevent dirt from entering, cover the…


Remove the right rear wheel. Remove the rear right mudguard. Remove the brake caliper of the right rear wheel and put it aside. Disconnect the connector of the ABS sensor of the rear right wheel and remove the wire from the fasteners on the rear axle. Disconnect the ventilation hoses -1 and 2- of the adsorber, to do this, disconnect the quick-release couplings. Disconnect the ventilation hoses from the fasteners on the "arrow" bracket.
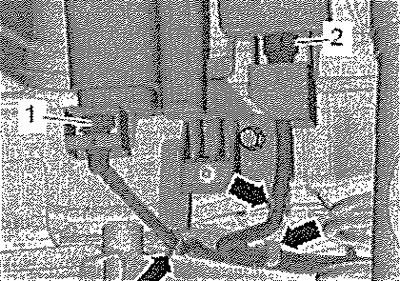
Remove the right rear wheel. Remove the rear…


Disconnect the ventilation hose "1" from the bracket mount "arrow". Disconnect the exhaust pipe with a body saw, for example "VAG 1523 A" or a cutting machine and remove the central and rear parts of the exhaust system separately.
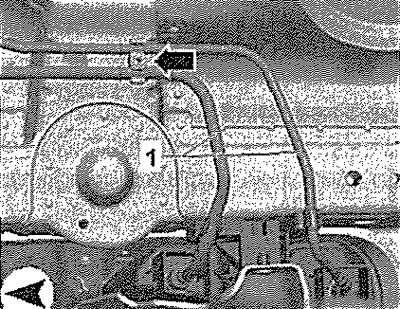


Disconnect the ventilation hose «1» from the…


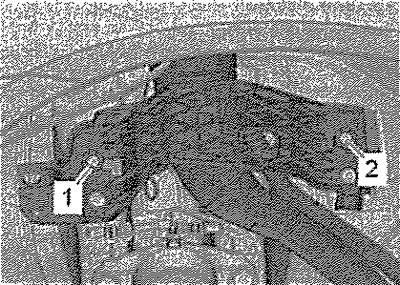
Remove screws "1" and "2" of the filler neck.

Warning! Risk of injury from fuel under high pressure. To relieve pressure in the fuel system, place a clean rag around the connector and carefully loosen the connection.


Unlock the parking brake cable from the fasteners.
Unlock the parking brake cable from the fasteners.


Disconnect the ventilation hose -3- and the fuel line "2".

Note: On vehicles with independent or additional heating, it will also be necessary to disconnect the fuel line "1" of the metering pump "V54". The fuel tank has a large mass - risk of accident. When removing, the fuel tank must be empty.
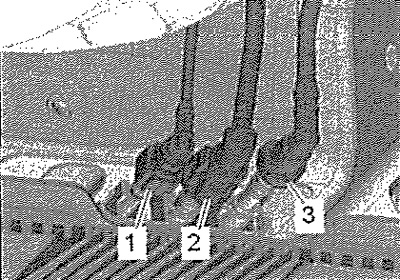

Note: On vehicles with independent or additional…


Unscrew bolt "5". Remove exhaust system suspension bracket "arrow". Unscrew screw "3" and remove tension band "7".
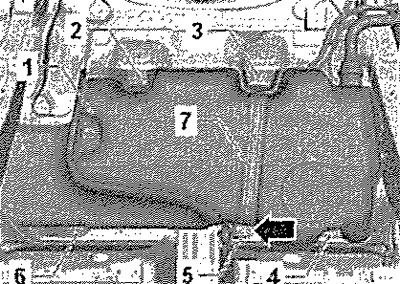


Unscrew bolt «5». Remove exhaust system…


[View the original on the website: Skodabook.ru]

Support the fuel tank with a jack for engines and transmission units "VAG 1383A".
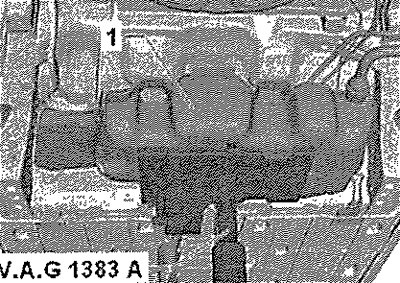
Support the fuel tank with a jack for engines and…


Loosen the fastening screws "2", "4" and "6". Loosen the nuts of the fuel tank heat shield and remove the shield. Lower the fuel tank slightly using the jack for engines and transmission units "VAG 1383A".

Note: A second mechanic will be required to remove the fuel tank. Be careful not to damage any of the wires.


With the help of a second mechanic, move the fuel tank to the side and lower it. Route the filler nipple between the rear suspension and the body.

Installation


Note: On vehicles with independent or additional heating, it is necessary to check the tightness of the metering pump -V54- on the bracket.


Check both ground connections for corrosion, clean if necessary. Check the mounting position of the ground wire.

Note: A second mechanic will be required to install the fuel tank. Be careful not to damage any of the wires.


With the help of a second mechanic, route the filler neck between the rear suspension and the body and support the fuel tank with a jack for engines and transmission units "VAG 1383A". Installation is in the reverse order. Ventilation and fuel lines should be laid without kinks. Do not confuse the supply and ventilation lines (ventilation - white, supply - black). Ensure a reliable connection of the lines. After installing the fuel tank, check whether the lines are secured to it.
This article is available at russian, bulgarian, belarusian, ukrainian, serbian, croatian, romanian, polish, slovak, hungarian
Article verified: Anatoly Ovchinnikov
Share with friends:
◀ Previous
Skoda Octavia 3: Supply system
Next ►

Fuel tank parts and components
Turbocharger parts and components
Removal and installation a turbocharger
Removal and installation the boost pressure regulator and sensor
Parts and components of the supercharging system
Removal and installation the intercooler
Read similar articles on other Skoda models

➧ Removal and installation the fuel tank Skoda Fabia 1 (1999-2007)
➧ Fuel tank — external view (1.2L MPI engine) Skoda Rapid 1 (2012-2022)
➧ Access to the fuel tank filler neck, refueling Skoda Superb 2 (2008-2015)
➧ Fuel tank assembly Skoda Kodiaq 1 (2016-2024)
➧ Access to the fuel tank filler neck, refueling Skoda Yeti (2009-2017)
➧ Removal and installation the fuel tank Skoda Felicia (1994-2001)
Link to this article in various formats
Reviews and comments of visitors
No comments yet


Add two numbers: 15 + 18


Octavia 3 (2013-2019) 
  • General information
  • User manual
  • Car driving
  • Maintenance
  • Petrol engines 1.2 l
  • Engine repair
  • Cooling system
  • Supply system
  • Petrol engines 1.4 l
  • Engine repair
  • Supply system
  • Petrol engines 1.8/2.0 l
  • Engine repair
  • Cooling system
  • Supply system
  • Diesel engines 1.6/2.0 l
  • Engine repair
  • Cooling system
  • Supply system
  • Transmission
  • Mechanical gearbox 02S
  • Automatic gearbox 0CW
  • Automatic gearbox 0D9
  • Chassis (running gear)
  • Front suspension
  • Rear suspension
  • Brake system
  • Steering
  • Body and interior
  • Doors, locks and windows
  • Exterior (external elements)
  • Interior (internal elements)
  • Ventilation and air conditioning
  • Electrical equipment
  • Equipment and devices
  • Headlights and lighting
  • Wiring diagrams (basic)
  • Wiring diagrams (comfort)
Octavia 1 (1996-2004) 
  • General information
  • Vehicle details
  • Maintenance
  • Power unit
  • Petrol engines 1.6 l AEE
  • Petrol engines 1.8 l AGN
  • Diesel engines 1.9 l AGR
  • Fuel system
  • Exhaust system
  • Cooling system
  • Transmission
  • Clutch
  • Car gearbox
  • Gearbox repair 02J
  • Gearbox repair 02K
  • Chassis (running gear)
  • Wheels and tires
  • Suspension and axles
  • Brake system
  • Body and interior
  • Exterior (external elements)
  • Interior (internal elements)
  • Doors, locks and windows
  • Electrical equipment
  • Equipment and devices
  • Electrical circuits
SkodaBook.ru © 2018–2026 | Mobile version | Articles on Skoda | Sitemap EN BG BY UA RS HR RO PL SK HU | Feedback | Site search | Bookmark
Fabia 1 (1999-2007) | Fabia 2 (2007-2014) | Rapid 1 (2012-2022) | Octavia 1 (1996-2004) | Octavia 3 (2013-2019) | Superb 2 (2008-2015) | Kodiaq 1 (2016-2024) | Yeti (2009-2017) | Favorit (1987-1994) | Felicia (1994-2001) |
By continuing to use the site, you agree to the use of cookies.