
Company vehicles Hyundai Company vehicles Kia Company vehicles Lada Company vehicles Mazda Company vehicles Mercedes-Benz Company vehicles Opel Company vehicles Mitsubishi
English Русский
Български
Беларускі
Український
Српски
Hrvatski
Română
Polski
Slovenský
Magyar
Articles   
Bookmark Contacts Sitemap
SkodaBook.ru


Fabia Rapid Octavia Superb Kodiaq Yeti Others
Octavia 1 (1996-2004) Octavia 3 (2013-2019)

Removal and installation oil seals with the cylinder head installed (Skoda Octavia 5E)

  • Main
  • Octavia
  • 5E (2013-2019)
  • Petrol engines 1.8/2.0 l
  • Engine repair
  • Removal and installation oil seals with the cylinder head installed
0
Contents: For the intake side ⬇ On the exhaust valve side ⬇ Installing the oil seal ⬇
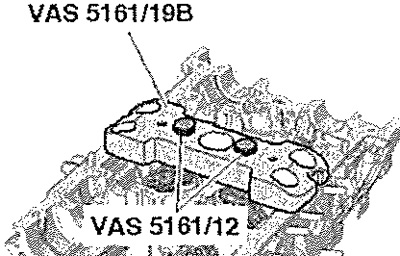
Remove the camshafts. For reinstallation, mark the roller rocker arms and hydraulic compensators. If necessary, remove the roller tappet levers together with the hydraulic compensators and set aside on a clean surface. Remove the spark plugs using the spark plug wrench -3122 B-. Screw on the guide plate for FSI engines "VAS 5161/19B" using knurled head screws "VAS 5161/12" on the cylinder head, as shown in the figure. Set the piston of the corresponding cylinder to the "BDC" position.

Remove the camshafts. For reinstallation, mark…


Screw the adapter "T40012" into the spark plug socket. Connect a source of compressed air with a pressure of at least 0.6 MPa (6 bar). Loosen the valve crackers with a drift "VAS 5161/3" and a hammer with a plastic striker.
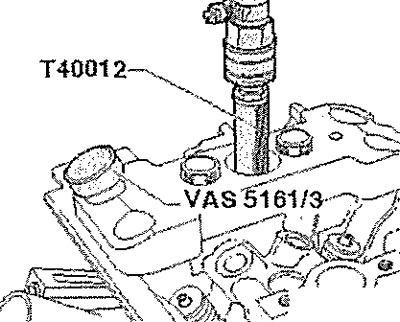
Screw the adapter «T40012» into the spark plug…


For the intake side


Screw in the part with the mesh "VAS 5161/6" with push fork "VAS 5161/5" into the middle threaded hole of the guide plate for FSI engines "VAS 5161/19B". Insert the mounting cartridge "VAS 5161/8" into the support plate for the FSI engine "VAS 5161/19B". Hang the pressure fork "VAS 5161/2" on the mesh part "VAS 5161/6".
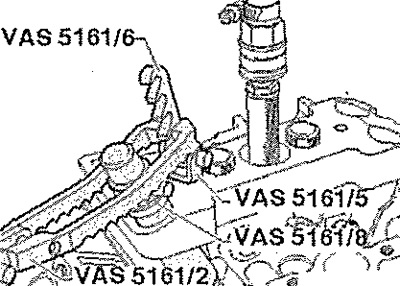
Screw in the part with the mesh «VAS 5161/6» with…


On the exhaust valve side


Screw in the part with the mesh "VAS 5161/6" with push fork "VAS 5161/5" into the extreme threaded hole of the guide plate for FSI engines "VAS 5161/19B". Press the mounting cartridge "VAS 5161/8" downwards and simultaneously turn the knurled head screw of the mounting chuck "VAS 5161/8" to the right so that the tips are fixed in the valve crackers. Alternately turn the screw with the knurled head first in one direction, then in the other - the crackers will be pressed away from each other and fixed in the cartridge. Release the pressure fork "VAS 5161/2". Remove the mounting cartridge "VAS5161/8".
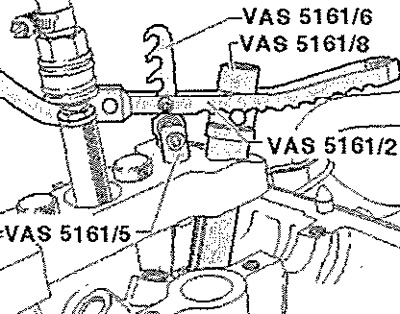
Screw in the part with the mesh «VAS 5161/6» with…


Using puller "3364" remove the oil seal.
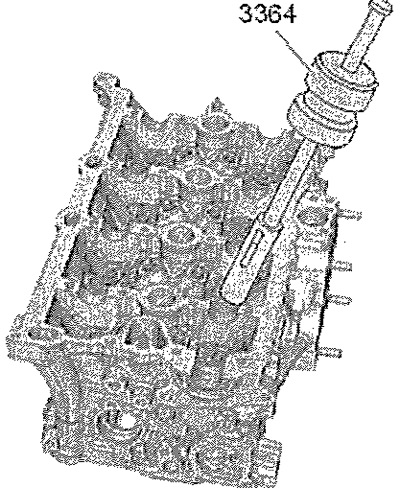


Using puller «3364» remove the oil seal.


If the valve stem seal puller "3364" cannot be used due to lack of space, press out the spacer pin "arrow" using a punch and impact attachment. Install the lower part of the valve stem seal puller "3364" on the valve stem seal.
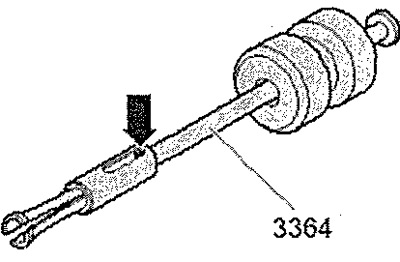
If the valve stem seal puller «3364» cannot be…


Insert punch "1" into the hole in the lower part of the puller. Install the mounting lever on the puller and remove the oil seal "arrow".
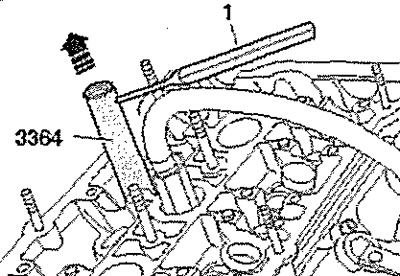
Insert punch «1» into the hole in the lower part…


Installing the oil seal


Caution! Risk of damage when installing valve stem seals. Place the plastic sleeve "A" supplied with the new valve stem seal "B" onto the valve stem.


Lightly lubricate the working edge of the valve stem seal with oil. Place the valve stem seal on the plastic sleeve. Carefully press the valve stem seal onto the valve guide sleeve using the mandrel "3365". Remove the plastic sleeve. Insert the valve spring with the valve plate. Install the dismantling and assembly device -VAS 5161 as shown in the figure.
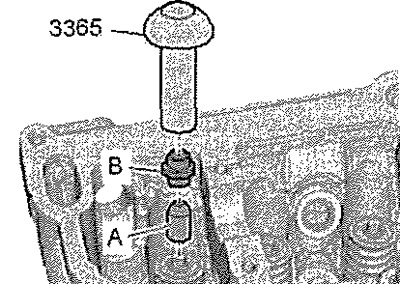
Lightly lubricate the working edge of the valve…


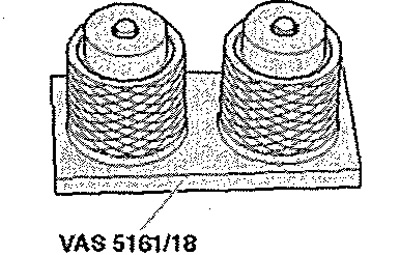
Note: If the valve crackers have been removed from the mounting cartridge, they must first be inserted into the receiving device "VAS 5161/18". Press the mounting cartridge "WS 5161/8" onto the receiving device from above so that the valve crackers enter the cartridge.


Press down on the mounting cartridge "VAS 5161/8" using a push fork "VAS 5161/2", turn the knurled head screw of the mounting cartridge one way and the other while pulling it upwards. Remove the load from the push fork "VAS 5161/2" with the knurled head screw of the mounting cartridge still tightened. Remove the "VAS 5161" dismantling and mounting device.


Press down on the mounting cartridge «VAS 5161/8»…


Installation is in reverse order. Install the camshafts.
This article is available at russian, bulgarian, belarusian, ukrainian, serbian, croatian, romanian, polish, slovak, hungarian
Article verified: Anatoly Ovchinnikov
Share with friends:
◀ Previous
Skoda Octavia 3: Engine repair
Next ►

Installing the ball into the camshaft coupling
Removal and installation camshafts
Oil separator and vacuum pump parts and components
Loosen and tighten the cylinder head cover screws
Valve mechanism
Parts and assemblies of the oil pan and oil pump
Oil pan mounting screw tightening sequence
Removal and installation the oil level and temperature sensor «G266»
Removal and installation the lower part of the oil pan
Removal and installation the oil pump
Read similar articles on other Skoda models

➧ Disassembling the cylinder head Skoda Fabia 1 (1999-2007)
➧ Cylinder head — external view (1.2 MPI engine) Skoda Rapid 1 (2012-2022)
➧ Removal and installation the cylinder head, its cover and vacuum pump Skoda Superb 2 (2008-2015)
➧ Cylinder head assembly Skoda Kodiaq 1 (2016-2024)
➧ Removal and installation the cylinder head, its cover and camshaft Skoda Yeti (2009-2017)
➧ Cylinder head — removal and installation Skoda Favorit (1987-1994)
Link to this article in various formats
Reviews and comments of visitors
No comments yet


Add two numbers: 36 + 27


Octavia 3 (2013-2019) 
  • General information
  • User manual
  • Car driving
  • Maintenance
  • Petrol engines 1.2 l
  • Engine repair
  • Cooling system
  • Supply system
  • Petrol engines 1.4 l
  • Engine repair
  • Supply system
  • Petrol engines 1.8/2.0 l
  • Engine repair
  • Cooling system
  • Supply system
  • Diesel engines 1.6/2.0 l
  • Engine repair
  • Cooling system
  • Supply system
  • Transmission
  • Mechanical gearbox 02S
  • Automatic gearbox 0CW
  • Automatic gearbox 0D9
  • Chassis (running gear)
  • Front suspension
  • Rear suspension
  • Brake system
  • Steering
  • Body and interior
  • Doors, locks and windows
  • Exterior (external elements)
  • Interior (internal elements)
  • Ventilation and air conditioning
  • Electrical equipment
  • Equipment and devices
  • Headlights and lighting
  • Wiring diagrams (basic)
  • Wiring diagrams (comfort)
Octavia 1 (1996-2004) 
  • General information
  • Vehicle details
  • Maintenance
  • Power unit
  • Petrol engines 1.6 l AEE
  • Petrol engines 1.8 l AGN
  • Diesel engines 1.9 l AGR
  • Fuel system
  • Exhaust system
  • Cooling system
  • Transmission
  • Clutch
  • Car gearbox
  • Gearbox repair 02J
  • Gearbox repair 02K
  • Chassis (running gear)
  • Wheels and tires
  • Suspension and axles
  • Brake system
  • Body and interior
  • Exterior (external elements)
  • Interior (internal elements)
  • Doors, locks and windows
  • Electrical equipment
  • Equipment and devices
  • Electrical circuits
SkodaBook.ru © 2018–2026 | Mobile version | Articles on Skoda | Sitemap EN BG BY UA RS HR RO PL SK HU | Feedback | Site search | Bookmark
Fabia 1 (1999-2007) | Fabia 2 (2007-2014) | Rapid 1 (2012-2022) | Octavia 1 (1996-2004) | Octavia 3 (2013-2019) | Superb 2 (2008-2015) | Kodiaq 1 (2016-2024) | Yeti (2009-2017) | Favorit (1987-1994) | Felicia (1994-2001) |
By continuing to use the site, you agree to the use of cookies.