
Note: Replacement of the accessory drive belt and timing belt is described in Chapter 2.
1. Belt tension is adjusted by automatic tensioners. However, the tension should be checked periodically along with the condition of the belt. To gain access to the belt, raise the vehicle and remove the right underbody guard. If necessary, rotate the crankshaft using its pulley bolt.
2. Feel the belt with your fingers along the entire length, checking it for cracks and delaminations (see resist. illustrations). Also check the belt for fraying and polished areas. The belt should be inspected from both sides, which implies the need to twist it. Along the way, check for rust, cracks and burrs on the pulleys. On the working surface of the belt, the presence of shallow perpendicular cracks is allowed. If these cracks do not go beyond the boundaries of one rib, are not very deep and their number does not exceed 15 per 10 cm of the belt length, there is no need to replace the belt.
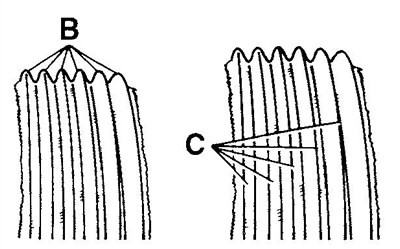
18.2a Wear of the edges of the ribs of the drive belt

18.2b Transverse cracks (D) on the reverse side of the belt and detachment of the ribs (E)
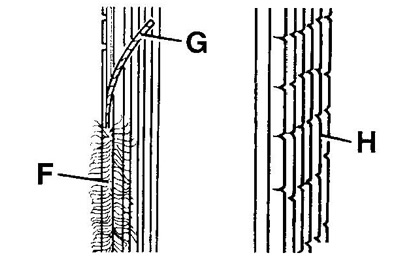
18.2s Loosening of the side ribs (F), cracks (H) and detachment of lateral ribs (G)
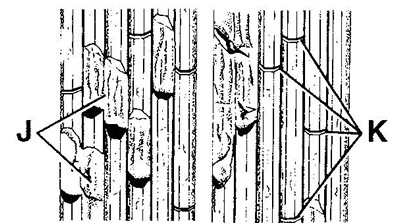
18.2d Rib break (J), cracks (TO)
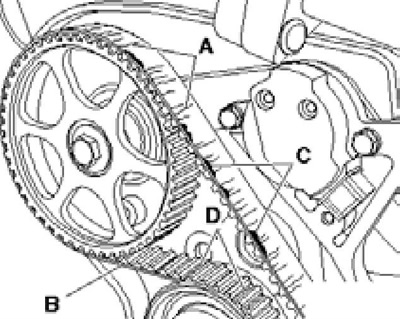
18.2e Timing belt damage
A Cracks in the coating, transverse fractures
The side wear
C Cord wear
D Cracked teeth
3. Make sure that the belt is correctly positioned on the pulleys and gears.
4. Replace drive belt if necessary (see chapter 2).
5. The tension is checked using a special tool.