



Caution: Do not allow diesel fuel to come into contact with engine compartment components.
Filter with a pumping channel
1. Unscrew the drain channel plug (1 on the accompanying illustration) and connect a diesel fuel extraction device to it (for example, VAS5226). Pump out approximately 100 ml of diesel fuel and tighten the plug with a new gasket.
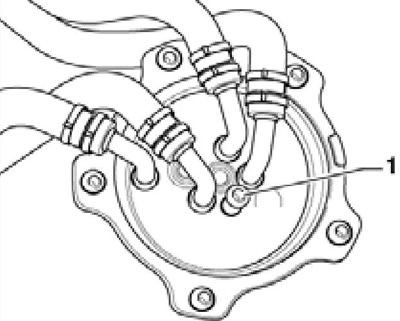
23.1 Pumping channel plug
2. Loosen the bolts (see accompanying illustration) diagonally by 1.5-2 turns, and then finally unscrew them and remove the filter cover.
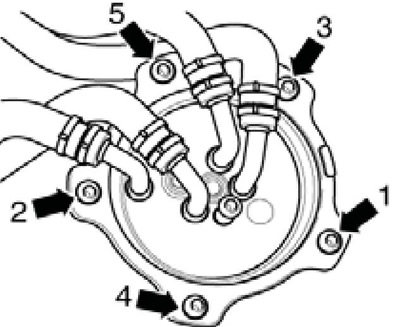
23.2 Filter cover mounting bolts
3. If you cannot separate the filter cover, insert it into the groove (And on the accompanying illustration) screwdriver VAS6543 and turn it.
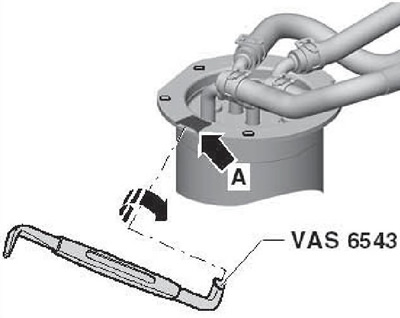
23.3 Removing the filter cover
Note: Groove size may vary from that shown.
4. Remove the filter element (1 on the accompanying illustration) from the filter housing (4). Replace the gasket (3) and install a new filter element.
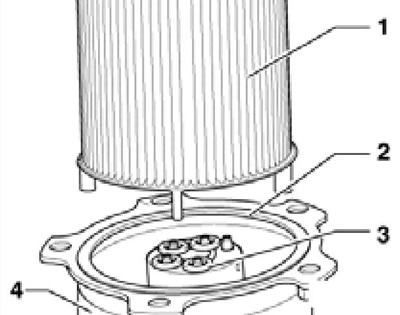
23.4 Removing the filter element from the filter
5. Lightly moisten the new filter cover O-ring with diesel fuel and place the O-ring on the cover. Position the cover on the filter housing and press it evenly until it is fully seated.
6. Tighten the cover mounting bolts by hand, then tighten them in the sequence shown in Illustration 23.2 with a torque of 5 Nm. Connect the hoses to the previous fittings.
Filter with and without drain hole
7. Loosen the drain plug (1-1 on the accompanying illustration, upper part) or unscrew it completely (11-1). Put a transparent hose with a receiving container on the plug or on the nipple and start the engine. Let about 0.3-0.4 l of fuel with sediment drain until clean fuel flows, and turn off the engine. Disconnect the hose and tighten the plug with a force of 7 Nm.
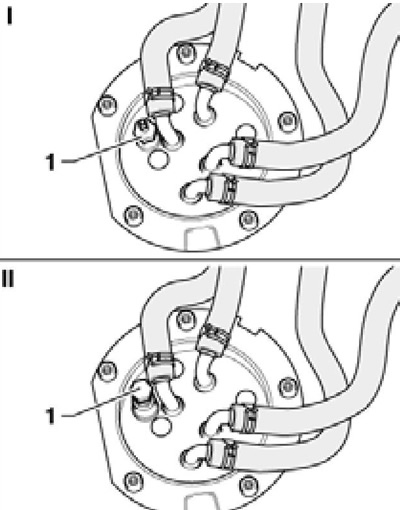
23.7 Drain plug (1)
8. Loosen the bolts in sequence (1-5 on the accompanying illustration) 1.5-2 turns, then completely unscrew them and remove the filter cover together with the filter element. If you cannot separate the cover, insert it into the groove (And in illustration 23.3) screwdriver VAS6543 and turn it.
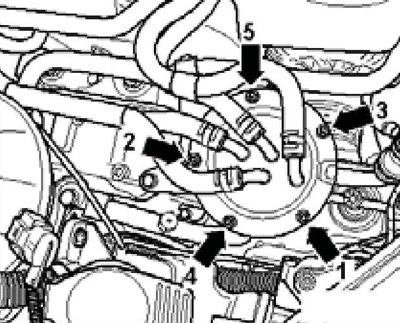
23.8 Fuel filter cover mounting bolts
9. On models without a drain plug, remove the filter element (3 on the accompanying illustration) from the cover (1) and pull it out of the filter housing. Remove any dirt and water from the filter housing.
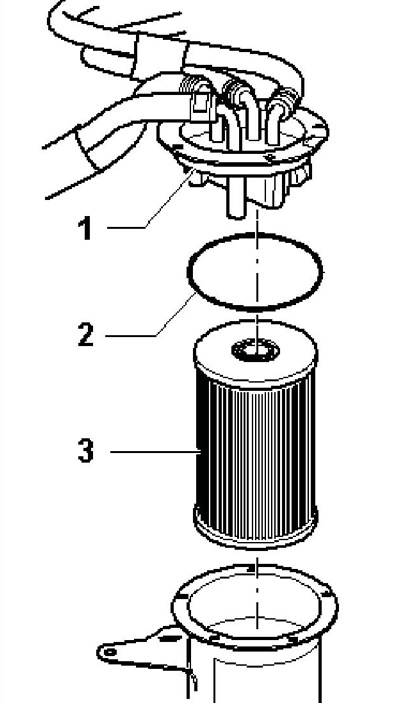
23.9 Filter element installation details (models without drain plug)
10. On models with a drain plug, separate the filter element from the drain port (1 on the accompanying illustration) from the cover (2) in the direction of the arrow (A) and pull it out of the filter housing. Remove dirt and water from the filter housing.
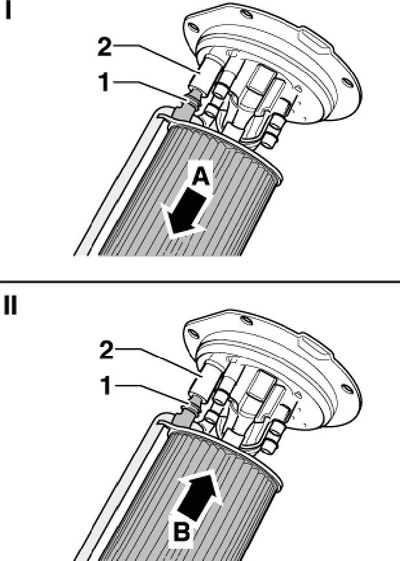
23.10 Filter element installation details (models with drain plug)
11. Remove from the lid (1 on the accompanying illustration) sealing ring (2), using a screwdriver to pry it out of the special groove (arrow). Lightly moisten the new sealing ring with diesel fuel and insert it into the groove in the cover.
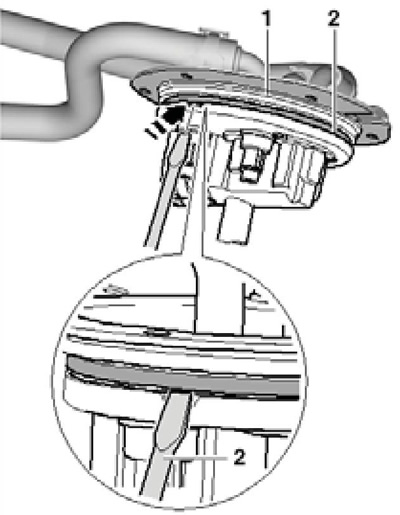
23.11 Removing the cover sealing ring
12. On models without a drain plug, lightly moisten the inner filter gasket with diesel fuel and insert the filter element into the filter housing.
13. On models with a drain plug, partially insert the filter element into the filter housing and hold it with your hand. Lightly moisten the inner filter gasket and the drain port gasket (1 in illustration 23.10) diesel fuel. Turn the filter element so that the drain port faces the bushing in the cover (2) and install the filter element by pressing it into the cover in the direction of the arrow (B).
14. Install the cover with the gasket on the filter housing and press it evenly until it is completely seated. Only then screw in the cover mounting bolts by hand, and then tighten them in a diagonal sequence (1-5 in illustration 23.8) with a force of 5 Nm.
15. On models with TDI-CR engines, finally fill and bleed the high-pressure circuit of the fuel supply system (see Chapter 4).