



Contents: Petrol models 1.4 l ⬇ Petrol models 1.8 and 2.0 l ⬇ Petrol models 3.6 l ⬇ Diesel models (cFFB, CFGB, CLJA…⬇
Note: A description of checking and adjusting the coolant level, as well as some cooling system checks, is provided in Sections 4 and 5 Chapter 1. The coolant type is specified in Specifications for Chapter 1. The following describes the replacement of the coolant.
Petrol models 1.4 l
Note: On 1.4 l engines, depending on the repair work being carried out, it may be sufficient to drain the coolant either only from the engine cooling system radiator circuit or only from the intercooler radiator, although these radiators are combined into a non-separable unit. When replacing the coolant, it must be drained from both radiators.
1. Open the expansion tank cap and remove the sound insulation under the engine compartment (see Chapter 11).
2. Drain the coolant from the engine cooling system radiator. To do this, loosen the clamp (see accompanying illustration) and disconnect the coolant hose from the lower radiator connection.
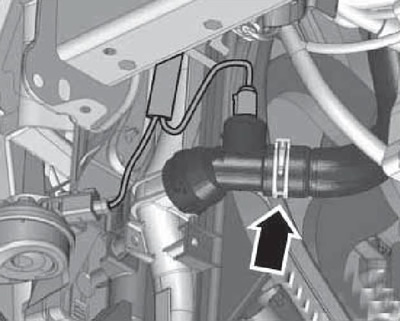
2.2 Lower radiator connection
3. Drain the coolant from the intercooler radiator by disconnecting the coolant hose from its lower pipe (see accompanying illustration).
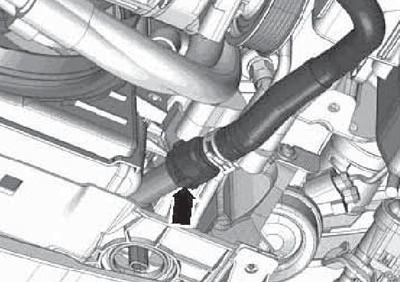
2.3 Intercooler radiator lower connection
4. Connect the hoses, install the sound insulation and fill the coolant as described below.
5. Turn off the air conditioning system, slowly fill the expansion tank to the "MAX" mark and close the cap.
6. Connect the diagnostic tool VAS5051 (see Chapter 5) and perform the function "filling and bleeding the cooling system".
7. Check and, if necessary, adjust the coolant level (see Section 4 Chapter 1).
Petrol models 1.8 and 2.0 l
8. Open the expansion tank cap.
9. Remove the sound insulation under the engine compartment (see Chapter 11).
10. Loosen the clamps (1 and 2 in the accompanying illustration) and remove the air pressure hose.
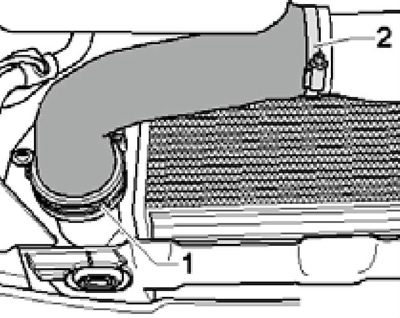
2.10 Air pressure hose
11. Loosen the clamp (see illustration 2.2) and disconnect the coolant hose from the lower radiator connection. Collect the leaking coolant.
12. Remove the lower coolant hose from the circulation pump "V51" (left arrow in illustration 23.26 Chapter 2). Collect the leaking coolant.
13. On models with additional heating, disconnect the hoses (arrows in illustration 30.10 Chapter 2) and collect the coolant.
14. Connect the hoses, install the sound insulation and fill the coolant as described below.
15. Turn off the air conditioning system, slowly fill the expansion tank to the "MAX" mark and close the cap.
16. Start the engine and let it run for about 3 minutes at 2000 rpm, then wait until the radiator fan comes on.
17. Check and, if necessary, adjust the coolant level (see Section 4 Chapter 1).
Petrol models 3.6 l
18. Open the expansion tank cap and remove the sound insulation under the engine compartment (see Chapter 11).
19. Loosen the clamp (see illustration 2.2) and disconnect the coolant hose from the lower radiator connection. Collect the leaking coolant.
20. On models with an additional heater, disconnect the coolant hoses from its pipes and collect the leaking coolant.
21. Connect the hoses, install the sound insulation and fill the coolant using the VAG1274/8 tool installed on the expansion tank cap.
Diesel models (cFFB, CFGB, CLJA engines)
22. Open the expansion tank and remove the sound insulation under the engine compartment (see Chapter 11).
23. Loosen the clamp (2 on the accompanying illustration) and remove the pressure air hose. Plug the hole in the intercooler.
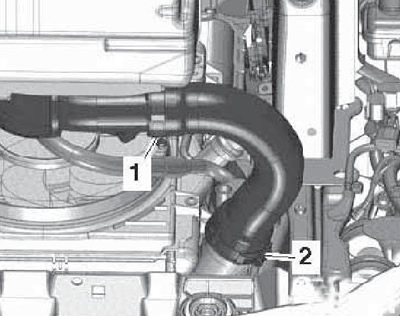
2.23 Air Pressure Hose Clamps
24. Remove the right coolant hose from the radiator by pulling out the retainer (see accompanying illustration), and collect the leaking coolant.
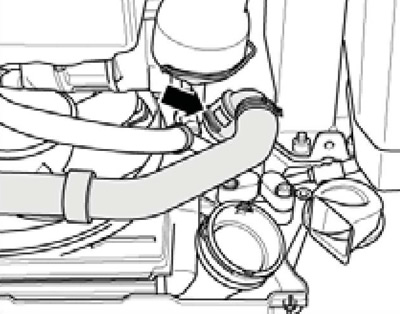
2.24 Right coolant hose
25. Disconnect the coolant hoses (3 in illustration 34.15 Chapter 2) from the coolant circulation pump No.2 "V178".
26. Disconnect the coolant hose from the oil cooler (see accompanying illustration) and collect the leaking coolant.
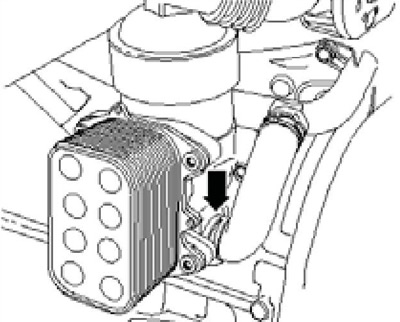
2.26 Coolant hose to oil cooler
27. Connect the disconnected coolant hoses using new seals. Install the sound insulation and fill the coolant as described below.
28. Turn off the air conditioning system, slowly fill the expansion tank to the "MAX" mark.
29. Start the engine and let it run for about 2 minutes at 1500 rpm, constantly adjusting the coolant level.
30. Close the expansion tank and wait until the radiator fan "V7" turns on.
31. Check and, if necessary, adjust the coolant level (see Section 4 Chapter 1).