



Carefully! When changing transmission oil, it is not always necessary to change the transmission oil filter. Therefore, it is necessary to follow the instructions when to change the transmission oil filter and when not. The engine must not be started after repairs have been made if there is no or insufficient oil in the gearbox or after a significant loss of transmission oil. Only the dual-clutch gearbox oil specified for DSG -0D9 as a spare part may be used. The use of other oils may result in malfunction or failure of the gearbox, part number. Follow instructions for automatic gearbox DSG -0D9-. Determine the transmission oil temperature. The condition of the gear oil changes depending on the temperature of the gear oil. Checking the gear oil level at too low temperatures leads to overfilling. Checking the gear oil level at too high temperatures leads to underfilling. Overfilling, as well as underfilling, negatively affects the operation of the gearbox. Replace the O-ring on the oil drain plug and oil level plug.
Engine stopped. A / m in a horizontal position; all jack fasteners must be at the same height to ensure a horizontal position. Selector lever in position "R". An automotive diagnostic, measuring and information system is connected. The transmission oil temperature at the beginning of the test must not exceed 35°C.
Transmission oil change, oil filter change
Note: The following instructions must be followed until the transmission oil change is completed.
Removal and installation of the oil filter
Remove engine cover. Remove air filter. Raise a / m. Remove the lower soundproofing casing of the engine. Install an oil collecting pan under the gearbox. Lower a / m. Unscrew oil filter housing -1- from gearbox. Before removing the oil filter housing, tilt it slightly so that the oil flows back into the gearbox.
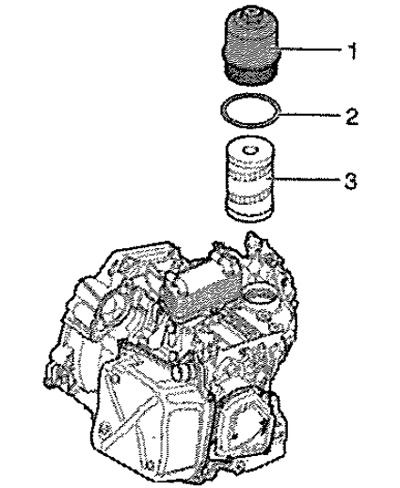
Note: Replace O-ring -2-.
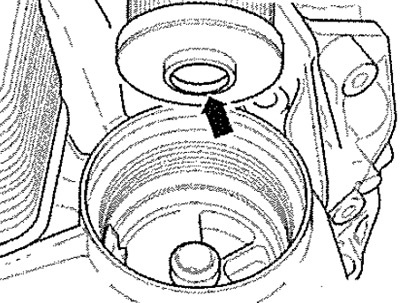
Remove filter -3-. Moisten O-ring -2- with gear oil. Lubricate the O-ring in the shoulder of the suction side (see arrow - of the new oil filter) with gear oil. Install a new oil filter with the flange on the intake side - see illustration. down arrow and tighten the filter housing to the specified torque. Install the air filter.
Transmission oil change, oil level check
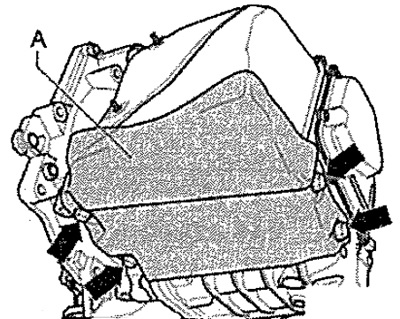
Raise a / m. Remove the protective cover -A- from the underside of the gearbox - see. arrows-; in the presence of. Place an oil collecting pan under the gearbox.
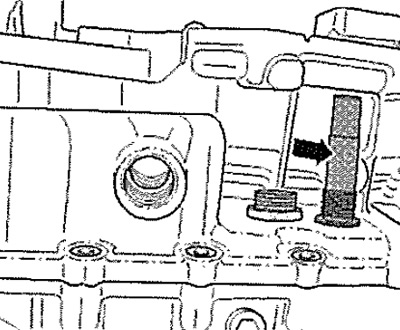
Unscrew the plug of the threaded hole for checking the oil level - see. arrow - next to the stabilizer bar.
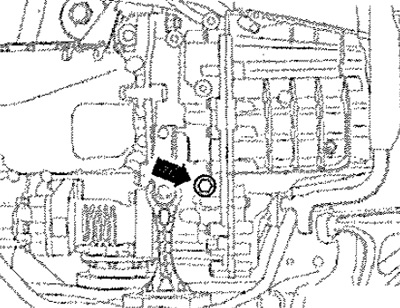
Note: Behind this plug is a plastic overflow pipe, which can be tightened to 3 Nm with an 8 mm Allen key. The length of the overflow pipe determines the oil level in the gearbox; when replacing this pipe, observe the part number.
Remove overflow tube. Runs out approx. 5.0 liters of oil. Leave a pan to collect oil under the gearbox. Screw on the overflow pipe and tighten to the specified torque. To top up, use an oil filling adapter, eg -VAS 6262- or -VAS 6262A-. Shake the oil container before opening.
Before screwing the oil filler adapter -VAS 6262A- onto the oil container, measure the length of the bleed tube, dimension -a-, and if necessary, cut off the tube to dimension -a-: 210 mm.
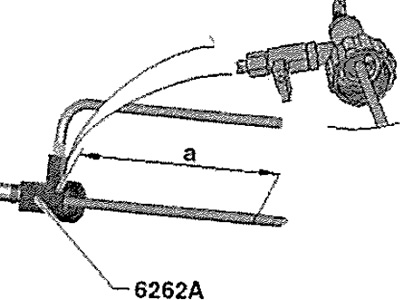
Note: Measure dimension -a- on the rod (starting from the green surface in the enlarged image) oil filling adapter -VAS 6262A-. If the thread on the oil container does not fit the adapter -VAS 6262A-, an additional adapter -VAS 6262/6- must be used.
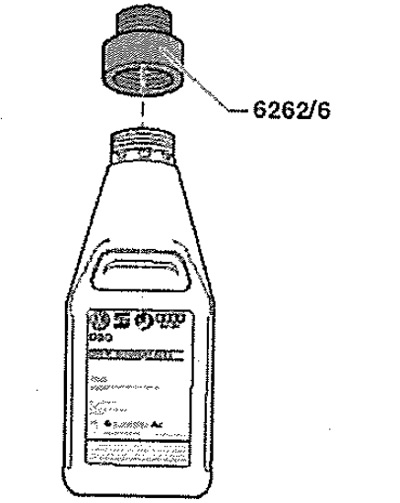
Carefully! Filler hose and adapter -VAS 6262- or -VAS 6262A- must be clean and gear oil must not be mixed with other oils!
Screw ATF filling adapter -VAS 6262/2- -A- by hand into oil level check hole.
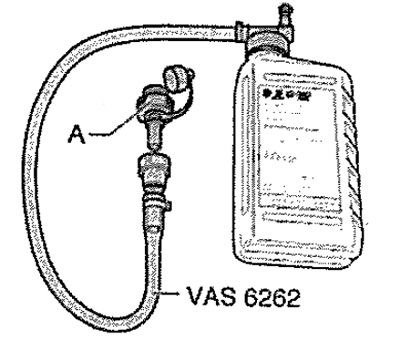
When changing the container, close the stopcock or hold the oil filling adapter -VAS 6262- or -VAS 6262A- above the gearbox. Using the oil filling adapter, fill in 5.5 liters of gear oil for a double clutch gearbox. Read the transmission oil temperature. Start the engine. Depress the brake pedal and move the selector lever within approx. 3 seconds in all positions. Then return the selector lever to position "R".
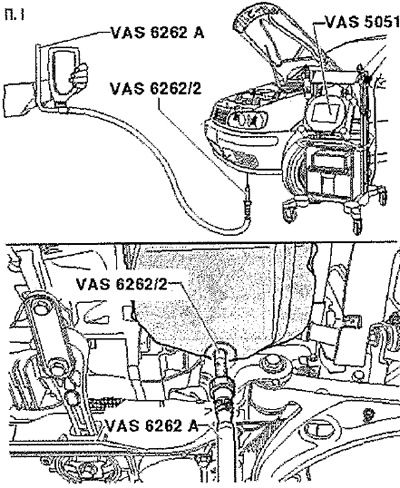
Don't turn off the engine!
Attention! When working near the radiator, keep clear of the fan - risk of injury! The fan may turn on by itself.
When the gear oil temperature is between 35°C and 45°C: While the engine is running, disconnect the quick coupling on the oil fill adapter. Allow excess oil to drain from gearbox.
Note: Every 30 seconds, a small amount of oil comes out through the overflow tube, regardless of the oil level; (the reason is the pulsations of the oil cooling the clutch). Such quantities of oil are not a criterion for determining the correct oil level and therefore should not be taken into account in the evaluation. The oil flowing out of the gearbox must not be used for topping up the gearbox. Dispose of drained oil properly.
As soon as the oil starts to flow (drip), unscrew the oil filling plug and screw in a new oil level plug -arrow-. Tightening torque: 45 Nm. Stop engine. This completes the replacement of transmission oil and oil filter. The oil level in the gearbox is within normal limits. Install the lower engine soundproofing cover.